Friday, May 16, 2014

Eat, Drink, Cool with Watermelon


Life's summers are beautiful when its a table for two.

Some time ago I spent half a day with my friends Johnson, Shirley and Shimon. Shirley as usual went out of her way to make lots of food for me, imagine I was the only guest and the table was laden every inch. Since she knows my food preferences she made a similar watermelon deliciousness instead of a dessert. I adapted it and tried the make it more healthy by skipping out sugar and using honey. Thanking Shirley for this lovely recipe.

Ingredients
1 watermelon (approx 3kg)
1 lime
2 teaspoons honey per glass

Makes 5 Tall glasses.

Scoop out the watermelon with a baller. Try to get as many round balls but don't dicard the scraps just cut them up into small bits. Save aside.

Collect the juice don't thro it away while you are scooping, its a good idea to use a large bowl to hold the watermelon.

Measure out 1 litre of  chilled water into a bin, add the melon balls and the juice to it. Squeeze out the juice of 1 lime. Pass thru strainer to remove the seeds. Give a nice stir and a shake to the bin. This will ensure the lime juice homogenizes into the water and juice mix and also permeates into the watermelon balls.

Chill the bin in the fridge for atleast 4-5 hrs.


To serve fill up glasses with the water melon balls and juice upto 3/4th of each of the glass. Pour 2 teaspoons of honey over the melon balls, it will glaze the balls and fall thru the juice and sweeten it.

Provide a long spoon to scoop up the melon balls and pop them straight into the mouth and stir the juice to mix the honey. Enjoy the cool sips of lime laced watermelon and eat it too.

Monday, May 12, 2014

Tondli with a lil bit of Amsool


It's more than two weeks we are off rice and roti. Oh we did have our weekly indulgence this weekend of rice and curry but thru the week we just cannot take rice and roti. When you don't eat main carbs then the sides or bhaaji too have to be less on spice. So our aamtis and bhaajis are all toned down this summer. 

Today while making Chavali and Tondli bhaaji I realized I had 0.5 kg of bhaaji which was too much to be used along with Chavali so I thought I'll make a nice stir fry. If it is the same vegetable my Dad and me would not like to eat it in the same meal, I guess even you wouldn't like it. 

So I sliced longs for the Chavali -Tondli bhaaji and half moons for this stir fry. Yes you got it right for this stir fry it has to be sliced thinnest and in half moons it cooks better and holds shape too that way.

I also was generous with the onions so that they would lend a sweetness to the savory dish. I had coconut on hand but did not want to sprinkle fresh grated coconut as we normally do. I wanted to bring out the nuttiness of coconut. Then I just thought since I am making this as a light bhaaji with no other spices but 2 green chilies for heat why not add 2-3 pieces of kokum or amsool to it. Coconut and amsool have a love bond. So I did. What I got was a really lovely salad like clean flavoured bhaaji which can be enjoyed on its own.

Since its so simple and I just cooked this up by fluke choices thought I will post it here. Well once I make something so good I am going to make it again many times. May be you too want to make it.

Ingredients

1/4 kg Tondli / ivy gourd
1 large onion halved and sliced fine n long
2 green chilies
2-3 amsool / kokum/ indica garcenia
1/4 cup fresh grated coconut
1 tablespoon oil
1/4 teaspoon asafoetida
salt and sugar to taste 

Heat oil in the wok and add the asafoetida. I know the recipe has onions but I like extra sulphur from asafoetida in simple recipes. Add the onions, half moon sliced tondli and green chilies. Stir and cook for 5 mins. Cover and cook till almost done and the tondli looks paler green. Add the coconut and amsool. Lastly add sugar and salt to taste and give a nice stir. Cover and cook for another 5 mins.

Serve hot as it is to be eaten as a cooked salad or serve as a bhaaji in your full thali meal. 

Friday, May 09, 2014

Real Kala Khatta is Pink!


The pink is the final diluted drink, in the middle syrup plus ice, the last glass is the color of Jamun concentrate or Kala Khatta.

Want some Jamun?

This week Dad brought home Jamuns along with his regular fruit haul from the Nerul market. My first question was how much did they cost? Must be expensive? 

Yes in Mumbai they are expensive at Rs. 45 per 250 gms. So the day was about Jamuns eating them, staining the tongue with them. Posing with them for 365project and feeling impish about clicking the stained purple tongue for the day's submission. But better sense prevaled.

It was a day filled with memories of walking under the Coconut and Bettlenut shaded paths in Thal and going Jamun and Karvanda hunting with friends. They would be ripe and fallen below the tree, we did not even have to take the effort at throwing stones at the fruit to fell them. We would pick the fallen fruit carefully. Ensuring no insect had bitten it, a little smash is ok, infact it is desirable for a squishy fruit gauranteed sweet juiciness.

Then there were days of walking down with MJ Kaka to VT from home in Fort. Next to Canon Pav bhaaji there used to be a sarbat stall that did roaring business. (I think both  still are Mumbai landmarks!). They sold the best Kala khatta! The location was prime oppositive VT station along the Azad maidan. It mostly would be a reward for studying well and accompanying uncle to J B Petit library for a afternoon read. You guessed it right this 4 - 5 o'clock drink was Amrit for me.

Now the Kala khatta that I remember from childhood was from that cold drink shop or the one made from Rasna or that Rajput Kaki made with some magical potions at home and bottles of dark almost wine black concentrate would be stashed away in the fridge door. Here is a post that voices eloquently the past that we cherish about "I love you Rasna" and the girl with the Fountain ponytail. 

Cut now I dread anything artificial. So I decided to make the real Kala Khatta. I had Jamuns in hand and I was not going to let go this opportunity. Before summer ends you want to give it a try with me?

Ingredients

100gms Jamuns
400 gms sugar
2 limes
3 teaspoons pink salt
500 ml water

First wash the Jamun fruit. Put it in a deep sauce pan or cauldron. Add 500ml water to it. Boil till done on medium heat. The Jamuns will start disintegrating and the water will get a purple color from it.


Next add the sugar and boil till you get a sticky thick syrup and a darker shade of purple.

At this point add juice of two limes into the syrup, it will clarify. Add the pink salt and put off the heat, you do not want to loose the sulphorous smell and taste of the salt.

Let the syrup cool and then strain it thru a juice sieve or a coarse mesh. This should trap the seeds and skins from the jamun and seeds of lime too.

Fill in a clean jar and store in the fridge. Stays well upto 3-4 months. This is your concentrated Jamun syrup or Kala Khatta concentrate.

To serve

Fill glass with 1-2 tablespoons of concentrated Jamun syrup. Add as many ice cubes as you like and top up with water to fill the glass to a little below the brim.

(Note : pl. use the concentrate in the proportion you like to get the sweetness and saltiness of your choice. )

Stir n shake.  Lo! there you are, making your own real Kala Khatta. Suprise surprise it's pink!

Real fruit juice makes a big difference and it's not a big deal to make your own concentrates for this summer. Hope you will dump all those artificial packets and the convenience of 1-2-3 for your health's sake.

Tuesday, May 06, 2014

Onion Mushroom Masala and a Focaccia


The recipe is of Onion Mushroom Masala actually. I made a Focaccia with it that's just natural.

This lipsmacking bhaaji is purely addictive. I make this for the non veg loving members of my extended family when they visit. Invariable they have named it as stir fried Kalava che gole or Oysters in onion masala. Taut yet biteable and the koli masala makes it sublime. Whether it is Kalava or Mushroom eitherways its a hit.

Ingredients

1 pack fresh button mushrooms
2 large onions chopped lengthwise.
1 teaspoon Kolimasala.
1/4 teaspoon turmeric powder
salt to taste.
2 tablespoons oil

Heat a wok with oil in it. Add the onions and the mushrooms. Stir and fry till onions are transluscent. Add the Koli masala, turmeric and salt cover and cook for 5 mins. 

At this point stop cooking to use as topping for Focaccia. 

However if making it as a bhaaji, cook till onions are caramelized and you see the oil leaving the sides of the wok. 

This is a ideal side dish with a rice roti, steamed rice and dal or even to mop up with a soft Mumbai pav.

You can garnish it with chopped cilantro if you wish to add color.


To assemble the Focaccia:


Remove the second  tray of dough from the fridge and leave it come to normal temperature while you preheat the oven at 180 deg celcius.


While the oven gets ready, spread the Onion Mushroom Masala  evenly over the puffy cushion like dough. Press down lightly just to embedded the toppings a bit.

Thrust the tray in the hot oven and bake for 30 mins. Ensure there is no charring of the onions due to hot spots in the oven. Change dirrection if your oven has hotspots.

Remove from oven and serve once cooled enough to slice up about an hour.


This Focaccia tastes awesome both warm or cold. It does not really require a soup to go with it. It is super tasty on its own.

Make it for your guests and win a thumbs up from them between smiling mouthfuls.


Monday, May 05, 2014

Olive, Garlic, Chili and Thyme Focaccia


My nephew called up to tell me he was coming over to my place with his cousins and friends at night. Young adults are best to practice your art of cooking and feeding on. They clean up everythings that you make and you feel so nice to see no leftovers.

On this day I chose a simple menu of soup and 2 kinds of focaccia. Then just as a back up I also made Valachi Khichadi. You never want to run short of food with entusiatic youngsters around.

This is a lovely focaccia perfect with soup. It had a nice crunch and was full of flavors of garlic, thyme, chilli and olives.

It also meant a great chance to try the new powerful instant yeast that Apolina sent me with this friendship package. There is more that is coming up with the rest of the ingredients. Thank you!


Recipe reference: The Pioneer Woman

Ingredients

4 cups all purpose flour
1 teaspoons heaped instant yeast (Bruggenman)
1 teaspoon sugar
1.5 cups warm water
0.5 teaspoon salt
1/3 cup Olive oil
1/4 cup sliced olives

Toppings

1/2 teaspoon salt
2-3 tablespoons Olive oil
1/4 cup sliced olives
2 tablespoons dried thyme
2 tablespoons red chilli flakes
15 cloved garlic chopped


In a medium bowl measure out the warm water and add sugar to it. Sprinkle the yeast on top and leave it to bubble up for 10 mins.

On the counter measure out the flour. Make a well in it. Add the bubbly yeast liquid in the center. Mix well and knead to form a smooth dough. Add the olive oil and knead well to make a shiny smooth dough. Oil a large bowl and keep the dough to proof for atleast an hour or till it doubles. 

Meanwhile, drain 1/2 cup of sliced olives and blot them on a kitchen towel. 

This Bruggeman yeast is fantastic! The first proofing was thready airy and I'm surely loving it. 

Once the dough is doubled, turn it out on a lightly floured counter. Incorporate half of the sliced olives and knead with a light hand.

Divide the dough into 2 balls. 


Prepare two 9X11 baking trays. Put one ball in each and spread the dough on it. I let it rise the second time in the fridge so its Ok even if it looks really thinned out dough on the tray. It rose to a beautiful cushion by morning and ready to be baked.

After spreading the dough, for one tray top with Olives. Sprinkle the red chili flakes and the dried thyme, fresh would be really wonderful. Spread the chopped garlic evenly.

Now dimple the dough to create pockets for the oilve oil.

Drizzle the oilve oil. 

Sprinkle the salt.

Cover with cling film and keep it in the fridge overnight.

Save the other tray for another type of focaccia. Cover the flattened and dimpled dough with cling film and put it away in the fridge for proofing over night. Following in the second post...

I do this often to get a fresh baked bread on the next day. It gives me extra time to do other things when I am entertaining.

Next morning remove the trays and let them come to normal temperature for 10 mins till the oven preheats at 180 deg celcius. 

Bake for 30-35 mins.

This turned out a nice crunchy focaccia not to mention it looked pretty too.

Thursday, May 01, 2014

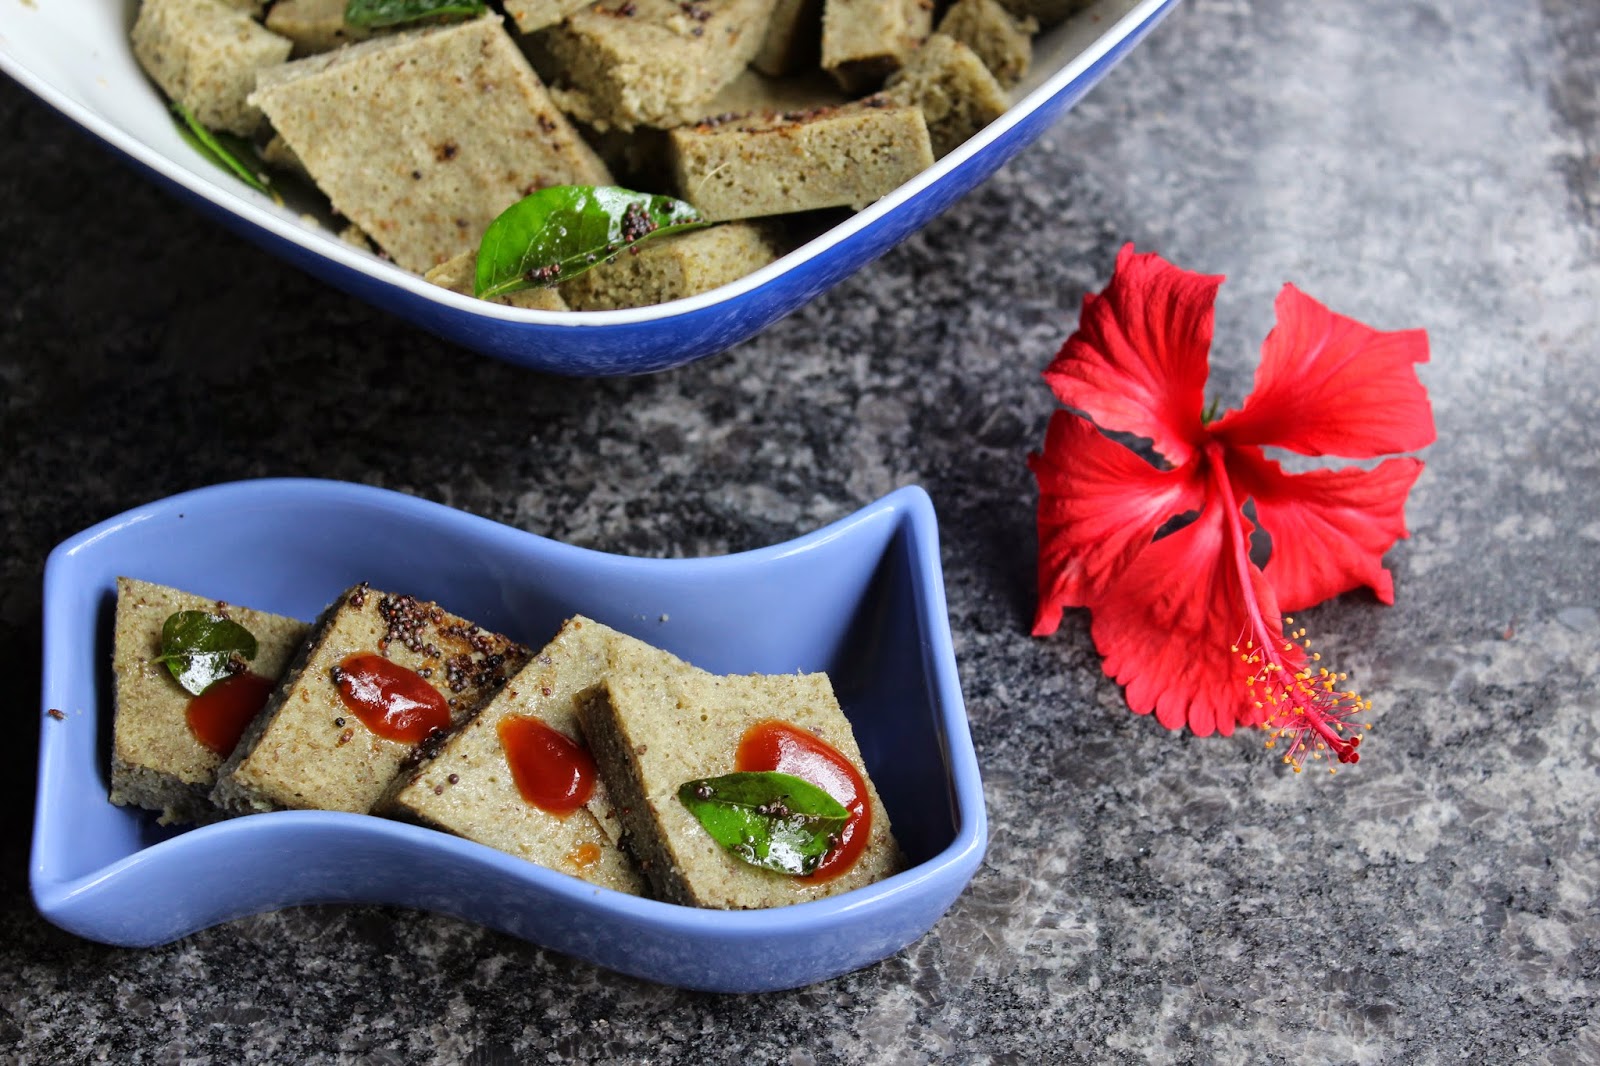
Green Moong Dal Dhokla


The green skinned moong dal is something I love unconditionally. I love pesarattu and I love moogache ladoo. At times I make this dhokla. It has a good amount of fibre and is nutritious. It takes a little bit of planning to make it as the dal needs to be soaked, just a few hours.

I think you must have it on your healthy food list. 

Ingredients

1 cup green skinned split moong dal
1 large pinch soda bicarb
salt to taste.
0.5 teaspoon ginger 
0.5 teaspoon green chili paste

For the seasoning

1 tablespoon oil 
1 teaspoon mustard seeds
few curry leaves
2-3 green chilies
1/2 teaspoon asafoetida

Preparation

Wash and soak the green skinned split moong dal in water. The water level should be more than the dal. Soak atleast for 3-4 hours.

Once soaked, drain the dal and grind to fine paste using minimum water. The green skins may loosen but that is fine, do not discard. Grind along with the skins.

Next add salt and green chili and ginger paste. Add a large pinch of soda bicarb. Mix well. 

Prepare the steaming plates, grease them with oil. Pour the batter about 1/2 inch thickness in a single plate.

Steam in pressure cooker for 20 mins.

Cool completely. Cut up into diamond shapes. 

Prepare the seasoning. Heat oil in a tempering spoon. Add mustard and splutter it. Follow in with asafoetida and curry leaves. Put off the heat. Sprinkle a table spoon of water on the seasoning. With a spoon sprinkle the seasoning over the steamed dhokla.

Toss the dhokla to give a nice coat of the seasoning.

Serve while still warm with ketchup or dry peanut chutney.


On Trail