Tuesday, April 30, 2013

Kokum Sarbat


It is summer time and more than the last year I am feeling the heat more this year. Last year when I came back to Mumbai I was fearing being hit by the heat but the summers just passed away. This year I am deliberate in attempting to make lots of cold drinks for us to sip on especially in the afternoon instead of tea.

Here is a post by my dear blogger buddy Saee, on how Kokum juice concentrate is made just the way it is made traditionally in the villages of the Konkan region of Maharashtra.

I haven't gone to Thal in a while and no fresh Kokum for me yet. So I use the Kokum juice that comes in a plastic can to make this thirst quencher.

Ingredients

300 ml Kokum juice concentrate
700 ml chilled water
1/2 a lime
1/4 teaspoon pink salt
few sprigs of fresh mint
Ice cubes

In a glass jar measure out the kokum juice concentrate. It is all natural fruit preserved in sugar. Since this concentrate is made in sugar you won't need extra sugar to make the sarbat. 

Squeeze into it half a lime. The lime should be thin skinned and juicy to lend a nice citrus twist to it. 

Add pink salt, this sets off the sweetness a hint and lends a balance.

Crush the mint between your palm and add to the jar.

Top up with the water to get 1 litre of sarbat.

Add ice cubes into the glasses and fill them to the brim as you hand out the sarbat to a parched soul as the person steps into your home. 

In summers in the Kokan this Kokum sarbat is the welcome juice of choice due to the abundance of this fruit. It is called  Ratambe (plural) in the local dialect. Funny that we love our Hapoos and Payari so much yet this completely different fruit with it cooling properties and antacid effect is called Ratamba (singular) or mango of the night. It must be simply because we love both the mangoes and the night mangoes equally!

Look for Kokum sarbat in any Marathi locality in Mumbai or tell your Mango supplier, I am sure he will get you a drum of Kokum sarbat concentrate.

Make a glass won't you! 

Monday, April 29, 2013

Growing Green Garlic


In my home garlic is not something that we depend on to enhance the flavor in our food but there are certain things unarguably that taste better with garlic. Like the garlic chutney which is a signature Koli style.

Well but garlic cloves taste quite different than Garlic greens. The greens are milder and impart and beautiful mellow taste. 

Growing it is as easy as sticking the garlic cloves from your pantry into some mud, watering it and waiting for it to sprout and waiting to let it grow into 10-15 inches tall grass like greens.

Here is what I did
  1. Take planter plate. 
  2. Fill with planting soil upto 1 inch below the brim.
  3. Create holes in the soil at the top.
  4. Take a whole garlic, separate out the cloves. Stick each clove into the holes created and cover with soil.
  5. Sprinkle water to moisten the soil. Do this every day.
  6. Ensure enough sunlight, but not direct. You can keep it under a larger plant for some shade.
  7. End of a week or two you will see beautiful greens. Let them grow till 10-15 inches tall.
Harvest : 
Pluck the greens when still tender for use as a herb. You can keep them fresh by keeping it standing in water for a few days.
Some uses:

Sunday, April 28, 2013

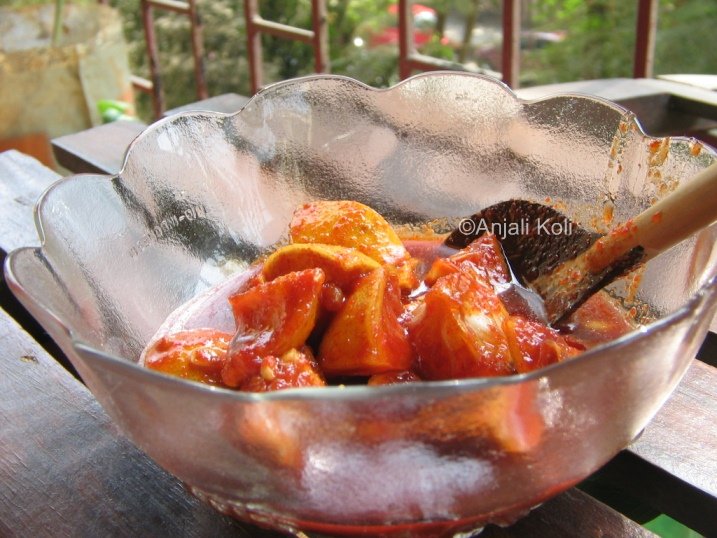
Lime In Salt and Sugar


Fresh and yet to be aged

This is a preserved lime recipe my Mother would make for me as a kid. She would make small quantities and we had a special glass bowl with a lid for it. Simple yet wonderful especially for a kid that suffered nausea and acidity all through growing up years. If there was this lime my Aai brought out on my plate, I would eat my varan bhaat without complaints.

It's simple to make and not much of a recipe. Just preserving the lime in lots of sugar and salt.

Ingredients

20 Indian lime
1/2 kg sugar
4 teaspoons salt

Wash the lime and drain. Pat dry with a napkin and cut each lime into 8 pieces. 

In a glass jar put all these pieces and cover up with sugar and salt. Shake the jar and keep it in the sun to cook for a week.

After 3 months this pickle will get paler yet juicier as the lime juices thicken with the sugar and salt.

In my home it is called Mooravlela limbu in Marathi or preserved lime.

Aged preserved lime after 3 months, yum!

Friday, April 26, 2013

Bhoplyachi Khichadi With Green Garlic

The green garlic used in this recipe was homegrown

Yesterday was my best friend Sangita's birthday. I had invited her family over for dinner and one of the things I made was a variation of this Khichadi. Yesterday it wasn't Khichadi but took the avatar of risotto with cheese and a bit of cream in it. This one is surely an Indian khichadi. It is a simple wholesome dish with the garlic and pumpkin making it delectable. 

The flavor profile is clean and uncomplex. The creaminess makes is so very comforting that a warm bowl guarantees that you will make it on those days when its cold and you would like to meditate over it, almost!

So get going if you are tempted to cook right away.

Ingredients

1/4 kg pumpkin / bhopla
1/2 cup small grained rice.
4 cups water.
1 tablespoon ghee
1 small bunch of green garlic, about 10 cloves with greens 
salt to taste

In a pressure cooker measure out the rice. Wash and drain. Peel the pumpkin and chop into large chunks. Add salt to taste. Top up with water and close the lid. Allow 4-5 whistles to get mushy cook rice.

Cool the cooker and then open the lid. Mash the rice and pumpkin with a ladle to gooey consistency. 

In a tadka bowl heat ghee and add chopped green garlic to it and tip off into the mushy rice and pumpkin khichadi. Mix well. 

Enjoy the pumpkin khichadi with some crunchy munchies. It tastes awesome.

Monday, April 15, 2013

Stuffed Chilli Pickle

This is an irresistible pickle! 

That said, I must say you need guts of steel to enjoy this one. There is something very glamorous about pickling these pretty red hot~~ chilies.
On one of those visits to APMC market I spotted this guy selling these beauties. I fell for the sheer charm and bought a whole kg. On counting they were 45 or more!

I took on the challenge of washing, drying and slitting them open to remove the seeds. They were going to be my best pickle I knew already. I am not kidding each of my 4 sisters, my 3 bros, my atyas and uncles all got a share of this pickle. They all loved it!

Well it was Sia's Monsoon Spice pictures that got me into risking scorching my hands and she in turn refers to the original recipe by Rajani of Eat write think.

I kept the same ratios but made a huge batch of the masala thinking the quantities specified by both the ladies are small compared to the no. of chilies. They had made smaller batches while mine was more than double. I had too much masala in the end but you will see in the upcoming post what I did with the extra masala. Anyways what I give here is halved quantities of the masala I actually made and used for this pickle.

Ingredients

1/4 cup Fennel Seeds
1/4 cup Cumin Seeds
1/4 cup Fenugreek Seeds
1/4 cup Mustard Seeds
2 tablespoons Nigella Seeds
3 tablespoons Turmeric Powder
1/8 cup Amchur Powder/Dry Mango Powder 
1 tablespoon asafoetida
1/4 cup salt
1/2 cup Mustard Oil
300 ml Mustard Oil  to immerse the chilies

In the microwave toast all the seeds for 30 secs. Let them cool to room temperature.

Put all of it into the mixer jar, add the turmeric, asafoetida and amchur and give it a whiz. Stop at coarse grind. 

Remove to a thali the coarse grounds and mix in salt and mustard oil.

Preparing the chillies is the biggest challenge. I would recommend handling the chilies with gloves on. Wash and pat dry. Then slit the chilies and remove the central pith and seeds. I at the time thought I did not think I needed gloves and assumed the the chilies would not be that hot. I was wrong. My hands were scorched. Until...


I made this pickle over the day long chores in the house so I was applying ice all through the day on my hands till I sat down to stuff up the slit chillies. It was an amazing feeling how the prepared spice paste cooled my hands. It assured me that the heat in the chilies will be toned down as they aged. Yet again I was to be proved wrong.

After stuffing all the chilies I lined them into a clean and dry glass jar. Pour 300 ml Mustard oil over the stuffed chilies.

Keep the jar in the sun for a week.

Then move it to store in a cool dry place.

To serve I usually remove 1 chilli at a time from the oil using a tong and divide it into bits for individual serves.

Do you need suggestion to eat this pickle? We eat it with everything Indian! It's the best pickle now in my repertoire may I say :)

Thank you Rajani and Sia, I am now the designated stuffed chilli pickle maker in my family and friend circle.

Sunday, April 14, 2013

Spicy Lime In Jaggery


Suncooked for a week and aged for 3 months, ready to be licked up!

This is a very very traditional Maharashtrian pickle, sweet, citrusy and spicy all in one! It is a must to have this pickle at home. It went with almost all desserts to set off the sweetness and clean the palate or much like ketchup with the savory snacks, like thalipith, tikat puris etc. I was under the impression that red chili powder is not permitted for Upvas for the longest time but this pickle has always been part of the fasting food in Gondavale.

We fell in love with this pickle in Gondavale and my expert pickle maker Aunt Devaki made it every year in winter when the limes came cheap. Bought from the markets in Byculla, in scores by her husband PJK. We would sit down around the huge tub of limes washing, cleaning and pat drying them before quartering. Our hands went sore with the lime juice. It was an activity that we loved doing as a group of kids in our sit out in the back of our little cottage in Tata colony. So much happened then!

Ingredients

40 nos. medium sized limes, quartered
1 kg Jaggery
1/4 cup red chilli powder
1/8 cup salt

Mix all the ingredients in a large tub. Pack it into a clean dry jar and leave it for cooking in the sun.

Fresh after a week of suncooking
Pack the jar only 3/4th as the jaggery melts and bubbles up, it needs space. Else you will have lava flowing out. I did cause it, as I filled the jar to the brim and on the second day had to remove a lot of the pickle into another jar.

If you do not like jaggery use the same amount of sugar. Sugar ferments lesser than jaggery so it lasts longer too but we don't mind the fermentation as we love jaggery, well and as a family of teetotalers wee bit of alcohol is Ok we think in the food, kidding ;)

This pickles stores well at room temp. As long as it is juicy and not smelly you can use it, ours lasts a year easily.


Saturday, April 13, 2013

Whole Awala In Brine

 Lets begin this series with the easiest of the pickles, Whole Awala In Brine.

Ingredients
1 kg Awala
1/2 cup salt
2 pinches of lime / chuna
1/4 cup julienned ginger
handful of whole green chilies
Wash and pat dry the whole Awala / Amla / Gooseberries.

Then prick the Awala from all sides with a fork to make salt absorption and adsorption possible. 

In a large bowl mix the pricked Awala, ginger, whole green chillies, salt and lime. Toss with a salad tong. The lime is added to avoid oxidation and precipitation. Else the brine becomes milky. The 2 pinches of lime keeps the brine clear.

Once mixed well, pack into a glass jar. Keep out for sunning for atleast a week till all the salt melts to give a brine.

Store in a cool dry place and shake well to mix once every fortnight to avoid fungus formation.

Uses:

As medicine for nausea or as souring agent in your curries and chutneys. Awala has that special flavor that lifts a mundane curry or chutney to a different level.

Wish you good health with this vitamin C packed pickle.

Friday, April 12, 2013

Pickles 2013


These are some of the pickles I made at the start of the year. Before I get to pickling the Rajapuri mangoes like last year posting these here. Those who follow the FB page would have already seen these. The recipe for each of these and some more to follow...

Sunday, April 07, 2013

Growing Chavali


Chavali or Black eyed beans, is one of my favorite beans. I love tender beans as a stir fry and the mature seeds soaked overnight and cooked into a spicy curry with a gravy. On one such day I soaked the Chavali for the curry and decided to plant one and see how it grows. I had read somewhere it grows easily. It did and I am happy with it.

I grew Chavali in three stages

Soaking:  
12 Jan 2013
Add the seeds in a jar and cover with 4-5 inches of water above the seeds. Soak them in water overnight.

Sprouting: 
Drain the soaked seeds and let them sprout in the soil       

Planting: 
  • I used a plastic tray with growing media.
  • Fill up to the brim.
  • Ensure there is a small hole in the bottom of the planter for draining excess water.
  • Sprinkle water to moisten the soil. Do this every day.
  • Cover thinly with dry leaves/ saw dust or a wet muslin cloth to protect from birds picking the sprouts.
  • Ensure enough sunlight, but not direct till the bean stalk proliferates quite a bit.
  • In a week I got 5 inch tall bean stalk.
  • Replant into a bigger pot with growing media, a mix of soil and twigs. Fill up with planting soil up to 10 inches.
  • Start supporting the bean stalk on the grill or a cage.
  • It flowers into white blossoms and bears fruit in the form or green beans.

Harvest:
Pluck the beans once they are about 15 inches to use when tender or leave them on stalk to mature if you want to wait for the seeds.

24 Mar 2013

Cleaning for Use:
Remove the crown and destring, if you must, break into small pieces or chop up fine.

Some uses:
Till now I have harvested only 4-5 beans at a time so they went as sprinkles on uttapams or into a sambar.

While we are talking about growing Chavali here, there is something else happening on the other side of the world with red chavali and my Koli masala which traveled across with ET. Mints, thank you for posting, you made my day!
 Fresh beans harvested for the mature seeds. 11th April 2013

Saturday, April 06, 2013

Finding peace...


My Green balcony


And 

My father's soulful singing


  Maze Maharaj


Sadguru Maza

Sunday, March 24, 2013

Tricolored Chili Paneer


In a vegetarian family serving starters always means making fried stuff or sandwiches, most times. Chili Paneer is a favorite and how much that my nieces and nephews choose it over chocolate cake. The last time we had a function is our home I was serving this tricolored Chili paneer to my uncle MJ, the kids saw it. It was not yet their dinner time and they were playing video games, on spotting it they immediately dumped their play and instead demanded that I serve them the chili paneer. I offered chocolate cake but they chose this lovely colorful chili paneer!

So here is the recipe

Ingredients

1 block of paneer about 400gms
2 tablespoons corn flour
1 red bell pepper
1 green bell pepper
1 yellow bell pepper
1 tablespoon dark soya sauce
2 tablespoon chopped garlic
2-3 onions chopped into squares
3-4 spring onions chopped fine
1/2 cup baby corn sliced
slit green chilies (as much as you can handle)
2 tablespoon oil
salt to taste
sugar to taste

Keep a pot of boiling hot water ready to dunk paneer after frying to make it super soft.

To begin lets fry the paneer first. Make a thin batter of corn flour water and salt. It should coat the paneer chunks thinly. Cube the paneer to finger sized pieces. Dip each piece in the batter and fry in hot oil. Remove once golden and dunk in the hot water. Once all the paneer pieces are fried and dunked in hot water to soften. Drain them on a sieve. Separate out each piece if they are sticking together.

Heat oil in a wok. First fry the garlic then add the chopped onions and fry till translucent. Chop all the three colored bell peppers into long fingers. Add them to the saute. Cook for 5 mins. Add the white parts of the spring onions and cook for another 5 mins. Follow in with the slit green chilies and baby corn slices. Add the soya sauce, lastly add the paneer and stir well and fast on high heat just to caramelize a bit. Salt it and add sugar as per taste.

Remove from heat and serve immediately with sprinkles of the spring onion greens.

Saturday, March 16, 2013

Gongura Pappu


Is my most favorite spicy dal. Especially if my ex-neighbor Rani has made it. The dal is cooked to creaminess with the gongura leaves in it and the single way to enjoy it is drizzle ghee and mix it with the fingers. I have seen thinner version of gongura pappu but this is how Rani makes it, thick and creaminess characteristic of gongura.

The thick dal mixed with rice and made into a mudda is how Rani would love to enjoy but since we always teased her she would go to the kitchen and eat her muddas but never in front of us. We would tease Anu, my pilloo that she would have eaten rice balls on the day gongura dal was made and she would go, "Noooo". Such precious memories!

Then life does a 360 on you. Today if I have to thoroughly enjoy gongura pappu I must make muddas with rice!

Two years ago when I did my Andhra Pradesh Road Trip I was in search of a good gongura pappu but found none. Which only means that this recipe is priceless and good recipes are the ones that are made at home. My belief is strengthened.

So here I am sharing with you.

Ingredients

1 large bunch of gongura 
2 cups tur dal
1/2 teaspoon turmeric
1 teaspoon red chilli powder 

For more authentic taste use the red chili and mashed garlic masala that Andhraites make in bulk. The garlic lends a very slight fermented taste to the masala and a beautiful flavor to the Andhra specialties.

Pluck the leaves of gongura. Wash and clean. Chop them fine. Wash tur dal. In a pressure cooker add the dal and the gongura. Add the spices. Top up with 6 cups water. Cook for 20 mins with whistle or for 3 long whistles. Open the cooker. The dal should be crumbled completely on cooking. Mash it and keep aside.

For the poppu/ tadka

1 teaspoon mustard seeds
2 tablespoons oil
asafeotida
as many Garlic cloves as you like, peeled
curry leaves (I was out of stock)

Heat oil till smoking point. Splutter the mustard seeds add asafoetida, curry leaves and finally garlic cloves. Fry till golden. Pour the poppu over the cooked dal and bring to a rolling boil. Serve hot and enjoy.

P.S: In the picture I have used a red Pochampalli cloth done in Ikat style of dyeing which is unique to Andhra Pradesh. I love ethnic fabrics and these weavers need encouragement.

Sunday, March 03, 2013

Kache Popaya Chi Chana Dal Ghalun Bhaaji


Raw papaya (Koli: Popaya) and chana dal in green coconut masala.

Traditionally this gets made in two ways, one with chana dal and the other with sode (peeled and dried prawns) but in our home its the veg version ofcourse. It would sound scandalous now if I say it, since I am a  vegetarian for the last 25yrs but this tastes the best with sode. This a very much Koli Style bhaaji, what we call esavana chi bhaaji which means bhaaji with essence of non veg, mostly dried fish.

Yesterday, I visited Thal to see my youngest Mama/ Maternal Uncle who suffered a paralytic stroke. I realized one thing that we are becoming people who show apathy to even the most grim circumstances that affect our life. In the village if a person falls ill, he is immediately considered useless and left to die. It is a lot to do with not having money and no humanity! Fortunately Shankar Mama has people who love him around him and I am praying he recovers well.

In Thal popaya is considered "bhutacha khana". To ward off evil many a times the popaya is waved around the body of a person and then discarded on the seashore faraway from the residents and their commonly used areas. See even the ghosts are fed in our culture!

I was touched by my cousin sisters in Thal. I saw a terracotta handi filled with water lying out in the backyard. I told them I wanted another one like it. Nirmal Tai immediately wanted to give the same handi to me but then explained that it was kept for the birds and animals. In my city home for decades we have stopped doing this. Why?

Few things I can think of is nesting problems, messy window sill. Are these problems so big that we must let our birds and animals die? 


Join me in celebrating World sparrow day on March 20th and add a feeder to your window sill to keep celebrating everyday. 
 
Here is what Mohammed Dilawar is doing for the sparrows.

Last weekend when I stayed over at my friend Gauri's home she shared with me this bouquet of dried paddy she had brought back from Kolkata. It is a symbol of fertility and prosperity in Bengali homes and is hung in the doorway. Yes the doorway was open to birds and animals in the villages but in our modern vertical growth concrete jungle the doorway is mostly a maze thru which humans, themselves hate to make passage. So I chose to hang that bouquet of paddy in my window.

I had taken the day off on Friday, I spent the entire morning watching the sparrows feed on the paddy. It was such a calming experience for my nerves that had been wrecked by some unnecessary burden I had invited. Yeah I am like that some times, 'Kunachya khandya var kunache oze' must have been written for me ;P.

Oh lets get back to the recipe.

Ingredients

1 kg raw papaya/ kacha popaya
1/2 cup chana dal
1 tablespoon oil 
salt to taste

For the masala

1/8 piece of a fresh coconut 
1 teaspoon cumin seeds
3 green chilies
1/2 cup chopped coriander leaves
1/2 teaspoon turmeric powder
1 teaspoon Koli masala or garam masala

First grind the masala. Keep aside.

Peel the raw papaya and chop into bits. Wash the chana dal and keep aside Heat oil in a wok. Add the raw papaya and the washed chana dal to it. Top up with water about a litre and cook till chana dal starts crumbling just a bit. Salt it to taste.

Add the ground coconut masala. Add more water to get a nice gravy but not too thin.

Note: If you are using peeled and dried prawns, you need to soak them in water for 30 mins to plump them up. Use them instead of the chana dal.

Enjoy the Kache popaya chi bhaaji with chapati or Chavlachi roti.

 I'll leave you to listen to this beautiful Abhang by Tukaram and sung by Lata Mangeshkar which is what this post is about.

Tuesday, February 19, 2013

Hazelnut Cold Coffee


The last week just zoomed past, for me the fun begins on Wednesdays itself, when I attend my Marathi Sugam Sangeet Class. This week we learnt Nij re nij re bala it is such a beautiful Angaee geet or lullaby that I sang it to bed and was up at 3.30 am with the song still playing in my head. I lay in bed looping it until 6 am. Woke up and did all my Thu morning chores to it.

Thursday evening is my most favorite, it is my Bharatiya Shastriya Sangeet class with kids aged 7, 9 and 13, 3 women in the 40s and the eldest is 60 plus and that does not include Mrs. Dabke, my Guru! Yet this class is absolutely fun. We are incorrigible gigglers. Last week the kids in between singing picked up some spectacles that were lying around and wore them on their noses to give us the bespectacled 40s and 60s company. It was hilarious, to watch Dhruv wearing 2 pairs one on top of other. In chorus we sang sa, ga re, ga pa~~~ dha, ni, Sa~~

Friday I sat down for riyaz for 2 full hours and followed it on Sat morning for another 2 hrs. Thru the day I moved around the house, cleaning, cooking, gardening, clicking pictures for the blog and more...

Saturday night went to a Kathak recital by Ntriyadarpana Foundation, it was an excellent experience with Paullomi Mukherjee Naik compering the show as she educated the audience on the nuances of Kathak and the characters played by her students. The brightest performance was by Vidhi Sampat whose abhinay and nimble footwork as Abhisarika captivated me. All the other girls were all decked up in Solah Shringar and were quite entertaining in their individual acts. I must bribe my friend Ashita to invite me for such concerts more often as these are non commercial focused on learning performances.

On Sunday I was too tired to cook as it was late the previous night. So we went to my favorite not a Dhaba but Punjabi homestyle outlet in Belapur called Bimal Paratha House. Guys you must visit this place. They chopped the sarson for us after we placed the order for Sarson da saag and Makai ki roti. Everything is always absolutely fresh, tasty and laden with ghee! Loved the indulgence as I was off rice and roti thru the work week.

Well today was a hectic day too even though I worked from home. So here is a treat I just made and posting as the Monday night turns to Tuesday.

It's a simple recipe but does wonders for my tired body.

Ingredients

300 ml chilled milk
1 teaspoon instant coffee
1 teaspoon nutella
Sugar to taste

Put everything in a shaker and serve in a tall glass.

Sipped slowly. Reflecting on how I love my life, this is the life I want to live and enjoy!

Now I am off to bed. Good night!

Monday, February 11, 2013

Marathi Popti Or Bengali Paturi, Nah It's A Casserol !


Many years ago I had briefly mentioned about Popti on this blog. I have not been able to make the real thing but here is a modern Popti. Is it or is it not?

In and around Alibag winter is when Val is harvested. The celebration of the harvest is with this special dish called Popti, it has hardly any spices and is cooked on wood fire. The Val fresh and young are stuffed into a terracotta pot lined with leaves and cooked in its own juices. The smokiness of wood fire takes it to a sublime level.

Popti is never eaten alone, its always for a party. The pot is kept in the center and everyone sits around the pot warming themselves idyllically in the warmth of the now dying embers of the fire on which the Popti was cooked. I have never experienced this Popti making on our farm in Thal but the elders tell many a stories from their childhood of flipping on Popti and then having farting competitions following it, the notorious Val doing the magic.

When a group of us blogger friends had visited Bengali Mashi's Kitchen last year, I had loved the veggie paturi. It was bundle bursting with flavours, sharp from the mustard and the tender Val beans cooked to perfection along with delicate spinach wrapped in a banana leaf. However as per the Bengali tradition the paturi was fried in mustard oil. I had commented that I would have preferred it steamed. It was on my mind for a while to try at home.


Yesterday I was at the APMC market and found tender Surti papdi. I was pondering on making Popti or the Paturi. For the Popti I don't have a terracotta pot and no wood fire. The Paturi without banana leaf is not a Paturi after all. So I decided to give the idea of making two similar dishes a modern twist. Ah! and it did fit so well for the event Preeti is hosting on her blog, an attempt to fight plagiarism is a positive way.

The flavors of this dish are classic Bengali and yet the cooking technique I used is inspired by the Marathi Popti.

If you love simple healthy food full of flavors that burst in you mouth and textures that tickle your palate this one is a pleasure.

Ingredients 


1 bowl Surti papdi or any type of tender beans in a pod
1 large bunch spinach, chopped fine
3 tablespoons mustard seeds
4 green chillies
¼ fresh coconut, grated or sliced
¼  teaspoon turmeric powder
2 teaspoons mustard oil
1 teaspoon sugar
salt to taste.

Remove the string of the Surti papdi or anyother bean pods you are using. Check that they are fresh, young and worm free (none of the pods should have holes or brown marks). Wash.

Clean and wash the spinach, chop fine. My 2400 ml casserole filled up with it.

Grind the mustard seeds, green chillies, coconut along with salt to a paste.

Mix together the bean pods, ground paste, turmeric powder and sugar. Put it all in a casserole, cover with lid and microwave for 15 mins. The spinach will wilt and leave a lot of water and the bean pods will cook in those juices. The next 10 mins microwave without the lid, so that the water evaporates.

Finally heat the 2 teaspoons of mustard oil to smokiness and drizzle over the baked casserole. Mix well. Serve while warm.

I am sure you will enjoy the same happiness of a Popti done in the farms of Alibag; indoors at your home or are you already in Bengal?

This post marks a change on this blog that I have delayed for too long until my picture was blatantly lifted. Did you see the watermark? It is the stamp of my ownership. This is to stop copying!

Saturday, February 02, 2013

Bloggers' Buzz in London and A Fight Againt Plagiarism


My blogger friend, Preeti of Isingcakes and More and three other Londoners and bloggers came up with this idea of a day long event for bloggers. Here is the schedule. 

It is a meet for passionate food bloggers and foodies for sure and if you are in London you cannot miss it. Check out the Bloggers' Buzz blog for further details.

We bloggers are connected by a passion for food, photography and culture. Networking with like minded people is something bloggers world over love to do. At Bloggers Buzz they have a masterclass on the Ethics of food blogging. I am sure this will be a very informative class, to build awareness and also strength among bloggers to fight plagiarism.

Sometime ago, Purva's Food Funda liked my FB page and invited me over to her page. The first thing that shocked me was she had my Vala cha Birda picture (the steel banana plate pic) in her album called "My recipes"!

I was furious, yet calmly asked her to either credit my pic to my source post or remove it. That is my right under the copyright law. Instead of taking action on it after couple of days she left a comment on my wall saying being a Marathi I was pulling her down instead of providing support!

There was no apology in the thief's words even when caught red handed and that irked Preeti so she came all out to support me. Both Preeti and I reported the photo and the page for Copyright Infringement to FB. The photo was gone, don't know if the thief removed it or FB. 

Meanwhile, this thief  instead of shutting up decided to show her unpolished behavior abusing Preeti and sending messages and appealed to our "Marathi Asmita". Yes we are Marathi and I was left with no choice but to tell her off very rudely. It did not end at that. She delete her comments on my wall but here is my post for proof of the harassment.


Well we did not expect anything to happen after this. The shameless thief still keeps stealing saying one of her readers has contributed the pictures to her page. See this album. She does not take responsibility of cleaning up the so called "contributions" and by the way all uploads are by the page owner her self, note that. Now all this happened in Oct 2012

Next what followed is scheming roguishness after so many months of quite which we least expected from two women who must be at least college educated. In Jan 2013, Purva, first invited Preeti over to her page, then she told her off publicly and wrote a nasty message. Later the co-owner of the page and partner in crime Manisha Rane wrote to Preeti. That message is so foul that I refuse to put it up here. I am warning these two women to stop harassing my friend Preeti else I will have to report them to authorities. I know they are my regular readers even if anonymous and they are certainly not going to miss this post.

Jyanna Ingraji kalat nahi tyanchya saathi ha nirop:

Maze kuthele hi kaam, likhan, photo ani kalpana hya mazya malkichya aahet. Tya mazya parvangi shivay koni hi vaparu nayet hi vinanti. Ani jar ka parvangi shivay vapar zala, tar legal battle sathi tayar raha.

I have seen some other fans of my blogs using my pictures on FB pages. Please stop it. It takes lot of passion, time and energy to procure ingredients and other material, to take enticing pictures it takes original thinking and creativity. It takes a lot of my personal time every weekend to post even a single post on my blogs. I do this first for my self expression and then for the love my readers shower on my work. Remember this blog is for free you do not pay to access my work. As readers you must support me by at least taking my permission before you use any of the content. I appeal to the goodness in my readers.
 
Rhea and Ketan have started a FB group "Food bloggers Hall of Shame" where ethical food bloggers show solidarity in curbing the plagiarism that is eating into our energies time and again. We join hands to take action against anyone who uses any of our content without the explicit permission of the blogger. I have a page with my Ownership notice on this blog and all my blogs and request anyone who wants to use my content to read it and seek permission by writing to me at annaparabrahma@gmail.com.

Edit at 23:10 IST

This is how Preeti, being a teacher that she is shows the way to ethical food blogging and she is even rewarding people who are creative and innovative. Go over to check out what she is giving away as a Prize for Ethical food blogging.

On Trail