Showing posts with label Sweet Tooth. Show all posts

Friday, May 29, 2020

SweetLime Cupcakes | Mosambi Muffins


This post is a dedication to my cousin sister Neelam. She stepped into her 50s yesterday.

A very simple girl. She and I grew up together and even though younger than me by 10 months she used to take care of me growing up a lot. She started cooking before me and was more responsible than me. At a young age a better cook than anyone in the family. 

An anecdote that family tells about us is that when we were babies 10 months apart I did not drink much milk so my bottle was given to her and she would suck up both hers and mine noisily. I was a bony baby she was chubby. She was vulnerable I was smart. Especially I knew how to escape our grandfather's pastings. That's our favourite memory to crack up to.

Then 5 yrs ago she had gone for a pilgrimage to Nashik. When she suffered deep vein thrombosis (DVT) and the blood clot travelled to her hand. In seconds it was black. Immediately she was moved to Mumbai and for 15 days doctors waited to see if they could revive it. Alas they could not and before sepsis set in they had to take a decision to save her life. It was a very hard time for family members to watch her go thru it. Finally she said she wanted to live for her young daughters. In that process she lost a limb.

Aai, me and Neelam

Since then She lives her life with strength and positivism. Still caring for her family. She doesn't show the struggle. We are fortunate that her younger sister in also married into the same family so she has her back.

Yesterday I had planned an online party for her. However due to several challenges in the family that party turned into a one on one call. Yet Dad and I went ahead and wished her. Showed her the SweetLime Cupcakes that I made and we ate later. I know it would have been such fun together.

The cupcakes turned out a little dense than I like but were nice and citrusy.

Here is the recipe if you wish to recreate.

Ingredients
1 cup maida / all purpose flour.
1.5 teaspoon baking powder
50gms white butter
1 cup SweetLime juice
1/2 cup milk
1 teaspoon zest
1/2 cup sugar, demerara

For icing
100 ml Amul fresh cream
1 tablespoon icing sugar
1 teaspoon Vanilla extract
1 teaspoon zest


Follow the video.

In a bowl mix in all wet ingredients and dissolve the sugar by whisking. Then add the baking powder and mix lightly. 

Add the zest. Next fold in the flour lightly into the liquid. The batter should be smooth.

Now line the muffin tray with cupcake cases. Spoon in 3-4 scoops into each pocket. Meanwhile preheat oven for 10 mins. I usually add this time to the time for baking and set the total time required. In this case we will bake for 40 mins in a bain marie so set the time at 50 mins at 160 degree celcius.

Put in a tray with 1 cup of water. place the muffin tray over it and bake. Check if baked properly by inserting a knife in the middle of the muffin. If the knife comes out clean it is done.

Cool completely for 12 hours before icing. 

Whip the fresh cream with icing sugar and vanilla extract. 

Top the muffins with icing to make them into pretty cupcakes. Sprinkle the zest over the icing.

Before serving place the SweetLime Cupcakes on a beautiful plate or cake stand. 


Happy 50th Budday Neelam!


Sunday, May 24, 2020

Aamba Barfi | Mango Fudge


When it is Hapoos season we are on a cooking baking high with the king of mangoes. Making Aamba barfi at home is so easy and you can control the sugar in it too unlike store bought ones which are extremely sweet and does not consider diabetics at all.

There are several Aamba barfi recipes that use milk powder and taste like dough but try this real burfi with Khava / Mawa and you won't like the milk powder vadis of the world. This Barfi is soft like Kalakand and delicate to taste.

For a short recipe like this lets not waste time, lets get going...

Ingredients

200 gms unsweetened khava / Mawa
1/4 cup of sugar
pulp of 1 Hapoos / Mango
1 handful of pistachios
6 cardamom pods
1 spoon of toop/ ghee

Collect all the ingredients on the counter. Crumble Khava and keep it ready. Mine was very moist so crumbled easily. If you have hardened khava pound it with a pestle.

Sliver the pistachios and keep aside. Peel the cardamom pods and pound the seeds to coarseness. Keep ready.

Pulp one Hapoos mango and keep aside, It should yield about 1/2 cup mango pulp. You can use any other mango which is fully ripe if you don't have access to hapoos. Hapoos has excellent color, flavor and fragrance hence it is the best. Remember whichever mango you use that will impart its characteristics to the Barfi like mentioned before.

Heat up a small fry pan and add 1 spoon of toop/ ghee. Melt it and then add khava to it. Fry till it becomes lump free. Khava is unsweetened but Mawa is sometimes sweetened so check it and then adjust sugar accordingly.

Now save little pistas for sprinkling on top. Rest major part add to the lump free khava. Mix to distribute evenly.

In a kadhai add the mango pulp and sugar and reduce it to compote thickness. The more you thicken it your effort for reducing along with khava is lessened.

Add the khava and reduce till the mass leaves the sides of the kadhai. Add the coarse cardamom powder and mix well. For this quantity it took me good 15-20 mins. Watch and listen to the sound in the video that tells you that the mix is ready to be removed from heat. Made in 30 mins.

I used a glass baking dish to cool this barfi but if you are using a metal plate or tray do grease it with toop.

Now remove the mix to the tray or glass dish and allow to cool over night. If it is set well cut into squares. I had to put it in the fridge to set for further 4 hrs to get neatly cut squares. Over few days the barfi sets firmly in the fridge as you relish it slowly.

Isn't it so easy peasy! Make it and tell me you accomplished making Aamba Barfi or Mango fudge.


Saturday, September 26, 2015

Coconut Mawa Cake With Ganache

 
It's a new birthday that I look forward to celebrate every year henceforth on 23rd Sep. Its a special person who has dared to accept me in his life. He who loves me and pampers me much. Meet AC, my beau.

I had ordered a cake with an elaborate theme but the homebaker services are unpredictable since its always a one person show. Well it turned out to be a blessing really. I made this simple cake myself in the flavors my beau would love, coconut and mawa and since its a day for celebrations poured some sinful ganache over it.

I baked the cake at home and made the ganache at his home. This was all before we stepped out for an evening of fun. We were joint by a friend for the cake cutting. It was so funny that I had two men watching me make the ganache like two little school boys. Thanks to the friend we had some moments captured on the cell that we will cherish for life. So we sang the happy birthday song and cut the cake. He liked it he said. Then I packed 2 boxes, one for AD the friend to take home and one for Mami.

Mami is one of our only 3 relatives. She is such a darling. She wished me happy birthday too! I laughed at the moment and only learnt later from a friend that it is an old tradition among the Parsees to wish both partners. Ain't it a cute tradition?!


I am blessed to have AC in my life and wish we have a meaningful, loving life together as long as we live.

Would you like to make this cake? Here is the recipe.

Ingredients

1/2 cups All purpose flour
1/2 cup rice flour
1 cup dry coconut powder 
1/4 teaspoon cardamom powder
2 teaspoons baking powder
1/4 molten Amul butter
1/2 tin sweet condensed milk
100 gms Mawa
1/4 cup of sugar or more as you like
1 cup milk
In a bowl whisk together the dry ingredients first, then add butter and whisk till incorporated. Then add the condensed milk, sugar and mawa whisk again till sugar distributes well in the batter. Now add milk and whisk together to loosen up the batter into foldable consistency.

Prepare a tin by greasing and dusting with dry flour. I chose a heart shaped mould for obvious reasons, you can use any other as the occasion calls for. Pour the batter in it and tap the tin on the counter to even it out. I used a wet baking strip to control the rise of the cake. A blogger buddy had gifted it to me couple of years ago and I finally used it. It worked pretty well.

I preheated the oven at 200 degs, baked for 10 mins at the same temperature and then lowered the temp to 180 deg Celsius and baked further for 25 mins. Checked with a wooden skewer, it came out dry. Removed and cooled for an hour and a half. Then frosted it with ganache

The ganache 
1 bar of dark chocolate (I used 80gms bar of 50% cocoa)
1 Amul Fresh cream 200 ml pack

In a bowl melt together the chocolate and fresh cream in a microwave about 45 secs. Mix to get marbeled effect till all chocolate is liquid. Pour over a cooled cake.

Chill it before cutting and serving.


I picked out this nice plate to serve the cake on and got to know a bit of history about it. It is from AC's grandmother's collection of beautiful things that are lying in dusty cabinets that I am going to dig up some treasures from. This one is aged approx. 100 yrs. It is from Burma, a light weight porcelain. On the back is a logo that reads "Honeysuckle" with the Victorian crown prominent on it.


 Like a friend rightly commented on seeing the pics and it sums up my thoughts too...
"Many Parsis were settled in Burma and had flourishing trade as it was part of the old spice route (not many people know that). This beautiful plate must be an old English one and has probably seen many an elegant evening and much familial bonding. Precious!"


After visiting Mami and taking her blessings, AC took me out to dinner at Delhi Darbar, Colaba. We chose it for all our growing up years nostalgia sake and the food there still tasted so good. Greasy but good followed by a juice at another childhood favorite Canteena adjacent to the restaraunt. Later a walk by the Gateway of India. 

I had come to Gateway with my lover and it was a special feeling as that's where I had walked most late nights as a toddler held by the finger with my favorite uncles T kaka, MJK and Mothe baba everyday after dinner.

That night we returned home very content, my head lightly resting on the shoulder that has promised togetherness for life...

Monday, August 10, 2015

Call It Nougatine, Praline Or Chikki


To us Indians, nuts coated in sticky jaggery is Chikki, to the French it is Nougatine or Praline Yeah but if its French suddenly everything becomes a little superior eh?

Traditionally if you go by Larousse Gastronomique both Nougatine and Praline are made the same way. That is caramelizing sugar and then adding nuts to it and then rolling out sheets while hot. Yet there is a slight difference. Nougatine uses ground almonds and the sugar to almonds ratio is 2:1 whereas In Praline blanched and then toasted whole almonds are used and the sugar to almonds ratio is 1:1. Cakes made with Nougatine or Praline are known by these names where traditionally buttercream is flavored with it and then used for filling and frosting the cake. You saw my version of Nougatine and Custard Filled Cake in the last post on this blog.

I told you that you will be surprised at the Indian connection. So here we are making Indian Chikki or Nougatine or Praline. Yes both these French versions have gone beyond the almonds and are made with other nuts of choice and the Indian chikki has expanded its variety by using sugar.

The process is simple but handling caramel is tricky. Be warned that this recipe requires complete focus do not multitask when working on it. This warning is especially for women as we are big time multi-taskers.


Ingredients
200 gms sugar
200 gms coarsely chopped mixed nuts (I used cashew, almonds and pistachio)
1 teaspoon salted butter

In a wide pan measure out the sugar. Put it on medium heat and let the sugar start melting.

Meanwhile prepare the surface of the counter by lightly spreading butter on it.

Add the rest of the butter to the sugar to give it a hint of salt and smoothness. As the sugar melts completely keep stirring as it will foam up evenly. Let the sugar get a nice golden hue while you are stirring.

At this point add the coarsely chopped almonds, cashews and pistachios. Switch off the heat. Mix to evenly coat the nuts with the hot caramel. While this mix is still hot remove from heat and pour on the counter. Press down the mass. Oil a rolling pin and use it to thin out the Nougatine into a sheet.


Let it cool for a few minutes. Then cut up the sheet into pieces, cool completely.

The cut up pieces can be served as Chikki /candy. It is a fantastic energy booster post workout or when traveling to carry along in your handbag.

If you are planning to use it to flavor a Nougatine or Praline cake like I did here then you need to crush the pieces. These crushed pieces can be used as sprinkles on icecreams and other desserts.

Have fun making this candy treat and spread some sweetness around you by distributing some to friends.


Thursday, April 24, 2014

Gor Papdi


Flash back to the days in Fort, there is a Jalaram Bappa and Ambe Mata temple in the building opposite my home. The bhajan is in full swing, me standing at the window and sticking out my head as a kid and there is a promise of Gor papdi prasad. Dad warns not go down at night. So I tell Ji, my grand old neighbor that if she goes down to the temple to get prasad for me. I tell Bharat to keep prasad for me. Ensure I get atleast one pudi of prasad (wrapped in newspaper).

Next morning we go to the temple and the potbellied pujari hands me a packet. Thrilled to bits I rush up and nibble the small piece. Then Ji asks if I want the prasad and I happily nod a yes. Bharat too ensures he drops in prasad at my home along with the milk bottle he drops everyday.

At another time Mom is discussing what to make as travel snacks for us to take on our yearly trip to Ganagapur-Akalkot-Gondavale and Kaki, Rajput suggests that we make khari puri and Gor papdi. So the two of them decide it would be made in the afternoon. Kaki would teach my Mom.

I would be pottering around and listening to Kaki's stories of travel. This image of gor papdi tied up in a cloth potli has stayed in my mind. Of the travelers eating it under the tree and drinking water from a kamandalu.


Flash forward to now. For our family trip to Gondavale besides many other things I made Gor papdi. This traditional sweet is made from pantry staples and gets done in less than 30 mins.

Ingredients

1 cup whole wheat flour
1/2 cup ghee
1/2 jaggery
1/8 cup water
5-6 cardamoms 
2-3 tablespoons poppy seeds

(This recipe can be doubled or tripled in all proportions very easily. I used 3 cups of wheat flour for the tray of gor papdi you see in the pics.)

First grease a plate and keep it ready.

In a kadhai heat ghee, once molten add the wheat flour slowly to it. Keep mixing and stirring till the wheat flour is browned and smells nutty. 

Meanwhile separately in a saucepan add the water and jaggery and heat till it dissolves completely. 

Pour the jaggery liquid into the ghee roasted wheat flour. At this point use the seeds of cardamom after crushing them. Stir till it starts leaving the sides of the kadhai and forms a mass at the center. About 5-6 mins.

Now transfer the mass onto the greased plate. Even it out with a katori. Sprinkle poppy seeds. Level it well. Let it set a bit and then cut up into pieces. Let it cool completely.

Once cooled pack it into a box. It stays fresh for 15 days. 

That's a healthy and nutritious snack for you better when you travel excellent for hikking trekking trips.


Sunday, April 06, 2014

Gulkand Kulfi


Kulfi, Kulfi-yo~~ 

That was the call of the Kulfiwala. Every summer night he would roam the backstreets of the Fort, Mumbai that went silent after all the commercial activities closed and the locals would find their peace and go down for a walk and the boys and men gathered to chat at the street corners.

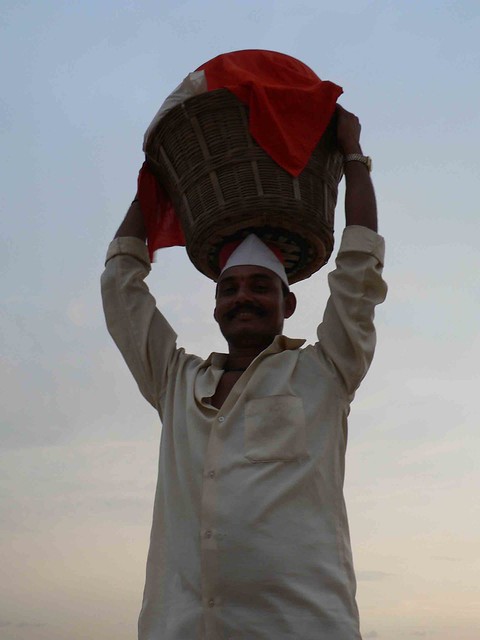
We as kids would go running to window and call out to the Kulfiwala, "Bhaiya upar aana" calling him up to our third floor home. There would be much excitement as he would climb the stairs and we would keep the change ready. He would put down the huge basket which nestled the large urn or matka on to the floor. The urn would be filled with salt and ice to keep the kulfi frozen. It would then be covered with a red cloth which he ensure was always wet to retain the chill. Barely would he have settled the basket down and each one of us would demand our own flavours, Malai, Kesar pista, Pista. These were the basic 3 flavors he carried. The Malai kulfi tasted the best. Simple with no artificialness. Then he'd pick out one kulfi mould cone and rub it between his palms to loosen the set kulfi inside and pop it out on a leaf, cutting it up into bite sized pieces. There was never a time when we did not lick up the last bits of kulfi from the leaf!

The Gulkand kulfi is a more sophisticated version that I had never tasted on the streets but in a fancy restaraunt. Any kulfi is pure joy but Gulkand kulfi is romance of the flavors of boiled down milk and rose petals. It transports you into the era of the Mughals. They who brought to India the Persian influences, the use of rose in cooking and what better way than in a Indian cool treat.

You will find many recipes of Kulfi across the internet and in books that include corn flour as a thickner or other modern adaptation of a quick fix recipe using condensed milk from a can. However I choose to go the traditional way. Making Kulfi is a love affair you cannot rush thru it. It is just not the same, it has to be done slowly and over time. I prefer to do it over two days savoring every stage of the making as much as letting the sublime flavors melt in the mouth with every morsel.

A great Gulkand kulfi need two things, full fat milk and good quality rose petal jam that gives the name "Gulkand".


First let me explain to you what is Gulkand after all. When the roses are blooming, the best are picked, cleaned and petals are separated. Then in a glass jar the petals are layered with sugar and suncooked. The suncooking pales the bright red color of rose petals but the sweet smell is encapsulated by the sugar and you get a lovely jam. You can make your own jam at home with this method if you have access to organically grown roses. Gulkand boasts of wonderful ayurvedic properties and it's best know for its cooling effect on the human body. It is either consumed as is in spoonfuls or had mixed in the daily glass of milk in the summer months. 

Stay away from anything that is bright red on dark pink colored and labeled as Gulkand. It would without doubt have artificial food color. A good Gulkand in kulfi lends a creamy shade to the kulfi. I succumbed to the pressure of making it colored to give it a rosy look as the name suggest the use of roses so I used a little bit rose syrup, yes the pink colored liquid from a good brand but I could have avoided it easily.

Are you ready to enjoy the wonderous art of making Kulfi with me?

Lets begin...

Ingredients

3 litres Full fat Milk
100 gms Gulkand
25 ml Kalverts rose syrup (skip this if you do not want the rose tinge)
100 gms sugar
10 cardamom pods

Day 1:

Pour milk in a large thick bottom vessel. Boil it and reduce the quantity to about half the amount. It takes about 1 hour on the smallest burner and on simmer. Ensure you are stirring intermittenly and the milk is not charring at the bottom. If it does there is nothing that can be fixed as it will smell burnt and affect the taste too. So stay close. 

Once the milk is reduced add the sugar. Now remove some milk into a different pot and mix the gulkand and Kalvert syrup into it. The pic below shows the steps and the difference in colors at every stage. Pour back the Gulkand mix into the reduced milk pot. Let it simmer for 10 mins. Peel the cardamom pods and separate the seeds. Add the seeds to the thickened milk and give a stir to distribute evenly.

Put off the gas and allow it to cool completely. I generally do this at night after I finish cooking and in a clean work area so there is no chance of any other flavors or smells affecting the purity of milk. Never do it parallely with other activity else its easy to spoil milk.


Day 2. 

In clean kulfi moulds fill to 3/4 capacity the cooled thickened milk, sugar and gulkand mix. I filled 6 kulfi moulds and the rest I put in 2 plastic containers. Chill for a 24hrs in the deep freezer. You can check in 2hrs if set completely and you are in a hurry to serve it. 

Serving

Each kulfi mould can be rubbed between the palm to warm up and then demoulded into a serving dish. It can be cut up into bitsized pieces or left whole.

To demould the kulfi from the pastic contains just dip them in warm water and invert on to a plate. Them slice up into roundels. Serve a slice on a nice plate.

So you see Kulfi making takes time but it has just 4-5 ingredients that make this cool treat a lasting memory.

Note: For a plain malai kulfi you need to skip the gulkand and instead increase the amount of sugar to your taste. Once you have the basic kulfi play around with flavors, colors textures using saffron, fruits and nuts.

Monday, March 31, 2014

Sev Barfi or Singhar Ji Mithai


गुढी पाडव्याच्या हार्दिक शुभेच्या !

Does it matter if I post a Sindhi sweet recipe on a Marathi New year? Would it taste different if I tell you I made it in Diwali and am posting it now? 


No, naa. Then here is the recipe. You have one more sweet recipe to try at home.

Since I spent the first few years of my life in Colaba where besides the Kolis the Sindhis have their base, I grew up feasting on a lot of sweets from the famed Sindhi Mithaiwalas, whether it was Kailash Parbat or Chandu halwai. Then 20 years later Jhama's had us swearing with the hot samosas, juicy jelabis and a lot lot more. The sev barfi was brought home as an odd time treat, never for the religious rituals or naivedya. For the naivedya it has to be pure milk based sweets and this sev barfi had chana atta in the form of sev so was meant only for human consumption.

I don't know what made me think I cannot make it at home. Then I chanced on Alka Keswani's Sindhi Rasoi it sounded so easy so how could I not give it a try. During Diwali I was visiting friends when I made it as gifts for them and packed it into pretty boxes. It definitely is an uncommon sweet and people love the little surprise of a sweet made from sev. 

The key to making it successfully is laying your hands on Feeka sev! That's salt free Sev. The sev is usually savoury snack or topping that goes on the chaats but for this sweet the regular sev will not work.

Again I got lucky to  get Feeka Sev at Jhama's itself and I bought it on stealth lest my Dad who was with me asked me to dump it and buy the ready made Singhar Ji Mithai instead. That would have been easier but a blogger never takes it easy when it comes to food gifts, what say?

So there I was loaded with a kg of Sev and I mean that's a lot. I was home and in the kitchen boiling sugar syrup to make my own Sev barfi. I doubled the quantities as I need a large batch to be given to 3 families. I used vanilla and dropped the food color. My barfi was richer with more mawa.

Ingredients

500 gms Feeka Sev
750 gms mawa
500gms sugar
3 cups water
1 teaspoon vanilla extract
Cashews and almonds for decoration
5-6 cardamoms peeled, seeds separated

In a saucepan measure out the water and add sugar to it. Boil it till sugar dissolves. Add the vanilla extract.

Keep a greased tray ready.

Add the sev to it and stir to mix. Break the mawa into chunks but don't crumble it. Add it into the sev and sugar mix. Stir to even out. 


Transfer the mix into the tray. Level it out. Score the barfi. 

Chop the almonds and split the cashews, decorate as shown or just the way you like. Sprinkle the separated cardamom seeds over the top.

I do not use Varakh or silver foil. Its a choice I make, here is why?

Wednesday, February 05, 2014

A Mango Mousse And My First Catering Experience


A week ago after my music class as Chitra, Sangita and Me walked back home together, Chitra reminded me to block my calendar for 1st Feb as it was her son, Anurag's birthday. I nodded and almost did not believe her request, "Won't you help me with the party?"

She was uneasy the next few days, then on 30th Jan, Sangu asked me what's my suggestion for the dessert for the party. I suggested mango mousse or bhapa doi and this order just fell into my lap.

Chitra called up and told me that I have full freedom to decide the menu and also the flexibility to cost it out! Only friends allow you this kind of freedom, I know! I grabbed the opportunity and went shopping to my favorite market for the ingredients and the serveware for the party.


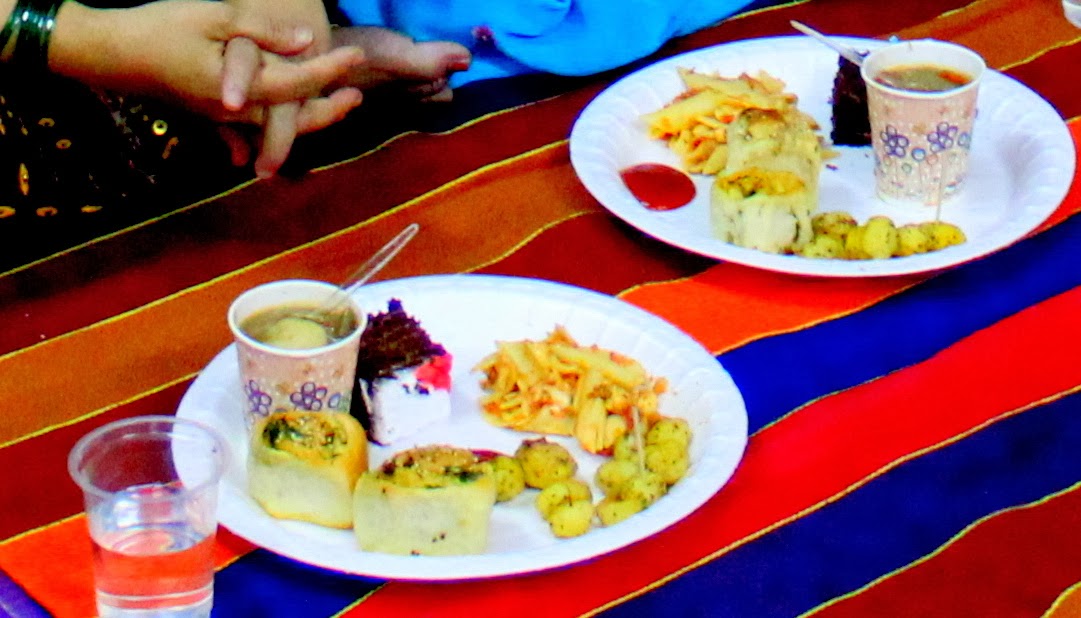
That evening I called Chitra over to my home to show her pics of the menu I was going to make for Anurag's party. There would be only 5-6 close friends of his but most adults were Chitra and her husband's friends. She was suggesting pav bhaaji but Sangu recoed continental to her. Sangu is my all time guinea pig hence the right person to veer Chitra to a good menu.

We finalized all the recipes from here itself!

Grilled Herbed Baby Potatoes
Hasa Al-Khadr Maa Hummus (Chunky Veggies and Chickpeas Soup)
Pull Apart Garlic Rolls
and 

Mango Mousse 

You can recreate this entire menu in your own home for your families.

Chocolate truffle cake was bought out as I did not have time for baking and decorating the cake.

Drink was plain water as majority of the people were singers and were to perform at the party. 


Chitra doing the Aukshan for Anurag

She started counting at 20 people, then after the menu was finalized she added 5 more then on the 31st Jan she made it 30! I added my 10% grace to it. So the entire menu was made with 35 people in mind.

Meanwhile I informed my neice M who has chosen culinary science as her career to come over to help me. Her grandma, my aunt decided to join in. So I had three Sous chefs to help me including Dad.

I began the day with chopping the tomatoes and pureeing them on the 1st Feb. That's the advantage of evening parties it allows cooking thru the day at a relaxed pace.

Pressure cooked the chickpeas and as the whistle blew I sliced the carrots in the FP for the soup.

M and Gopi aatya arrived around 8.30 am and immediately started helping me out.

I boiled the baby potatoes and cooled them under running water in a colander. Then set the colander filled with potatoes on the bay window seat. Setup a stool for my Aunt, Gopi aatya and let the bro-sis duo yap as they peeled them. 

The onions were done is two ways too, for the soup and the pasta sauce. The food processor did a fab job and in mins my prep was done. M did the peeling the skins.

Once the seniors were out of the way, I got the yeast started. Used the FP to knead the dough. As I worked I was training M in all the nitty gritties after all this is going to be her future career. I want her to learn things at home that no one will ever teach her at the institute!

The potatoes were peeled so we tossed them in olive oil and herbs and lined single layers of them on a tray and grilled them. We stopped short of golden as they need to be redone in the evening before serving.

The soup was set for cooking in large tapela. I used the entire bottle of Za'atar that Manisha gifted me when she visited (Ok I have to tell you the story, yet!)

The pasta sauce was cooking and boiling over, so divided it into 2 pots. I'm learning to handle larger quantities of food now. Learning #1

While this was happening the dough proofed and doubled so before we took a break for lunch I rolled out the dough and made the pull apart buns and filled one tray and 3 springform cake tins. Letting them sit for the second bulge on, we sat down to a lunch of masale bhaat that M made with papads on the side.

The afternoon saw us baking the bread and whipping the mascarpone for the mousse side by side and filling up the cups. Shoved the cups onto a tray and into the fridge for chilling.

I used both my ovens to finish off the baking quickly. Pasta was boiled and kept ready for final mixing. Cheese, two types Mozarella and Processed, shredded in the FP for the pasta.

We had a very long cooking day starting from 6.30 am to 7 pm. Finally at 7 we reheated all the food before Chitra's hubby came to pick us up and transport the food. 

Even though the drive was just 5 mins the soups spilled a bit. Next time I will transport it in a steel bin with a tight lid. Learning #2

Chitra insisted I buy the serveware myself for the party as I would know what's best for the menu. I bought Thermacol plates for the mains, thick paper cups for the soup, plastic cups for the mango mousse, dessert spoons and large spoons.

As soon as the cake cutting was done there was a round of singing and then the kids were served first. Later the adults were served. M and me were serving so another girl came to help. I don't like this part at all. I'd rather lay everything on the table for a buffet but Chitra wanted us to serve so we did!

Here is the recipe of the mango mousse which was a hit in the party besides the other favorites of pull apart garlic bread and grilled potatoes. 

Ingredients

Serves 10 people

1 kg Mascarpone cheese
1 cup milk
300 gms icing sugar
2 teaspoon vanilla extract
1 tin Mango pulp

First remove Mascarpone cheese, milk, vanilla extract to a mixing bowl and on slow speed add  icing sugar little by little,whisk till stiff peaks are formed. 

Open the mango pulp tin. Use a ladle to portion out the pulp into each cup. Swirl around the mango pulp. 

Scoop or pipe neatly into the cups the whipped creamy mousse. The mango pulp will give a marbled effect on the sides. On top add a drop of the pulp and run a stick thru it to give it a design.

Chill till you are ready to serve. This picture was taken today but for the party I used smaller cups and stuck a chocolate wafer stick in the cups for effect.

Decadent dessert for the 11 year old Anurag's party. 


I owe Chitra and family for having the faith in me and giving this order and complete flexibility to execute the menu; A Big Thank You!

That is the menu: 
Chunky soup in the cup, cake, Penne in arrabiata, grilled herb potatoes, pull apart garlic buns.

Most of the guests came up to tell me they loved the food and that they were stuffed to the gills.  I have a happy customer and happy guests. Especially I loved how my friend Snehal's daughter Sakhi went 'HAW!' when she got to know I baked the Garlic pull apart buns too besides all the other stuff on the menu!! Every one was gushing about the mango mousse, the bread, grilled herbed potatoes too!


Tuesday, January 14, 2014

Black N White Tilgul

Happy Makar Sankrant!

Hope you are flying kites, eating tilgul and enjoying the last bit of the winter chill. 

It's been quite cold in Mumbai like we did need to pull on a light cardigan thru the day. Yeah the tropical climate will come back starting with Sankrant today. The long nights will be gone and the long days will begin. 

During the winter we did indulge with lots of goodies carrot halwa, high teas with Banana bread sandwich, sounds interesting? Come again for the recipe.

Today I am here to post a Black n White Tilgul recipe. Black has a significance for Sankrant in Maharashtra. Black is worn on this day to retain body heat. Black is also the abolisher of evil so on this day we wish that all evil be absorbed by wearing black so that the rest of the year is full of Positivity!

That said I wonder why it is traditional to use only white til or sesame for making the til gul ladu? Until a few years ago I was ignorant and thought black and white til are 2 different varieties but was educated by a friend that Black til is the sesame with the husk and when it is dehusked rather to be exact it is decorticated it gives white sesame. But wiki does mention that other shades of sesame exsist. Then I wonder all the more. Why have I never seen tilgul ladu with black til. 

This is the very reason I chose to make black n white tilgul this Sankrant. Anything with husk is healthier and richer in iron and don't they look pretty! So the label of My Kitchen Lab is justified.

As I set out to make tilgul Dad as usual had doubts. He wondered aloud "hope you get the candy state tilgul". Yeah its been years since I made tilgul successfully. I blame it on bad quality jaggery. Nevertheless I am not one to give up. So a flip of the pages of Ruchira, don't remember if I mentioned it here, I had won it for this post. Then I came up with the recipe I wanted to make. 

Ingredients

3/4 cup Black sesame or til
3/4 cup White sesame or til
1/2 cup coarse ground roasted peanuts
1/4 cup roasted chana dal/ Dahale/ Phutane
1/2 dry shredded coconut
1.5 cup grated jaggery
1/2 cup water
4 pods of cardamom

In a kadhai toast the sesame seeds on sim. Add the coconut shreds, toast to pink. Now follow in with coarse ground roasted peanuts and dahale stir for 30 secs just to make them eminate the aromatic oils.

Keep the kadhai aside. Now in a saucepan add 1/2 cup water and grated jaggery. Boil till all jaggery dissolves and gives a bubbly syrup. 

Meanwhile peel the cardamom. Pound the seeds with a teaspoon of sugar in a mortar and pestle. Save the pod peels in the tea leaves tin for later use. Add the powdered cardamom to the above toasty mix.

Carefully pour the hot jaggery syrup into the kadhai. Mix well to coat the toasted mix with the syrup. Let it cool till the mix is hot enough to handle and a ball can be shaped. Roll pinches of the mix into large marble sized ladu. 

There is a reason why tilgul is marble sized and not as large as boondi or rava or anyother type of a ladu. This seed has astringent effect on the gut and if consumed in large amounts causes loosies.

So eat a small ladu in intervals and let it generate enough heat to keep you warm in the final days of this winter.

Catch all the TV channels broadcasting the Uttarayan special effects like the Gavi Gangadhareshwar temple where the Sankrant sun beam floods the Shivalinga in Bangalore.

Have a lovely rest of the Sankrant!

Our Sankrant Naivedya 
Clockwise: Lime pickle, sweet curd, Masur aamti, Cashew curry, Rice sevai pulao, Malvani vade, papad and Black n white tilgul!

Wednesday, January 01, 2014

Cherry Topped Vanilla Mascarpone Cheesecake


Wishing all my readers a very Happy New Year 2014!


Keep visiting and writing in. 

I have been away travelling and life has been busy. Many stories to share with you in the posts to come up.

But for now here is a quick recipe of an easy yet decadent Cheesecake to celebrate the new year with your gang.


Ingredients

1 cup hung curd

2 cups homemade mascarpone cheese
200 gms icing sugar
1 teaspoon vanilla extract
25gms agar agar
1/2 cup water

250gms digestive biscuits

5 tablespoons cocoa powder
50 gms butter

1 cup cherries for topping 

few sprigs of fresh mint 

In a dry grinder jar pulse the digestive biscuits along with butter and cocoa powder.

Boil half cup water and add agar agar to it. Stir till it dissolves completely. Let it cool to room temp.

In a 9 inch springform tin press down the powdered biscuits in an even layer. Chill in the fridge.

In the stand mixer bowl add hung curd, mascarpone cheese, vanilla extract and dissolved agar agar solution. Add the sugar little at a time while you run the machine. Whisk till soft peaks are formed.

Pour the mixture into to the chilled springform tin, above the crushed biscuits. Chill for atleast 8 hrs or overnight to let it set properly.

Before serving top the Vanilla Mascarpone cheesecake with cherries and sprigs of fresh mint from your herb pot, I plucked some beautiful ones from my Window grill box.

I had made this cheesecake for Bhau beej for my bros but that won't stop you from making it for a New year's celebration, what say?

Serves 10 people generously.

Enjoy!

Thursday, November 21, 2013

Orange Marmalade Shortbread


Mrs Rekha Karmakar posts on her son Kalyan's blogShe is a storyteller who is full of wonderful memories. Whether it was her going back to Diamond Harbor looking for that home of her childhood vacation along with her two school going sons or her rediscovering Delhi, her memories of Jalpaiguri  or her travels around the world take you back into a different era. I feel like I am listening to my own aunt telling stories.

When I conducted a contest on the Fb page Mrs. K participated in it, I was happy she did as she was just recovering from bad health. She deserved a treat!

So along with the pack of masala I promised to send her for her enthusiasm to participate in the contest; I also made Shortbread with Orange marmalade. Keeping her health in mind I thought this is mildly sweet so she will be able to enjoy it and hoping she will like it.

Thanking Mrs. Rekha Karmakar for sharing her wonderful memories of travels and childhood and wishing her good health!


Basic recipe source: Indian food rocks

Ingredients

2 cups flour
3/4 cup powdered sugar
3/4 cup ghee
2 teaspoon vanilla extract
3 tablespoons Orange Marmalade

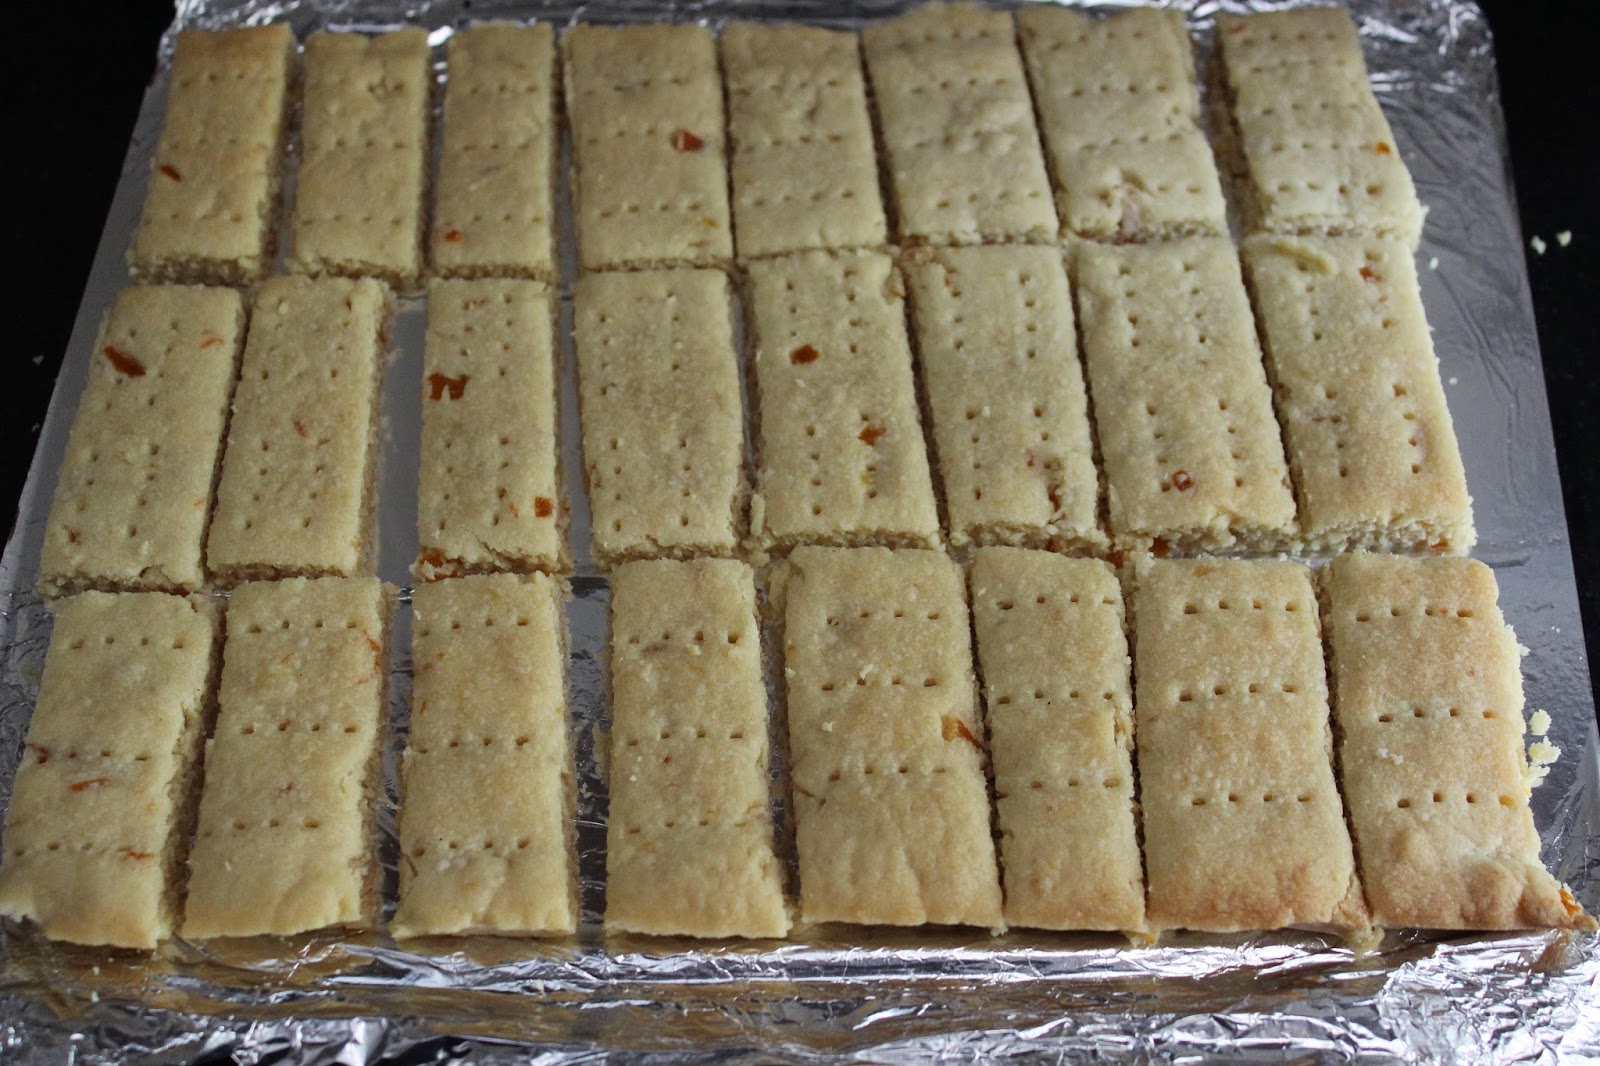
Just dump everything in the food processor and whiz. Remove to counter and knead to form a smooth ball. Line a baking sheet with foil. press the dough into the sheet. Roll out evenly. Score into fingers. Chill the baking sheet with the dough for 20 mins. 

Preheat oven to 140deg Celsius for 10 mins. While you do that, remove the baking sheet from the fridge. Use the fork to prick the dough so that it does not puff up. 


Bake the shortbread for 20 mins. Remove on counter. Score the fingers again on the same lines to ensure the fingers can be separated out after baking. Bake again for 5 mins to get the pinkish tinge on the fingers.


Remove the baking sheet. Cool for 5 mins. Then lift out the foil along with the shortbread fingers carefully separate out the fingers. Put them on a rack to cool completely. Store in air tight container.


For chocolate drizzle
2X2 inch piece of chocolate + 1/4 teaspoon of ghee 

Zap in the microwave for 20 secs. Give a stir to thin the molten chocolate evenly.


Since I was to speedpost these for Mrs. K I did not drizzle chocolate on hers. But I thought let me do it for Dad and so there you see. Well I just drizzled with a fork for neater drizzle use a ziploc bag or icing bag.


On Trail