Showing posts with label Preserves. Show all posts

Friday, July 19, 2019

Cherry Rum Preserve

This is a sweet preserve I made with the Kashmiri Misri cherries my fruitwalla Sadhuram made sure he got for me before he left for his village for monsoon rice cultivation. These were the reddest and sweetest, the remaining were shades of orange n yellow which I kept in the fridge so I get to snack on them for long.


The recipe is very simple but potent to lift up a regular breakfast or dessert to pleasurable heights. Make and keep some handy.

Ingredients

2 cups Kashmiri Misri cherries, pitted and halved 
1 cup sugar 
1 teaspoon lime juice
1 cup water
4 teaspoons rum

In a saucepan put the pitted and halved cherries. Add 1 cup water and cook the cherries till soft. Next tip in the sugar and cook till a syrup is formed. The syrup should coat the back of the spoon. Switch off the gas and let it cool for 30 mins. After this point add 4 teaspoons rum, I used Old Monk. Stir in well and let it rest till use, store in a clean dry glass jar.


The next day I had a bread baking class and I had planned a fruit and custard dessert for the lunch menu. I let the glasses of fruit n custard chill in the fridge and topped the individual servings with 2 teaspoons of the Cherry Rum Preserve. It made the dessert extra-ordinary.

Other ideas to eat it, I had it with fresh homemade Mascarpone and even with just plain butter croissant. You can use it to top a cake too.

Friday, June 26, 2015

Peach Jam


It is the time of the year when peaches fill the markets after the mango recedes from its prime place. I love cooked Peaches than ripe peaches. The sweetness gets concentrated and peaches bring a peachyness on my cheeks.Would you believe that? ;)

I decided to try a small batch of peach jam couple of years ago. This draft was lying unpublished for years I thought I must share an easy recipe with you. 

The color of the peach jam you see in the pic is original and real. The taste was unmatchable to anything  store bought. Try making it, atleast a small batch.

Ingredients

300 gms peaches
3/4 cup sugar
1 tablespoon lime juice

In a saucepan boil water. Immerse the whole peaches in the water and allow to cook for 3 mins. Remove them after that and immerse in ice cold water. The peaches will leave their skin. Peel off the skin and cube the flesh. Separate the seed and discard.

Now in another large pot add the cubed peaches, sugar and 1 tablespoon of lime juice. Boil till sticky. Test if the jam is set after 20 mins. For this chill a plate in the fridge for 20 mins. Drop a little bit of jam on the plate. Try to move the jam drop. If it forms a skin and moves aside then the jam is done. Let it cool a bit and transfer it to a clean dry jar.

Enjoy it with a buttered toast for a heaven on a slice experience.

Friday, July 25, 2014

My Plum and Cheese Crescents go to KitchenAid Contest at IFBM 2014


These Plum and cheese crescents are going to the KitchenAid India Plum Challenge at IFBM 2014.

Look at this recipe in two parts and pace it over two days. Infact it's two recipes I am sharing here. We are talking slow life here, it also means ease.

We make the Plum jam first and then roll up the crescents.

Day 1 : Making Plum and Honey Jam with Star Anise

Ingredients
6 Plums, ripe yet firm
1/2 cup water
6  nos. star anise
1/2 cup honey


In a saucepan measure out the water and set it to boil. Meanwhile slice and dice the plums discard the seeds. Once it starts rolling add the diced plums into the water. Drop in the Star anise. Let it cook till the diced fruit is soft about 10 -15 mins. At this point scoop out the Star anise and discard. Pass the cooked plums thru a medium mesh to get a puree. I put back the fruit skin but if you don't like remove it now.

Add the honey and boil on slow to reduce the liquid. We need a thick jam to be used as filling for the crescents. So boil until a spoon dipped in it gets a thick coat of jam clinging to it. Or do this test. Chill a plate in the fridge and drop the boiling jam on it. If it forms a skin immediately the jam is done. Remove from heat.

I poured it into a plate. After cooling completely, set the plate to chill in the fridge overnight.

So there you have the first recipe for Plum and Honey Jam with Star Anise.

Incase you are making a large batch just multiply the proportions of the ingredients. After making the jam cool it to room temperature and store in a clean dry jar. It should stay good for atleast a month. For longer preservation you may want to do canning.

____________________________________

The second part is the basic recipe for Crescent rolls that are so versatile. However since this recipe is going to KitchenAid India's Plum Challenge we are going to use the Plum jam along with cheese for the filling. The Crescent rolls are eggless and like us if you are vegetarians you will love this recipe.

So sleep well at night and the next day when you have time for a 2-3 hour stretch or when you are working on other things in the kitchen start with the dough for the crescents. Its a simple no nonsense dough.

Day 2 : Making my Plum and Cheese Crescents


Ingredients

The dough
2 cups of all purpose flour
1/4 cup butter (I use Amul which is salted butter)
1/4 cup sugar
3 tablespoon curd
3/4th tablespoon instant yeast
1/2 cup water
1/8 cup butter for rolling and brushing

Warm the water add the yeast to it to dissolve. In the Food Processor bowl measure out the all purpose flour and follow in with sugar and butter. Run the FP on slow to let the butter form crumbs with the flour and sugar. Now add the curd and yeast liquid. Run the FP on medium to form a ball. The dough will feel slightly sticky as it has sugar but that is ok. Cover and keep till the dough doubles. This is the first proofing of the dough.  It may take 30 mins to 40 mins (In Mumbai its warm and humid) elsewhere look at the doubled volume and not time.


After the first rise. Punch down the dough to remove air. On a clean counter spread some butter. Roll out the dough into a 15 inch circle. Cut out 16 wedges from the circle.

The steps for Filling
16 nos. 1 inch squares of processed cheese (Amul)
Plum and Honey Jam with Star Anise

Take each wedge and roll it out a bit thin. Put a spoonful of Plum jam at the broad end of the triangle leaving about an inch of space for rolling. Top it with a cube of cheese. Now start rolling from the broad end so you have the pointed end closing in. Bend a little bit to give it a crescent shape. 

These days I use my low and high oven racks to bake by covering them with aluminium foil. That way I maximize the space utilization as well as power consumption. You can also follow the standard practice of using a baking sheet or tray. Line up the crescents on the foil covered racks or tray. Let the crescents proof to double up, this is the second rise for the dough.

Preheat oven to 200 deg Celsius.

Bake the rolls for 15 mins or till they are slightly golden. Remove from the oven and brush the rolls with butter. Allow to cool for 10 mins. 

Best enjoyed when still warm. But watch out don't pop them in your mouth hot, the oozing plum jam can scald the tongue! When you bite into the Plum and Cheese Crescents, the first bite is buttery roll filled with Plum jam and mild notes of Star anise when you hit the cheese its different, slightly savoury bite. Together its deliciousness. That's why I use the cheese cubes instead of grating it. There is a surprise factor to it which makes every bite enjoyable.


The home smelt awesome with the warm baking aromas of buttery dough, plum jam and the mild notes of star anise. I took a tray full to my music class to share. Everyone enjoyed it and Snehal even asked for a piece to take home for her daughter. The smiles said it all.

Friday, May 09, 2014

Real Kala Khatta is Pink!


The pink is the final diluted drink, in the middle syrup plus ice, the last glass is the color of Jamun concentrate or Kala Khatta.

Want some Jamun?

This week Dad brought home Jamuns along with his regular fruit haul from the Nerul market. My first question was how much did they cost? Must be expensive? 

Yes in Mumbai they are expensive at Rs. 45 per 250 gms. So the day was about Jamuns eating them, staining the tongue with them. Posing with them for 365project and feeling impish about clicking the stained purple tongue for the day's submission. But better sense prevaled.

It was a day filled with memories of walking under the Coconut and Bettlenut shaded paths in Thal and going Jamun and Karvanda hunting with friends. They would be ripe and fallen below the tree, we did not even have to take the effort at throwing stones at the fruit to fell them. We would pick the fallen fruit carefully. Ensuring no insect had bitten it, a little smash is ok, infact it is desirable for a squishy fruit gauranteed sweet juiciness.

Then there were days of walking down with MJ Kaka to VT from home in Fort. Next to Canon Pav bhaaji there used to be a sarbat stall that did roaring business. (I think both  still are Mumbai landmarks!). They sold the best Kala khatta! The location was prime oppositive VT station along the Azad maidan. It mostly would be a reward for studying well and accompanying uncle to J B Petit library for a afternoon read. You guessed it right this 4 - 5 o'clock drink was Amrit for me.

Now the Kala khatta that I remember from childhood was from that cold drink shop or the one made from Rasna or that Rajput Kaki made with some magical potions at home and bottles of dark almost wine black concentrate would be stashed away in the fridge door. Here is a post that voices eloquently the past that we cherish about "I love you Rasna" and the girl with the Fountain ponytail. 

Cut now I dread anything artificial. So I decided to make the real Kala Khatta. I had Jamuns in hand and I was not going to let go this opportunity. Before summer ends you want to give it a try with me?

Ingredients

100gms Jamuns
400 gms sugar
2 limes
3 teaspoons pink salt
500 ml water

First wash the Jamun fruit. Put it in a deep sauce pan or cauldron. Add 500ml water to it. Boil till done on medium heat. The Jamuns will start disintegrating and the water will get a purple color from it.


Next add the sugar and boil till you get a sticky thick syrup and a darker shade of purple.

At this point add juice of two limes into the syrup, it will clarify. Add the pink salt and put off the heat, you do not want to loose the sulphorous smell and taste of the salt.

Let the syrup cool and then strain it thru a juice sieve or a coarse mesh. This should trap the seeds and skins from the jamun and seeds of lime too.

Fill in a clean jar and store in the fridge. Stays well upto 3-4 months. This is your concentrated Jamun syrup or Kala Khatta concentrate.

To serve

Fill glass with 1-2 tablespoons of concentrated Jamun syrup. Add as many ice cubes as you like and top up with water to fill the glass to a little below the brim.

(Note : pl. use the concentrate in the proportion you like to get the sweetness and saltiness of your choice. )

Stir n shake.  Lo! there you are, making your own real Kala Khatta. Suprise surprise it's pink!

Real fruit juice makes a big difference and it's not a big deal to make your own concentrates for this summer. Hope you will dump all those artificial packets and the convenience of 1-2-3 for your health's sake.

Saturday, May 26, 2012

Orange Marmalade


I made this Orange marmalade in Jan while we were still in Blr. when oranges were in Season. I love the thick skinned oranges. In this recipe I have used Seville oranges which lend themselves wonderfully for a marmalade. I make marmalade without any gelatin so this is slightly runnier than store bought. It helps me achieve the home made feel that instantly family and friends spot. It is therefore more spreadable unlike the marmalade you get in the factory manufactured ones.

Also my proportions of sugar are 3/4 cup of sugar for 1 orange plus juice of 1 orange. You get the most wonderful looking marmalade and the smell is divine on a hot toast or even a warm paratha like you see in the pictures. No spices for me in my orange marmalade please.

Ingredients

2 Seville Oranges
Juice of 2 Oranges
2 cups water
1.5 cup sugar

To begin cut into half horizontally, slice the oranges with skins on a V-slicer.

In a deep pot put the orange slices and add water. It should cover the slices completely. Boil till the oranges are cooked and soft. 

Add sugar when you can press the orange skins and they easily crumble. Once you add sugar the cooking will stop. This is very important, if you have uncooked skins in a marmalade, it is a failure. No one likes chewy skins. So doubly make sure the orange slices are cooked only then add the sugar. 

Boil till the sugar syrup is thick. Add orange juice at this point. Keep stirring intermittently with a wooden spoon. Be careful while stirring, the sugar syrup splutters a lot. Once it starts coating the wooden spoon the marmalade is ready to be removed from heat. It will set as it cools.

Once it is cool enough to handle, can the marmalade in glass jars. Keep a pretty jar on your table for your breakfast cravings of Orange Marmalade on toast or a methi paratha at dinner time.

Monday, December 26, 2011

Awala Supari


In Blr. We get Awala or gooseberry almost all the year round. Yet the Awala in winter is the best. I bought some to make Nellikayi Chitranna and there were at least 5 more left. I had never made Awala supari ever but had seen my aunt make it. It is as simple as chop in to bits, sprinkle salt and dry it in the sun. This fruit does not release much water even after salting so you can just mix the salt into the bite sized pieces in a plate and keep it out in the sun. To get completely dried Awala supari you will have to leave it out for at least 3 days under the strong sun.

Store the dried Awala supari in a clean dry airtight box.

It is tart and salty when eaten as is but drink water after it and you sense the sweetness on the tongue. For people who do not know what is supari, it is mouth fresher. Like you all know that Awala is a power source of vitamin C but in this form it acts as a digestive too.

Go ahead make your own.


Sunday, September 18, 2011

Candied Orange Peels

To add zing to your cakes you can make these and stock up. Any thick rind orange can be used. Peel one orange and chop the rind into bits put them in a non stick pan. Add half cup of sugar and mix. Keep the heat low. I almost charred mine so got the caramelized color. Once sugar melts switch off the heat and let it cool. Once cooled break up the bits to separate so they are easy to use when you need it. These can be stored for almost a year in the fridge. I used the candied orange peel in Ginger Infused Zesty Carrot Cake.

These are chewy if eaten as it is but in a cake they rehydrate a bit. Incase you want to have them like a mouth freshener then they can be boiled in water drained and then candied.

These special touches you add to your cakes separates the homemade ones from the bought out glamorously decked cakes.

Friday, August 26, 2011

Punjabi Wadi

When you are in the south unlike Mumbai you will rarely chance upon regional specialties, especially in South Bangalore. So I first saw the mention of these wadis on Manisha's IFR and the whole world seem to be talking about it. I sulked, here I am in India itself and I did not have access to Punjabi wadi. No not even in the fancy super markets. But years after the Wadi movement I chanced upon these at Total Mall. Remember I mentioned it on the Nolen gur post.

Here is the recipe to make your own wadi.

I made Broccoli Aloo wadi curry inspired by Anita' curry and a greens stir fry with sauteed wadi in it. I loved the rasa curry more than the stir fry. The wadi is quite stiff even when cooked. While eating unless you really crumble it in the curry you will not enjoy it thoroughly. The post on the Broccoli Aloo wadi curry to follow...

Monday, April 25, 2011

Raw Mango Thokku

 When you have raw mango you must make this Thokku and Kairi Panha!

 This is Kairi Panha! notched up into Slurp~~

I am only human to succumb to the charms of the mango at the advent of the summer. They were expensive but I anyways bought two. I had to make Raw Mango Thokku to be enjoyed with curd rice, fried rice papads and sandage. That is South Indian summer!  But I also had to make Panha to tell my self I am a true Maharashtrian here is Blr. for work, discount the fact that I will complete 6yrs on 2nd May in this city. Unlike the Maratha warriors who settled in Karnataka a few generations ago and wish I understood Kannada.Well there is nothing more unifying than food and I never said I don't love Raw Mango Thokku.

On another note, I  am looking for a recipe to prepare my own sandage. I love them and these are unique to this region. Project Sandage will begin in March, hope so.

Meanwhile here is the Thokku recipe yet again adapted  from Annapoorna by Mangala Barve. She calls it Takku in the typical Marathi style. That remind me I must get my copy rebound or resurrected before it disintegrates completely. I have loved it and it has been the only real cook book I owned, it was a first too gifted to me at 14yrs by my Dad's dear friend who passed away last year.

Moving on more cheerful things and the recipe for which you have come here.

Ingredients

1 raw mango
1/2 teaspoon mustard seeds
1/2 teaspoon turmeric
1 teaspoon red chili powder
1/2 teaspoon asafoetida
1 teaspoon roasted Fenugreek powder
1 tablespoon jaggery or more
1 teaspoon salt
1 tablespoon sesame oil or other

First wash the raw mango. Pat dry it. Shred it and keep aside.

Then heat oil in a wok. Splutter the mustard seeds. Reduce the flame to low. Follow in with the roasted fenugreek powder, asafoetida, turmeric, red chili powder and salt in that order. Add quickly the shredded raw mango. Stir and cook for 5 mins. It will look gooey. At this point now add jaggery and let it melt into the Thokku. Mix well and cook for another 5 mins. Switch of heat.
Let it cool completely in the wok and then store it in a pretty pickle bowl with a lid. Keep it fresh in the fridge. Serve with your favorites like curd rice, idli, dosa or anything that need a special sweet sour accompaniment. I could lick it up just like that but I make it last 7 days I resolve.

Sunday, September 28, 2008

Baby Onions and Chilies in Vinegar


Some time ago I had put some baby onions (sambar onions) in vinegar and forgotten about it. Then yesterday I bought these chilies for Mirch ka Salan that I want to try out. I removed the baby onions to check the taste. I flipped completely.

I knew I would not need more than 6 chilies for the two of us so had to do something with the rest of the chilies. They went into the vinegar. That was the easiest way to enhance my fantasies of jalapenos in vinegar. I washed and pat dried them. One slit in each chili to ensure pickling inside out. I let the chilies swim in the onion pink vinegar and let the already pickled onions in the same jar sit atop the green chilies. They looked picture perfect I thought.

I know they are not jalapenos but can someone tell me what type they are?

Date: 25th Nov 2012

7 Jalapenos in vinegar with 2 cloves of garlic and 25 nos. black pepper corns

Sunday, August 03, 2008

Tomato Tamarind Relish

and the Richness of Life


Recently two quotes that I really appreciated all over again am sharing here:

You are rich or poor in life by
Smiles around you,
Friends you make,
People you are with,
Ideas you have,
Dreams you chase,
and the love you spread.
- by Anon

नितिधार्माचे आचरण ठेवता यावे
मुलाबालांचे रक्षण करता यावे,
अब्रुने जगता यावे, इतका पैसा
जवळ असला की तो मनुष्य श्रीमंत समजावा

It means:

To be able to live life with consciousness,
To be able to take care of children
To be able to live with respect
If one has that much money
then consider that person rich

- by Shree Gondavlekar Maharaj


The second one is what I live by. I think I have done better in life materialistically than my parents did. Yes they did equip me well for it and I am indebted to them. Plus GOD has blessed me with fewer responsibilities. So by those standards I have enough for my needs and a little more for others too.

Yet life has made me a Fakir by nature. I don't care much for possessions. I give off easily what little I have. I appreciate the Fakiriyat in another person. I propagate it to my close circle of influence. I have a lot of rich friends, par unka crore unke paas.

I have my own definition of Fakiriyat:

  • Own only the necessary.
  • Give to others what you wanted but never did get.
  • Spread love yet never let anyone take advantage.
  • If I possess something I enjoy it, tomorrow if I loose it I don't allow it to affect me.
  • I am lucky I don't have to worry about anyone's future.
  • If anyone visits my home I treat them equally.
  • I share whatever food I make with the same love and respect with all.
Probably my name has a lot to do with it

Anjali = Hands joint in divine offering.

I am Giver, will remain that till I die perhaps. I have rarely got back how much or whatever I gave but still that has not changed anything for me. Infact it has inspired me to give more. Now I don't even fear losses.

Yet

I do my duties and do not give reasons like 'I am detached.'

As per the quotes this Fakir is Richie Rich !!!

There is always a balancing act that one has to do in life. To make a mundane life interesting there are always small pleasures that one enjoys and so do I.

On that note the recipe I'm sharing here a recent creation that happened by accident in My Kitchen Lab

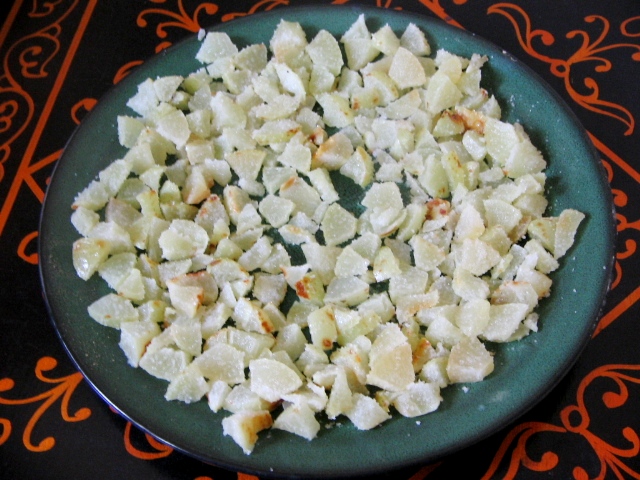
I set out to create a tomato pachadi and ended up with a relish! The accident is recreated here for a deliberation that will recur all the time in my home.

Ingredients

5 big ripe but firm tomatoes chopped
1/2 cup of tamarind extract
1/2 cup sugar
1 teaspoon salt
2 heaped teaspoons red chili powder
1/2 teaspoon asafoetida
3 tablespoons oil

In a large vessel heat oil. Add the tomatoes. Cover and cook till mush. Add the tamarind extract salt and sugar. Cook till it leaves the sides of the vessel. Keep stirring to avoid burning. Once it looks thick and jammy put off the heat. Add the red chili powder and asafoetida, mix well. Cool completely and pack in bottle. It should stay good for couple of week without refrigeration and more in the Frigidaire.

Your Tomato Tamarind Relish is ready to go with any fries, hot rice, as spreads for breads etc.

It is to be enjoyed in small portions to spice up a mundane meal and relish every morsel.

My dear friend Deepa loved it for its Chat pata taste :).

Friday, July 13, 2007

Ambada in Brine

What is this ? A fruit? A vegetable? Ambada!!!


Is this snow in the box? Sea salt to make the brine.

Updated 16th July 07

Shilpa of Aayi's recipes and Mamta are the winners of this guess. It is Ambada in Marathi, ambado in Konkani and amtekayi in kannada. Thank you all for your responses. Hope you enjoyed it!

Ambada is a fruit with a hard skin and fibrous inside. It is very sour when raw and cannot be bit into dirrectly. If one does try the sensitivity of the teeth is lost temporarily. This is however a good fruit to pickle just like raw mango. The most favorite way to preserve it though is with plain sea salt. After a week you get shrivelled ambada in brine. This preserved ambada is then used as an accompaniment with meals like a pickle.

In its raw form it is used as a souring agent like Shilpa mentioned in dals and curries. It livens up even the most mundane curries and takes them to new heights. If eaten too much it induces sleep.

When I saw these Ambada in a heap in the market I had to buy them. It reminded me of Thal where they are just dumped into huge earthen pots called Ranjun (remember Alladin and the forty theives) filled with salt and allowed to hibernate there all the year long till they are removed for eating. In Thal every household has a story of the kids trying to steal the Ambada in brine and in the attempt falling into the Ranjun.

Ingredients

1/4 kg ambada
1/2 cup salt
Just mix together and fill into a jar. Through the week just shake up a bit to make sure the fruit does not spoil. Once the brine is formed it will preserve well. When the fruit is shrivelled and discolored to a pale green it is ready to eat.

Serve as a pickle Or use to make your curries tangy like Mamta mentioned. The taste is its own and not to compare with mango. It will hook up all ladies especially the ones with a good news ;). Right now I am surrounded by three such ladies who keep asking for tangy things!

Tuesday, June 26, 2007

Karlyache Wafers


By Aruna Kaki


I chose to share this recipe of Karlyache wafers by my aunt as there is a similarity between the vegetable and my aunt.


Karla/ Karela / Bitter gourd is everyone's most hated vegetable atleast as a child that you actually might grow up to like. Its bitter taste may not satisfy the jivha but the nutritional values you cannot ignore. Check here.


Aruna Kaki is just like that very straight in feedback only when asked but will cure one undoubtedly. When a company selling packaged papaya juice claimed it to be real mango juice she held them by their tusks and rejected their import export license. How did she know that? I had visited their factory in my Pollution Control Technologist avatar some years ago. I had narated my disgust at the dinner table that night. She recollected that when she was processing that company's papers. She singly faced the wrath of the company. Sad to say in India the Erin Brockovich types don't get the recognition they deserve. The corporates won and Aruna Kaki took voluntary retirement. If she wished she could have made this a media dance and become a politician. Yeah that's the way things go.


So now she dotes on us when ever we visit and treats us to sumptuous meals she never had time to make when she was working. Now she makes the karlyache wafers too. I took this picture when I last visited Mumbai.


Ingredients


1/4 Karli/ Karela/ Bitter Gourd


1 table spoon salt


Slice the Bitter Gourd thin on a V- slicer. Remove the seeds you will get rings like in the picture. Rub in the salt and spread out the wafers on cloth for drying in the sun. In 2-3 days you will get crisp wafers. Fry them and sprinkle with red chili powder. Serve at meal times or munch with tea. These wafers last all the year round if stored in an airtight container.

Wednesday, June 06, 2007

Sandage

Is this Alien environment?

Sometime ago there was a wave among bloggers about Amritsari wadi. There were recipes some authentic some experimental. My blogger friends who have tasted them went gaga about it. I said to myself yet again the charm of Punjabi entrepreneurial skill won over the Marathi who don't seem care much about popularizing their cuisine.

Well if Punjab has its wadi then Maharashtra has its Sandage. I made these this summer and Manisha just reminded me about them I am looking forward to her recipe too. She would probably have a Nagpuri version.

These are preserved Dal drops used as flavor and protein enhancers in a bhaaji.

To make sandage there is some preparation required.

1. Keep a 1 square meter clean plastic sheet at hand.

2. A 1 square meter muslin cloth to cover

3. Soak equal amounts of 5 dals of your choice in water early in the morning latest by 7 am. I used 1/4 cup of Chana, Tur, Udid, Masoor, and Moog dal.

4. Keep the following spices ready to be ground

1 teaspoon each of red chilli powder
1 teaspoon cumin seeds.
1/ 2 teaspoon hing
1/2 teaspoon turmeric powder
4-5 green chilies
salt as per taste.
fresh ginger 1 inch

5. At 9 am once the sun is out. Put all the ingredients in a wet grinder. The soaked dals should be drained and added in. Minimum amounts of water should be used. Grind together to get a rough paste.

6. Spread the plastic sheet in the Sun. Now with a small spoon drop the ground paste on the plastic sheet or use 1/4 spoon to get same sized drops. Leave them to dry. The batch should be completed and left for drying max by 10 am so it gets the full day's sun to dry nicely on the first day itself. Cover with muslin cloth to keep of dirt and holder to keep it there.

This is a very important tip to remember any drying must start at max 10 am to get long sun exposure especially on the first day. This will take care of any fungus threatening to form on it.

7. In the late afternoon around 3 pm carefully turn over each and every sandage to dry the underside.

8. At 5-6 pm bring them in.

Never leave anything you are drying out in the night. Condensations, dew can wet the stuff and your labor would be wasted.

9. Keep for drying for couple more days to get hard rocks of dal.

10. Once dried completely store in airtight bottle.

I will post on how to incorporate these protein powerhouses in your bhaaji in the upcoming post.

Well so that is Sandage(Marathi), can be defined as dal dropping literally!

Wednesday, May 30, 2007

Fig Sauce

Figs are not exactly glamorous looking fruits. Infact it is not actually a fruit but the receptacle. To see the flowers you got to cut the fig tells wiki. Hence the myth that the flowers of the fig tree are invisible.


The fruit tastes amazing when ripe. It is sweet with a fragrance that is delicate.

Vidya Auntie got this bag of figs for us. It was a great timing as I had planned my party just then and had freezed in on the desert to be Date n Chocolate Cake. So fig sauce was a good idea for the dressing. It is simple to make and was easily voted the best at the party.

All you need is :

Ingredients

2 cups Figs

1 cup sugar

half lemon juice.

Peel the figs. The skin would come off easy if ripe if it cannot be peeled then not right for this sauce. Halve the figs. Put everything in a saucepan heat on high till you bet a boil. Simmer till the figs are soft and just about to loose shape into the sauce yet you see the chunks. Remove from heat when sticky. The preserve is ready and can be consumed refrigerated for a week.

I decorated the cake with it. You can also have it with bread/ toast or even make chapati wrap with it.

We love fruity cakes to the rich creamy ones and the fig sauce has an enormous repeat value is all I can say.

To all the fig lovers like Indira, bee and a convert yours truly!


On Trail