Sunday, March 29, 2009

Tomato Chutney, Rasavalu Batata Nu Shaak

& my Kasuri Methi Bhature

I had a lovely three day weekend. I thank the Lord for it. Ask me what I did. I was just relieved of thoughts that trouble me. It means I must thank W for giving a patient ear to my outpour and spending that much time with me.

Obviously the food this weekend reflected the relaxed mood in its colors, variety and that I actually searched the blogs for somethings nice to cook. Then I thought why not join MBP March 2009 too. It is hosted this time by Ashwini's Spicy Cuisine while the initiation of the event happened at The Spice Cafe.

Tomato chutney from Konkan World

This is a really nice and easy chutney. I did not have methi seeds so I used Udid dal for the seasoning. Next time I will try with garlic like my old neighbor made. Brings back memories of Pergannu and tomato chutney mixed in it...Yum!


On the top right Rasavalu Batata Nu Shaak from The Spice Who Loved Me
&
my Kasuri Methi Bhature (I also made Kelyacha Shikaran shh~)

We Indians have an obsession for the Potato curry with fried bread, don't we? You see regional combos all over India in different colors, consistencies and it is still the most favorite meal at any time be it breakfast, lunch, brunch, high tea or dinner. I love my Marathi Batatyachi suki bhaaji and Puri as much as I love this Gujarathi Rasavalu Batata Nu Shaak but this time I combined with my Kasuri Methi Bhature, a Punjabi dimension. This eclectic platter turned out to be an example of unity in diversity and a reflection of our changing eating habits. The Rasavalu Batata Nu Shaak was just like Preeti's Mummy used to make in Fort.

Thank you Maya and Trupti for the recipes!

And here is the recipe of my Kasuri Methi Bhature

Ingredients

1/2 cup All purpose flour
1/2 cup wheat flour
1/2 cup Kasuri Methi /dried fenugreek leaves
1 cup curd
salt
Oil to knead and fry

Put all ingredients in a big bowl and knead to smooth dough. Add a table spoon of oil and knead again for 5 mins. Let it rest for another 5 mins before you start rolling out 3-4 inch diameter discs. Heat oil on high. Reduce to medium. Then fry the discs of dough till nicely puffed. Splash a little oil to make them swell like a balloon and to get the perfect hot bhature.

My Dad who is my biggest critic enjoyed the meal and then taunted "I follow a strict diet but only because you force me, I have to eat this!"

Well...well am I not allowed to indulge even on weekends. I don't smoke, drink or party hard. I just freak out on food that too the food that I make. Gosh if W is reads this I'm dead.

Also showing our Gudi Padva/ Ugadi Thali

Clockwise: Dal Holege & Kai Holege (Tur Dal Poli & Coconut Poli), Masur Dal fry with rice, Papad, Mixed veg koshimbir and Curd rice.

Saturday, March 28, 2009

Carrot Potato Soup


It has been a long time since I posted a recipe in my Slim N Trim category. Also some time ago my friend Vinaya asked me for recipe of soups. However the thing is in my home we like our soups with a sourish taste. Corn soup is not our type. Spinach soup is what we like. Tomato is the crowned king in soups.

This soup that I am presenting here is some thing I derived from carrots and potatoes and some cilantro that is common in the kitchen. These days I avoid cooking anything fresh in the evenings coz we end up eating more. So this cooking in the morning once and just adding something lite in the evening is helping me go healthy. I am able to sleep well yet wake up early and fresh from a good rest.

It is such a lovely soup. All you need is:

Ingredients

2 big carrots
1 small potato
1 handful cilantro
1 green chili
salt to taste

Optional
Lime
chat masala

Boil the carrots and potato. You can save energy by putting it with other things when you are setting up your pressure cooker. They can be refrigerated and used when you want.

Peel and clean boiled potato. Remember the carrots need to be first cleaned and then boiled.

Now puree all the carrots, potato, cilantro and green chili with salt in the juicer. Adjust consistency to your liking with water. Pour it out into a saucepan and heat up before serving. Serve in your favorite soup cup or bowl.

Enjoy it warm. A dash of lime and some chat masala gives it a nice zing too.

Hope this post brings back Vinaya to my blog. She's been reading but not catching up much.

Wednesday, March 25, 2009

Small things make me happy :)

You go to meet someone. No one is there and you get a chance to take a close look around. Doll's picture, some knick knacks and two take away boxes. They look familiar. You remember you had packed Diwali sweets in them. They should have been discarded by the person who has a thing for order and cleanliness. Those boxes are definitely not collectibles.

It made my day!

What are they still doing there? Where a person spends most time.

What do you think? Tell me.

Tuesday, March 24, 2009

Panha Stands For The Advent Of Summer Truly...

Cheers to Ratan Tata for giving us the Nano !!

Cool Panha and bowls of steaming hot boiled corn
with pepper and a drizzle of ghee


I think most women start making pickles when they are just about turning 35yrs. If that is a standard then I must say I started making at a young age of 20 may be. Devaki Kaki was an expert pickle maker and I guess that's why Bal became a expert pickle nibbler. He needs pickle with every single meal.

Devaki Kaki made loads of pickle in summer. Now you must be wondering when this is a post about Panha why am I talking about pickles. Well the amount of pickle we made specifically mango pickle yielded lots of mango seeds which we never really scraped clean when cubing it for the pickle. The seeds with some pulp on would go into a large pressure cooker get boiled and then juiced and pureed to get the raw mango juice for Panha making.

In Tata colony in Mothe Baba's home there was a mango tree in the backyard that gave fruit once in two years. The fruit was small and sour. It could not be used for pickles so we made Panha or Kairichi Amti.

It is end of March and the advent of summer is marked by the appearance of the mangoes on the grocery stacks. I bought two medium sized Rajapuri Mangoes for Rs. 54 but was worth every penny. It yielded nice thick smooth pulp on boiling and the other one was used to make Kejyarcha Kairi Lonche so you see a new picture there.

Let me warn you this Panha should be made just for tradition's sake it is loaded with sugar even though I used jaggery I had a lot of guilt while consuming it. Even after that I know you do want to try it.

Ingredients

1 raw mango
1.5 cup crushed jaggery
10-15 cardamons

First dice the mango into large chunks. Boil them so it is ready to pulp out. Peel the skins and puree the pulp in the juicer or by passing through a juice strainer. I like Panha made from hand mashed pulp and with little pieces floating in the glass. My dad likes a smooth sip. So we make batches of both.

After pulping dissolve crushed jaggery in the pulp and add crushed cardamom powder to it. Mix well. This concentrate is generally frozen and diluted while serving with chilled water. Adjust the jaggery and dilution to your liking. Traditionally Panha is syrupy sweet.

There is nothing better than sipping on Panha in the backyard of your home under the huge mango tree in an arm chair on a sultry late afternoon. Tata colony is that place in Chembur where we lived with Mothe Baba for a part of our life. The little cottage with a garden of fruit trees and ornamental plants which was home to sweet singing birds was provide by Tata Electric Company to my Uncle who was the captain of the speed boat first for JRD and then for Ratan Tata. My family loves the Tatas. They took very good care of all the employees to the point of pampering them.

So its time to rejoice when Tata Nano has just been launched. Cheers to Ratan Tata for making the average Indian's dream come true!!

You watched Ratan Tata talk about it a year ago and now it is reality.


Tata Nano Launch Event - Part II
Tata Nano Launch Event - Part III

Monday, March 23, 2009

Spring Onion Thepla Weds Aloo Paratha

Spring Onion and Aloo Paratha, pickle, carrots, cucumber
and a bowl of fruit salad.


It was Dad's birthday last week. I made this new type of a paratha. There was a bunch of spring onions which I used in the cover and filled in the regular Aloo with spices as in Aloo Paratha. It was delicious and I roasted it with ghee for the special occasion. The besan in the cover makes the paratha khamanga!

I also made Panha and corn for the evening treat but that will be another post.

Ingredients

For the cover

1 cup chopped spring onions
1 cup wheat flour
1/4 cup chickpea flour/ besan
1/4 teaspoon turmeric
2 tablespoon of curd
1 teaspoon carom seeds/ ajwain
salt to taste

In a bowl put all the ingredients together and knead with minimum amount of water. Leave it to rest while you prepare the Aloo stuffing.

For the Aloo stuffing

follow the Aloo paratha post


Now knead the dough again to make it smooth. Then like you do for all stuff parathas, make small baskets of the dough and fill the Aloo stuffing. Seal the open end and flatten the ball before rolling out into nice round parathas. Roast on both sides, apply ghee to give a nice smoky aroma.

You will love the spring onions and carom seeds that turn the tame Aloo paratha into one bursting with flavors and appetizing volatiles.

We had our's with mango pickle. What do you like to have your parathas with? Dad likes with ketchup. My vote goes for curd. Take the poll on the side bar and share with us your quirk.

Sunday, March 22, 2009

Say it now!

Your woman.

1. cares
2. nurtures
3. loves
4. gives
5. pleases

Does all of it. At the end just want's to hear 'I care'. Is that expecting too much.

If you are not a woman reading this go and tell your lady that you care.

Melyavar paani pazun upyog nahi!

I mean "What's the point in giving a drink of water to the dead!"

Saturday, March 21, 2009

Beetroot Bhat Moodh

My second entry for the kid's lunches event
by the mingling
What's for Lunch Honey & Cooking for all seasons.

If kids had their way they would love to live on just peppy and frooti! Stop that with a fortified rice that Kids will love. Most kids love color in their food and beetroot lends itself so well.

One day in Mumbai my nephew was visiting me. He came armed with a huge packet of some tomato fryums. I know it was not my sister's choice, it was Pranav's ofcourse! Kids almost always gift what they like to others. I rolled my eyes at him as he was handing over the packet to me. Later I got busy in the kitchen and after an hour I realized that there was little mouse that was doing the rounds in and out of the kitchen and the fryum packet was half by then. Just in time to catch him red handed I turned around. Angry me, "Pranav, what is this? Was this not supposed to be for me?" Sheepishly Pranav, "Yes I bought it for you! but it tastes so good just couldn't stop!!" Me trying to control my laughter and holding myself back from cuddling him at the wrong time I looked away. Then turning around with a straight face explained to him that those wafers were not good as they had ajinomoto (the salt used to give the tomato flavor) and it's carcinogenic effects.

Immediately Pranav's next question was, "Then what is good to eat and can counter cancer?" Ofcourse colorful vegetables.

Beetroot is something my nephew enjoys in sandwiches. We use it sometimes to color rotis and puris. So this time I tried this pink rice. I have used beets as natural block printing stamps too for cards Pranav and me have made together.

Block printing with beetroot:

To do this cut a beet at the equator to get a cross section. Then stamp it on white or light colored paper. Make creative patterns you like with the beet as a stamp. Dry the printed paper with a blow drier. Use it to make cards.

With that lets move on to the recipe. That's why you are here right?

Ingredients

1 cup rice
1/2 cup beetroot grated rough or chopped fine
1 handful cashew nuts
2 one inch sticks of cinnamon
6-8 cloves
10 peppercorns
1 tejpatta/ bayleaf
1 teaspoon udid dal/ black skinned lentil
2 green chilies mashed
1 tablespoon oil

Wash and drain the rice on a sieve. Leave it there for 1/2 hr.

Heat oil in a small pressure cooker. Add the spices and fry for just a few seconds till the aroma emanates, fry the cashews too for a few seconds. Add the green chilies, stir in the beets after this. I used some coarse grates and finely chopped beet. The coarse grate lend more color while the finely chopped pieces provide the texture and munch. Give all of it a stir and mix in the washed and drained rice. Cover with water enough to just cover the rice. Pressure cook for just one whistle. Let the cooker cool completely. Open it once steam subsides and mix the rice one time.

Scoop out small mounds onto a plate using either an icecream scoop or a tiny bowl and top with a cashew. This gives the name Beetroot Bhat Moodh. 'Moodh' is a mound in Marathi. It makes it easy for the kids to pick up with their little fingers and bite into it.

P.S:
Since this post is about kids, sharing here a story told by Channa to his daughter and a message for the adults for a new kind of discipline that we need to build in ourselves and the kids.

Sunday, March 15, 2009

Creamy Corn and Herbs


Finally after all went well with the SnS wedding Dad is now back with me in Blr. He has been in Mumbai for two months, helping Somu with the wedding preps. I would have loved to be in Mumbai too but work kept me in Blr and two months is just not possible. I did whatever little I could here and then when I went down to Mumbai a few days before the wedding did a bit of running around.

We as a family are happy that as planned the wedding was a simple ceremony with all the sanskars right from morning to evening attended by just the closest family and friends, about 50 people. That was a feat in itself for a family that has its entire clan in Mumbai and Alibag. The pooja is still pending and will be held in Thal.

So for all the hard work that Dad did I decided to make a special day for him today. I know he hates to come to blr but he has to for my sake. So there was a special thali for him.


Clockwise: Ghadichi Poli, Shrikhanda, pickle, Methichi bhaaji, Bharli mirchi and Varan bhat.

Then for the evening it was Creamy Corn and Herbs served on Snacky Chili flakes and sandwiched in a bun.


Guess what's common in both the plates?

Didn't figure it out. Dumbo! It is the Chakka!!

Now on I will always keep some chakka aside for this savory treat.

I hung curd early in the morning to make the Chakka (thick hung curd). Chakka is mixed with sugar to make Shrikhand but I thought of making something savory using some chakka. So I kept aside 1/2 cup of it for later use. Rest of the chakka was used to make Kesari Shrikhand that I served for lunch.

I know you are drooling so here is the recipe for you.

Ingredients

1/2 cup thick hung curds
1/2 cup chopped fine herbs (cilantro + basil)
salt to taste
1 green chili chopped fine
1 cup sweet corn kernels boiled
1 teaspoon lime juice

In a medium bowl mix together hung curds, herbs, green chili and salt. Keep aside for min 2 hrs for the herbs to flavor the curd.

After 2 hrs or just before putting together the starters or sandwiches. Add the lime juice and corn kernels and mix well.

Spoon the Creamy Corn and Herbs onto the Snacky chili flakes like I did OR toast a bun on a grill with little butter on the inner side. Fill it up with the very yummy and fresh Creamy Corn and Herbs.

This is a much lighter dip than mayo or cream cheese so qualifies for my Slim N Trim tag.

I love the creamyness of the curd, the light and fresh flavors of the herbs, the bite of the chili and the sweetness of corn all in one. It is a dip/ spread/filling for versatile use. The colors are soothing and children will love it.

Sending this off to Srivalli @ Cooking for all seasons. This time the monthly mingle is about lunches for kids and was started by Meeta of What's for Lunch Honey

Saturday, March 14, 2009

Methi na Thepla

a meal for a journey.


In my home Methi na Thepla were introduced by my next door neighbor, Vimli in Colaba. It must have been 1978 or so. She was all of 20 yrs, ready to prove her skills at cooking and in the corridors of marriage. It was the first train journey that we were going to set out on, ofcourse a pilgrimage. Did any middle class people go on any other journey of adventure or leisure at the time? Rarely.

Vimli walked in and the effervescent kid that I was, announced to her that we were to travel. She quickly told my Mom that they could put together the food for the travel. The menu decided, shankarpali, chakli, Chivda the snacks and for the next day's lunch it would be Methi na Thepla.

This is Vimli's recipe and we don't change anything about it. It has been our staple on journeys.

Passing on this recipe to the new bride. She is still honeymooning at their second destination. Dad is on his way to Blr and must have been thrilled to see Somu and Sapna jump on the train at Lonavala to be with him for a while till Pune. Such a sweet thing to do. Love them for the thoughtfulness. Dad is going to remember this journey for a long time even though the family staple thepla is missing.

Ingredients

2 cups chopped fenugreek leaves
1 cup wheat flour
1/4 Chickpea flour/ besan
1 handful millet flour/bajariche pith
1/2 teaspoon turmeric
1/4 teaspoon asafoetida
1 teaspoon red chili powder
1/2 teaspoon cumin powder
1 tablespoon curd
salt and sugar to taste
water to knead

In a big kneading bowl put the finely chopped fenugreek leaves. Add the flours, spices , salt /sugar and curd, knead slowly. Add only as much as water required to make the dough tight. Leave it for 10 mins. Knead again as it would have loosened a bit due to the water from the fenugreek leaves. Pinch off small balls and roll out into small rounds.

Roast on a medium hot girdle applying a little oil or ghee on both sides.

Roast all and cool them by spreading on a paper. Store them in a box. These last for a couple of days without refrigeration. That makes it a great food for journeys.

Serve with your favorite pickle, Chunda or sauce.


Tips:

1. Finely chopped leaves should be used for any type of thepla or paratha because they don't tear the thepla when you roll it out.

2. Curd used in thepla or parathas makes them flaky.

Here are Thepla stories from other blogs:

Thepla for the Soul
Roma’s Methi Thepla even she makes for travel

Monday, March 09, 2009

Paneer Tikka


Tikka... Paneer Tikka...I remember a friend of mine telling me how to pronounce it. Don't go by the spelling on the menu written in English. Tikka sounds right when your tongue touches behind your front teeth while saying Ti...kka. Humm Tikka as in Paneer ka or Tikha as in hot or Tikka as in smearing on the forehead is still a tasty starter I assure you but you must do the right things right, pronounce it correctly!

Last when I visited Barbeque Nation with friends we were served some delicious Paneer Tikka. It was marinated in a green chutney mixed with curd and then grilled. I made this on a weekend when I was alone. It was too much of a pain to heat the oven so I made pan grilled ones, err actually they turned out pan fried ones.

Paneer is a high protien food my dietician Anjali Mukerjee had prescribed for me when I was on a weight loss program. My friend Kalpana, has the notion that paneer is fattening. So when I served her paneer tikka she was very careful and did not go beyond 3 pieces. I love paneer crumble, tikka or in a tomatoey gravy, actually whom am I kidding I like it in any thing :)

Here is how you do a pan grilled version of Paneer Ti..touch behind the teeth with your tongue...kka.

Ingredients

Paneer cubes 10 pieces about 2'' X 2"

1/2 cup cilantro
1/2 cup fresh mint leaves
3/4 green chilies
1/4 cup curds
salt to taste
pinch of sugar
Olive oil

Grind together chilies, mint and cilantro to get a chutney along with salt and sugar.

Mix in the curd to get a nice marinade for the paneer.

Dip the paneer in the marinade to get a nice coating and leave all the pieces of paneer on a plate for all the flavors to seep in.

Grill in a non stick pan with little Olive oil. I accidentally poured more so my picture tells tales of the oily scene but you do not require much. The just grilled for a minute paneer is luscious but if you keep it for longer in the pan it becomes chewy.

A couple of the pieces followed by some citrus juice makes a wonderful weekend meal.

Sunday, March 08, 2009

Navadarshanam's Unpolished Rice Idli Mix

and a memorial for Jyoti Ananthu

I came to Bangalore in 2005, on the train I mentioned the relocation to a co-passenger. The lady traveling with me was my age and did not have a reservation. She had roamed the coach all night. I let her share my berth though it is risky doing that with a stranger. I was convinced she was from a good family. As we talked we found a common interest in traveling. She handed out to me a pamphlet where she had visited as a newly wed. The info on the pamphlet was impressive. I had decided that once settled down I would go to the place to relax. That was my introduction to Navadarshanam.

A month later I took some family friends with me and went to Navadarshanam for the first time. The drive was long and through hamlets where time stands still. The surrounding area looked barren while there was this young forest in the middle. Some houses could be spotted in that land from far. My family friends who are Bangalore bred were not really impressed but for me a Mumbai bred this was a promising sight.

While co-ordinating the trip I had spoken to Ananthuji but on reaching Navadarshanam and meeting him and his wife Jyotiji I instantly felt at home. As we got talking she was thrilled to speak Marathi with me, she was born and brought up in Mumbai!

Navadarshanam is an eco-aware community set up by a group of old time IITians. They experiment here on alternative way of life and how one can live with a minimum carbon footprint. Read the ND story here.

One must visit Navadarshanam if you love nature and its ways but if you are looking for a landscaped resort then this is just not for you. There is beauty in the wild and the miracles in nature that grab your attention.

In the last 4 yrs that I have been visiting Navadarshanam Jyotiji became Jyoti Aunty for me. The smiling face, a beauty with the inner serenity reflecting on her face. I always loved to give her a hug when I visited and this time missed her a lot. This post is in her memory. It is a year today since she left for a greater journey. There was a memorial held today for her in Mumbai and Ananthuji mentioned that it was attended by about 100 people. All of those who loved her and Navadarshanam.


One new years eve we went to Navadarshanam and Lata the cook was on a maternity break so I was helping Jyoti aunty in the kitchen. I offered to make the cabbage bhaaji. as I was pouring oil for the seasoning she said "Pure pure (enough in Marathi)...Navadarshanam way of cooking uses minimal oil!". That has become my way too now!

Navadarshanam has always encouraged healthier eating and I love these Navadarshanam's idlis made of unpolished red rice. It is one thing you must not miss when you visit there. This time too I came back with 2 packets of the ready mix.

The unpolished rice idlis are reddish in color. Since this batter is fermented for long hours it gets a sweet yeasty smell which I love only in these idlis. They are slightly less soft than white rice idlis if you make them as instructed on the pack. However what I do to get softer idlis is, after mixing water, grind it for 5 mins. Then leave it for fermentation for 12 hrs or 24 hrs depending on the weather. These high nutrition idlis are for people determined to change the way they eat.


On friday I made these idli's for dinner. There were some leftovers which I converted in the morning to this.

Ingredients

leftover idlis
ghee
mustard seeds
Chutney pudi
Curry leaves

I have not given any proportions here as it is a free to fit recipe for your taste and preferences. Heat the ghee. Splutter mustard seeds and crushed curry leaves. Fry the idlis in the seasonings. Sprinkle chutney pudi. Enjoy!

It is amazing how life comes full circle. My background is in Environmental and Pollution control technology but I quit the field due to health reasons and also because I was working for companies that were compromising on their Environmental goals. I chose to move on to IT after getting certified in a fancy thing which anyways I am not using now. Then came this opportunity to be a volunteer for my organization's Environmental initiative. I feel less guilty now of quitting the Environmental field. Some weeks ago I took along a group of like minds to Navadarshanam. So here I am sharing the pictures from the trip.

Looking forward to many more...

Saturday, March 07, 2009

Kaandyacha Rassa

Baby Onion Curry

Rice, Angoori Rosogullas, Cauliflower bhaaji, Cucumber, Kaandyacha Rassa and farsan

This Kaandyacha Rassa beacame a part of my family menu only after we started using "Annapoorna" the cookbook by Mangala Barve.

This day I used red baby onions but my Mom always made with white ones. The white baby onions are more tender and the best for this curry.

It is a watery curry loaded with spices and ideal with steamed rice. The thali you see here is one made on a weekend.

Ingredients

10 baby onions
1 teaspoon coriander seeds
1/2 teaspoon cumin seeds
2 cloves of garlic
1 medium onion
1 tablespoon sesame seeds
1 finger sized tamarind
1/2 teaspoon red chili powder
1 small piece jaggery
2 teaspoons oil
salt to taste


In the mixer bowl cut and add the medium onion and garlic, run the mixer to get a paste. Soak the tamarind in hot water and extract pulp. Roast the sesame seed, cumin seed and coriander seeds on a tava. Grind to a powder while still hot.

Now in a saucepan heat oil and fry the onion and garlic paste we made, till reddish. Let in the cleaned and peeled baby onions into the masala. Top up with enough water to cover the onions. Bring to a boil and let it simmer. Check if onions are cooked. They should turn dull. It will take 10 to 15 mins to cook depending on the size of the onions.

To this add the tamarind pulp and the ground masala powder.Add the jaggery and salt. Let it simmer for another 10 mins. Adjust the consistency as per your liking. We like it not too thin not too thick.

Serve with hot steamed rice. There is no other way you will enjoy it better.

Monday, February 23, 2009

Tavyarchi Val Dal


In my home most Sundays the menu was fixed. It was Birda (sprouted field beans) or Tavyarchi Val Dal for lunch and Masale bhat for dinner.

Sunday mornings for my brothers were meant for swimming . We were blessed with a swimming pool that was built for the Asiad and the colony still benefits from it. H, S & S all loved their swim. They were not allowed to eat before swimming so when they came home they were served a yummy lunch. Especially Somu loved Birda so those who were at home would sit around a pot of Val sprouts to peel them after a sumptious Sunday breakfast. When that was not possible my aunts pulled out the Val dal. This is made by skinning and peeling the dried Val.

Since this Dal is made on the tava/ girdle, it needs soaking in water to rehydrate it to make it cook easily. A couple of hours should be good.


Ingredients

1/4 cup Val Dal
2 onions
2 green chilies
1 teaspoon Koli masala OR
1/2 teaspoon garam masala+1/2 teaspoon red chili powder
1/2 teaspoon turmeric powder
2 teaspoon oil
salt to taste

Heat a tava, add oil. Fry the onions in it till pink. Add the spice powders. Now add the rehydrated Val dal, cover with enough water to let it cook properly. This dal take about 25-30 mins to cook. Add more water if it is drying up. To check if dal is cooked pick a grain and press between thumb and forefinger. Make sure it is done well. The sign of a well cooked dal is if you see it is begining to crumble. Do not stir much while cooking it else the dal will disintegrate completely and the result will be a paste. It should be al dente. The onions should meld into the bhaaji and give the dal a lovely coat.

This dal has a fragrance that should get the fire started in you. This time I served with chapati but at our home when we were kids we prefered the Chavlachi Roti. Here I have garnished with green chilies but you can do it with chopped cilantro too.

Sunday, February 22, 2009

Methi Stuffed Paratha


Many times we make a simple stir fry with various types of green leafy vegetables like spinach, chard or wild greens. This particular day I made with methi. I love these stir fries made with onions and the greens. They go very well with rotis made from Jowar, Bajara, rice etc. Traditionally this combo is a farmer's diet.

Using this as the stuffing I made these Methi stuffed parathas. Here is a basic recipe for stir fried greens.

Now to roll out the paratha you need chapati dough. Make a basket with the dough fill it with a ping pong sized ball of the stir fry bhaaji. Pull together the dough to form a ball. Shape it a bit to ensure the filling does not come out. Flatten it between the palms. Dust the counter or chakala with some flour. Roll out the paratha with a light swift hand. Keep it a little thick about 1/4 inch. Roast on a non stick girdle. Keep it fat free if eating hot. If carrying for lunch in a box or storing for longer time coat with oil or ghee and fold it before putting into a container.

Tip: To keep parathas soft line the container with a cloth or napkin. This absorbs the excessive sweating while keeping them soft.

Have these parathas with your favorite pickle and a glass of butter milk!

Sunday, February 15, 2009

She is Special

Hope you folks had a great Valentine's.

Last week has been fun filled with all the shopping I did for Sapna. I like to give surprises but since I am buying stuff for her for the first time am anxious to know if she likes the stuff. So I thought I'd show it to her on the blog while my readers get to comment on the choice too.

She is 25, slim, working woman and someone ;) thinks she is the most beautiful lady!

I feel she is special too !!


Patti collar with front slit neckline on the Batik kurta and the bright pink kurta with a deep V.

Both are cotton, 40 length and can be worn with pants as well as salwar.

A straight wrap-around skirt having paisley print and contrast patchwork top

AND

Sarees from Nalli, you have to experience shopping there even non saree wearers like me get motivated. Humm...to buy...She too is not into sarees but then some occassion are meant to be...

Cotton sarees with thread work

A Pochampalli silk saree, Maroon and Yellow, it is the Haldi Kumkum combo with designs on the body.

A Kancheepuram silk saree, tassels on the pallu, bright green border with zari and threadwork. Dhup-chaav (double shades) body of lavender and gold. This one just glitters.


My friend Deepa gave me this pouch. I am going through a motherly phase right now so I requested permission from Deepa to let me keep it for Sapna. She said it was for me but I know she understands because she too keeps away the best for Ahana! :)

This much till Sapna gets to see the actual stuff. Till then I will still be anxious...

Wednesday, February 11, 2009

Falafel


Falafels are vadas of the middle east. They are eaten in pita pockets filled with some fresh salad topped with a dressing of tahini or hummus.

I neither had the mood to make tahini nor hummus. Anyways I had made the stew and it was an excellent dip and accompaniment to gulp down bites of Falafel.

Falafel differs from our dal vadas to begin with only the raw material. Rest of the spicing is almost identical to the Indian variety. Falafels are made with soaked Kabuli chana/ chickpeas where as we use chana dal for our dal vadas. The amount of cilantro used is more where as we might use just a handful.

They are great to pop into the mouth. Now in Mumbai these outlets have started in multiple locations. I am yet to try out but the prices look ridiculus. Most Mumbaites may prefer to buy their dal vadas instead from the food counters at the railway station or their favorite hole in the wall shops near home, 2 pieces for Rs.10. I prefer to eat at home whether dal vadas or Falafels. I followed this recipe with some freedom.

Ingredients

1 cup chickpeas/ Kabuli chana soaked overnight
1 large onion, chopped
2 cloves of garlic, chopped
1 teaspoon cilantro
1 teaspoon cumin
Salt
Pepper
Olive Oil for frying

Grind the chickpeas to grainy texture. Mix intermittently to get uniform texture. While grinding add cilantro.

Add the chopped onion, garlic, cumin, pepper and salt. Mix well. Roll into lemon sized balls. If you think they don't hold together well you can use some flour or add bread crumbs as binders. I did not do this as I was able to shape them well and knew they would hold shape while frying.

Fry them in a shallow pan using Olive oil, on high heat. Make them golden. Most times they are deep fried but shallow frying also makes them nice and crunchy while you use less oil. Especially when using Olive oil.

Serve hot with tahini or hummus and go traditional. I'll do that next time. A pita pocket too sounds good but not so soon.

Do note this:

Read here about how Olive oil deteriorates at high temperatures and should not be reused. So to avoid large quantity of leftover oil shallow fry with whatever amount of oil you need.

When I am frying something what I follow is fry first, mostly shallow, rarely deep frying. I never deep fry in Olive oil as I do not want to waste the expensive oil after frying once. Then use up whatever oil you need for cooking the other dishes on your day's menu. I try to finish off whatever little oil I have after the shallow frying, immediately.

Actually this applies for frying in any kind of oil even if they are the high temperature resistant ones like refined vegetable oils. I still don't like to keep leftover oil.

Tuesday, February 10, 2009

Hasa Al-Khadr Maa Hummus


I was looking for a middle eastern stew recipe. When I chanced upon this site. This stew/ soup is created by combining Chickpea soup with the vegetable soup and creating a new name too!

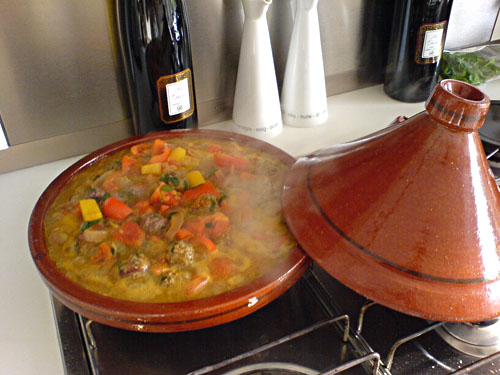
This stew or soup you decide, is traditionally cooked in a Tajine pot over an olive wood fire. I however made in on a gas and then served it in a glazed clay pot.

It is one hearty stew, I prefer to call it that. A medley of vegetable cooked in the juices of caramelized onion and chickpeas is spiced with cumin and coriander powders is usually eaten like a curry with couscous or the middle eastern flat breads. I made Falafels to go with it instead. I have studied a couple of recipes and then done my own thing. So here it is for you.

Ingredients

1 cup White Chickpeas
1 onion chopped fine
2 garlic pods
2 cups chopped vegetables (carrots, tomatoes, mushrooms, potatoes etc.)
1/2 cilantro chopped
1/2 teaspoon cumin powder
1/2 teaspoon coriander powder
1/2 teaspoon black pepper powder
1/2 teaspoon red chili powder
1 tablespoon olive oil
salt to taste
1/2 lemon juice

Heat the oil in a small pressure cooker. Fry the onions and garlic till caramelized. Add the chickpeas and top with water. Cook for 3 whistle. Cool till you are able to open the cooker safely. Then add the rest of the ingredients, chopped veggies, all the spice powders and salt. Cook for another 3 whistles. Open the cooker once cooled and mash the chickpeas with the back of the spoon. This will give the gravy a bit of thickness. Squeeze the lemon juice into the entire dish and give it a stir.

Serve it in a pot with a lid with a flat bread or couscous on a platter. I deviated though from this as you see.

I would be making this with different beans and veggies combinations more often. It is simple, healthy and tasty perfect for people on protein diets.

Monday, February 09, 2009

A Middle Eastern Meal

and a dimension of Indian Northwest Frontier


Falafels and Hasa Al-Khadr Maa Hummus


Blogging makes you adventurous. I have loved Khubuz with lots of butter dipped in Hummus. This is however the first time I have made a middle eastern meal, it was my dinner last night. It consisted of the Falafels and Hasa Al-Khadr Maa Hummus. I also made Paneer Tikka.

The Falafel is a dal vada from the middle east.

Hasa Al-Khadr Maa Hummus, I'm guessing I got the name right is a stew or soup you decide.

Paneer Tikka recipe based on what I enjoyed at Barbeque Nation.

Come back for the delicious recipes.

Bye for now and more later...

Sunday, February 08, 2009

Veg Sandwich From The Streets of Mumbai

Some places conjure the images of gastronomical experiences, others of healthy food and some others of the aroma of ghee.

Mumbai street food in definitely gastronomical but rarely will it stand for healthy food. Though everyone loves the vegetable sandwich this side of the country, people never list it as their first favorite.

When we were in college on returning home if we refused food we would be taunted "Must have hogged Vada pao." Mom and Aunts felt relieved if we said we had veg sandwich for a filler.

You will say what is so great about Veg Sandwich? Yeah this I realized when I heard some young boys from Mumbai comment in the cafeteria at work on the sandwich they were served. In typical Mumbai lingo, "Salon ko sandwich bhi banana nahi aata." Good here in Bangalore people don't grasp Mumbaiya Hindi. However I do understand their frustration and sympathize with my Mumbaikars outside Mumbai.

You will understand why when you try out this recipe. The Veg sandwich made on the streets of Mumbai bursts with flavors and veggies. It is not just a treat for the taste buds but is as colorful as a rainbow.

Every college has a cafeteria yet you will always find a sandwichwala outside the college gate. Kids build relationships with the Bhaiya (Sandwich vendors are mostly from Uttar Pradesh) and they know the regulars preferences. One does not have to specify the order. He would know who likes the sandwich with onions and who does not also who prefers to skip the beetroot.

We would love to watch him butter the slices, apply the chutney (wondering if the chutney was made in hygienic conditions) and then he would skillfully slice the vegetables thin, holding it in hand. We always feared he might slit his hand but his acumen was worth an applaud. Then he would pull out his tin of chat masala tap it on the portable counter and as if in a practiced dance movement sprinkle it over the fresh slices of veggies. This sandwich is always a club sandwich ie. of 3 bread slices. The final slice would cover the riot of colors. He would then apply a little pressure with his palm to hold all the stuff together and run his long bread knife along the edges to trim them and to cut the pieces, always 6 rectangle ones. The sliced bread used is generally Britannia or Modern. They use the large sized slices as the edges are trimmed. Many kids while they watch the Bhaiya prepare their sandwich like to grab the trimmings and eat it with a little ketchup. Most Bhaiyas don't mind this behaviour of the kids. Then depending whether you wanted to eat it at the stall or pack away, he would slide the sandwich off the board onto a plate layered with butter paper or a piece of the bread wrapper sheet. Finally handing out the serving to you. If you were eating in front of him he would hand over the ketchup squeezee to you else pack the ketchup in a small Ziploc pouch.

I would love to eat my sandwich fresh before it gets soft as this is not a toasted one. Going on to dot it with ketchup. It was always impossible to talk while eating as even the single piece loaded with all those veggies would stuff your mouth. After this came the best part when the entire gang of friends would pretend to act as if they were set on fire by the chutney and demand, "Bhaiya sukha dena" sniffing hard to drive the point. But Bhaiya knew us too well and he would keep a little triangle of buttered slice ready for each of us!

All this for just 5-7 Rs. Now I don't even know how much the Veg sandwich costs. I have not had one in years on the streets of Mumbai.

Would you like to try it out?

Make two.

Ingredients

For Green chutney

1 cup chopped cilantro
1/2 teaspoon salt
3/4 teaspoon sugar
2 teaspoon lemon juice
2 green chilies

Grind together to get an aromatic paste.

For the Sandwich

8 slices of bread
butter
1 beetroot, boiled
2 small potatoes, boiled
1 onion
1/2 cucumber
1 big tomato
Chat Masala

First butter all the slices. Keep aside 2 buttered slices for the sukha.

Apply green chutney on the remaining 6 slices. One by one slice the vegetable on bread slices like shown here. Sprinkle a large pinch of chat masala over each layer. Do you see the specs in the picture? They are slightly visible on the beets.

Assemble all the slices veggie side up obviously. Cover with a buttered and chutneyed slice with the plain side up. Press gently with your palm while cupping the sandwich with your fingers. Run the bread knife to trim the edges.

Then cut up into small 6 rectangular pieces like here.

Dot with ketchup and enjoy! I ate straight from the cutting board but if you are serving this to someone slide it off onto a nice plate and handout a tissue, putting a piece of this sandwich in your mouth without messing is a practiced art.


Don't forget the sukha buttered slices. Put together the buttered slices and trim the edges and cut up into four triangles. Tradition says only one small triangle of sukha after one full Veg sandwich. It helps cool off the heat of the green chutney yet lets your Jivha soak up in the wonderful flavors of a true Mumbai Veg sandwich from around the corner on the street.

Thursday, February 05, 2009

Sajuk Tup Chapati AaNi Sakhar

and Many ways to eat it.

The 10 days of being home alone makes it such a pain to cook on week days. I have been enjoying my dinner of fresh fruit salad yet the lunch leaves me wanting to eat food that I have made myself. Today is Thursday, one more day and it would have been the weekend but I did not have the patience. Infact there was no power at home but I was determined. I switched on the emergency lamp and started cooking in the dim light.

In the cooker went in a dal major rice minor khichdi along with onions and tomatoes. I had planned to add some ginger garlic paste but forgot to pound it. I kept aside the mortar and pestle with the peeled ginger garlic left in it. Would I dare to do it when Dad is around. I will wash the ginger and garlic before use, if I cook tomorrow else I'll throw it away.

While it whistled on slow, I made the dough for chapatis. Now in Marathi I learnt to call it PoLi much later but as a kid it was chapati so that is what it is.

I was craving for soft chapatis after eating the oil free ones made at the cafeteria at work, healthy but not a Marathi's style. I realize how finicky I have become about food. I cook every single day when Dad is here with me but now when I was eating out nothing tasted like home.

Since I had already made a khichdi I did not want to make a bhaaji. So I thought Sajuk Tup Chapati Aani Sakhar is what will make my soul sing. Just like Aai, my Mom would make it.

The ghee must be home made Sajuk Tup for this. The Dalda is ok for puff pastries and Nankhatai but has no place in my home for any other use. Sajuk Tup is a must with Varan bhat, on Sheera after it is cooked and with just off the tava chapati!

Ingredients

1 cup wheat flour
1/4 teaspoon salt
3/4 cup water
2 teaspoons Sajuk Tup for kneading

*Sajuk Tup for GENEROUS DOUSING

Rub in the molten sajuk tup into the dry wheat flour. Add salt and water and knead to get a smooth dough.

Now pinch of small parts of the dough and roll out to get a small phulka. Apply sajuk tup lightly dust with flour. Fold it into a quarter then fold 2 more times. Each fold lightly greased with the sajuk tup and dusted with flour. Now press it flat and roll out a chapati. Heat a tava on high. Roast the chapati and press lightly with a cloth or flat spoon. Douse the chapati with lots of sajuk tup before you remove from heat. Do this fast before the chapati turns stiff on the tava. Fold it into half and fold it one more time to get a quarter. Store it in a hot pot.

This chapati has lots of layers and sajuk tup flavor dominate. This is the famous Marathi Ghadichi PoLi. Some might find it very rich. So keep a fizzy drink handy.

There are many ways to serve and enjoy this delicate chapati.

1. Tear into rough pieces and sprinkle sugar on it and eat it with your fingers.


2. Open the quarter folds of the chapati, drizzle the sugar. Pack it for tomorrow's lunch.


3. Even if the khichdi needs to be gulped and cleaned. Roll a little sugar in one chapati and take a bite while watching TV.

Now off to bed.... have to go to work... tomorrow is Friday and then the weekend...

Thought for the night:

"Unconditional love gives one the freedom to be your own self."

Good Night...Sweet dreams :)

On Trail