Thursday, January 04, 2007

Meme 1-2-3

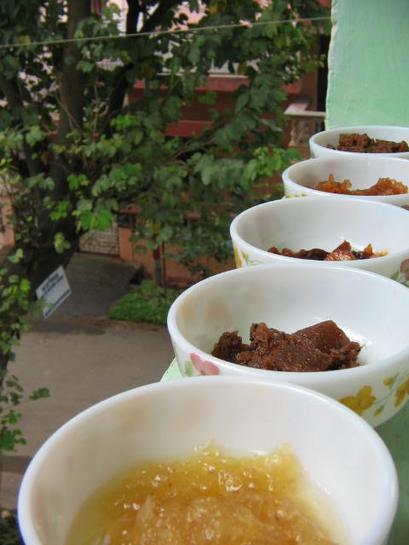
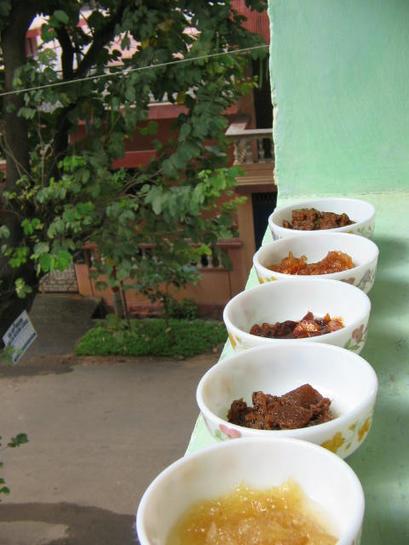
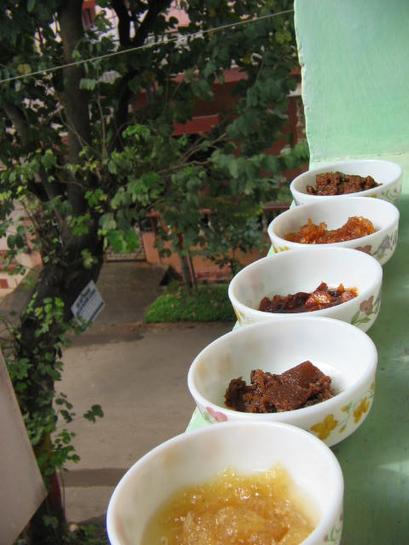
This picture reflects me as a person complex, diverse, natural.

Usha (samayal-ulagam) thanks for the tag :). Feels like I am in the blog circle now.

Meme 1-2-3

3 Things that makes me laugh:

  1. My tiny nephew's big talks.
  2. When I know I am fooled.
  3. My Uncle M's PJs. He is so witty.
3 Thing that makes me to cry:
  1. Reading old mails from him.
  2. My Dad not being graceful when I do things for him. He is so fiercely independent and giving but is unable to accept things done for just him.
  3. Seeing my loved ones in trouble.

3 Things that scare me:

  1. Being alone in life
  2. Many traumas that I have been through and seem to shadow my future.
  3. The violence and bad things happening in the world. We are not insulated. I feel this more after the theft in the old house last year in Blr when I suffered huge losses.

3 Things that I love:

  1. Cooking for all who come to my home. I make sure no one goes without grub.
  2. Doing needlework and other handcrafts too on weekends
  3. Reading old mails from him ....I know...I know ...Its the second time I listed it.

3 Things that I hate:

  1. That distance does people apart.
  2. Sometimes people have to compromise their entire life due to some critical situations.
  3. To let Money rule our life.

3 Things that I can do:

Cook, write and read....not just to save my life.

3 Things that I don't want to listen:

  1. People discussing TV serials very intently.
  2. When someone says NO when things are possible.
  3. Heavy Metal

3 Things that I want to listen:

  1. His voice....its so reassuring..
  2. My internal voice
  3. Any soul stirring music

3 Favourite foods: Cmon this list cannot be so short.

  1. Fresh baked warm cake
  2. Crispy paper dosa
  3. Mushrooms in spicy gravy

Our Priest's daughter's enjoying paper dosa when they visited me in Blr. They were thrilled as they don't get it in their village in Maharashtra.

3 Beverages I drink regularly:

  1. Lime juice
  2. Tender coconut water
  3. Ginger Ale

3 TV shows I watch regularly:

  1. Monster house
  2. Oprah's
  3. News -filtered I just change the channel as I hate the constant flashing of violence though its a reality.

3 Things I don't understand:

  1. The concept of GOD yet I am a believer.
  2. Why I care about people even though they don't care about me.
  3. How situations change people.
My favourite Gods

3 Things I want to learn:

  1. To be kind to people as I am considered sharp tongued when it comes to my views on right and wrong.
  2. To learn to make those perfect pooranpolis
  3. To be little thickskinned to public opinion

3 Things I want to do before I die:

  1. Be able to talk to my beloved and open my heart
  2. Do my bit of charity
  3. Have my family around me.

3 Things on desk:

  1. My planner
  2. Water bottle
  3. and ofcourse this media

3 Things that I'm doing right now:

  1. Pondering on the presentation that I just attended
  2. Planning for the next work week
  3. Pouring out the pent up in this meme

3 Friends I want to tag:

Shilpa (Aayi's Recipes)

Manisha (Indian Food Rocks)

Ashwini (Food for Thought)

Shilpa is busy with the new job, Manisha with the guests, Ashwini with the JFI yet buddies try to take this meme.


Enjoy!!!

Wednesday, January 03, 2007

Moramba

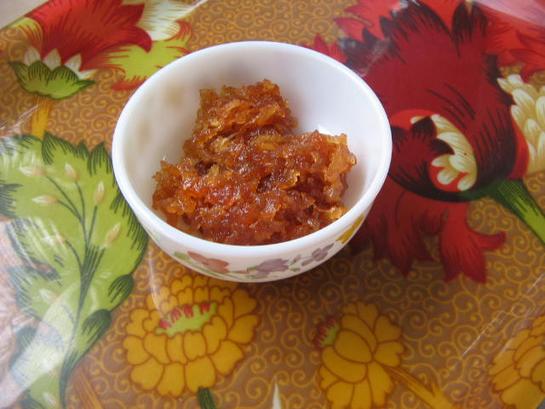
The first bowl with the yellow stuff is the Moramba. It literally means soaked mango. It validates the name by its taste too. Moramba is the Indian mango jam. It goes as an accompaniment with spicy eats or is eaten as is on fasting days. Very easy to make and children love it too.

Ingredients

1 kg Rajapuri Mangoes
1 kg granular sugar
1-2 teaspoons cardamom powder

Just like we did for the chunda grate the mango. In a heavy bottom vessel mix the sugar and mango shreds. Place on the heat and cook till you get a sticky jam like consistency. Keep stiring all the while. It takes couple of hours to cook it to the jam like consistency. I normally do not cook it at one go. I keep stirring and cooking for 1/2 hr put off the gas for a while take a break then again cook for half hour. I keep doing this till completely cooked. Stirring continously for 2hrs may end up giving you a frozen shoulder so take a break. Cool for a day when done. The next day mix in the cardamom powder and store in a jar. The yellow color is natural and it looks yummy.

So now you know the difference between a chunda and moramba. I am partial to the Chunda though as the sun does a trick that heat cannot do to the same ingredients.

Tuesday, January 02, 2007

Chunda

Chunda is the Gujarathi influence in my life. It is one of the many dishes I learnt from my old neighbours the Rajput family. The eldest lady Ji- aaji, Kaki and her three daughters, Indu, Ansu, Preeti spent a lot of time cooking for the family and I found it really funny that the two men in the family our pet Japan Baba, Rameshbhai were really pampered. These ladies kept aside all their likes and dislikes and cooked only what these men wanted to eat each day. Chunda was indispensible in their house it was very ritualistically made in summer months and stocked for the year.

It is quite simple to make yet has the suncooked goodness packed in it.

Ingredients

1 kg Rajapuri raw mangoes
750 gms granular sugar
1/2 cup powdered cumin seeds
1/2 cup red chilli powder
1 tablespoon salt

First wash and pat dry the mangoes. Peel the green skins. Use the coarse grate to get a pile of raw mango shreds. Incase Rajapuri mangoes are not available any mangoes with a lot of flesh and small seed can be used.

In a huge vessel or glass jar mix the shredded mangoes and sugar and allow to cook in the sun. Do not seal the jar but tie a cloth on the mouth to keep out the dirt. Put it in direct sunlight till you get transaparent raw mango shreds and the mix is sticky like honey yet crunchy in taste. Every day put the jar in the sun and in the evening bring it indoors to mix it well. Do not leave the jar out at night as dewdrops might get into it and that will spoil the preserve. Once the mix is stringy and finally you are ready to store it for the year mix in the salt, chilli powder, and cumin seed powder. Finally it should have the color and consistency as seen in the picture.

Chunda is now ready to be served with all the Gujarathi savories like thepla, fafda, ganthia, khari puri etc etc. As kids Kaki's first chapatis and fulkas with chunda or ghee shakkar were always fed to us every day. It is sweet memories how I was once who got it first then my siblings had their turns to get it first. Kaki used to call my youngest cousin, Kanha or Kanhiya as in Lord Krishna she actually believed that she was feeding the lord himself when she fed him such was her belief. We brats would have a good laugh at her but it did not shake her.

Try it out once and you will make it year on year.

Friday, December 08, 2006

Garlic Pickle


It was that time of the year when Chaturmaas the four month sacred period was going to start. I had some garlic bulbs that were unused and I was not ready to use garlic in anything and everything I cooked. So decided to make a pickle. This year I had already made 4 other preserves hence didn't want to go about making the masala myself. Also there was a packet of Bedekar's Pickle masala lying around that I wanted to use. Here is what I did.

Ingredients

3 bulbs garlic
1 table spoon Bedekar's pickle masala
1/2 lime juice
1/2 cup oil

Peeled the pods and cleaned to get the garlic pods. Fried them in oil for 2 mins. Let it cool for 5 mins added masala, lime juice and mixed. Cooled completely through the day. Before going to bed transfered the pickle into a dry jar. It gave me about 300 ml jar pickle. Generally we start using pickles as soon as they are made even if they haven't aged yet. This pickle was fortunate it aged for 4 months.

The first trial was with curd rice served to my friends and they gave a thumbs up!

P.S: I realize now my pickles have a story each attached to it especially the Kairiche Pickle. Will share my labours love with you soon and the Upadvyap we did for it all for the love of home made pickle with the specific type of mangoes that we like so much. Friends I will be away till next year so Happy New Year! in advance.

Thursday, December 07, 2006

Limbachya Salache Lonche

Last Summer holidays my family and friends visited me. There were 5 kids who had lime juice thrice a day all made by themselves. I didn't want to stop them from enjoying their juice making session either so I would give them all things needed apparatus and all and send them out onto the sit out. All parents gleemed amusedly by the noise they made and believe me the juice was superb. Can you believe how many lime peels I might have collected. They were not squeezing out the juice fully so I didn't want to throw away the peels. So I gave them a big empty jar and told them to put the used lime peels in it and top it up with salt layer. In 15 days I had a full jar. After the kids left and I felt lonely I started a new activity of putting the jar in the sun on the terrace every morning before leaving for office and getting it back into the kitchen in the evening before dinner. In a month I got lovely darkened lime in brine. I tasted it and since this was used lime it did not taste as good as lime with the juice that we make usually. So what did I do.

Ingredients

About 1 kg of lime peels in brine
1/4 cup red chilli powder
1 tablespoon mustard seeds
1/4 cup sambar powder
1/2 cup Oil

Heated oil in sauce pan. Spluttered mustard in the oil. Removed from heat allowed to cool for 5 mins. Added chilli powder, sambar powder and lime in brine. Mixed well and stored. It was ready to eat immediately. Threw away the brine.

I carried it to office in my lunch box the next day and my colleague who does not like any taste other than the typical south indian actually liked it. But I didn't tell her this secret recipe and the story for the fear of being tagged thrifty.

Wednesday, December 06, 2006

Recycled Dhokla


I was born a Koli but the period between 8 years-16 years of my life I lived in the Gujarathi / Parsee heartland Fort. Sometimes it makes me laugh how places get their names. This southern area in Mumbai was supposed to have been a Fort so the obvious but I do not see even a single trace of the Fort.
Fort is downtown Mumbai. Living in the area meant having a childhood without open places to play after school unless ofcourse if you went to Bombay gymkhana or Harnimon Circle. I regert I never did learn to ride a bicycle like most children do. Spent most after school hours reading books which were in plenty on the streets, school library and tagging along with MJ kaka to Petit library. I will write a separate post on Walking to the Petit Library with Kaka as it was never just that. Hey I'm just straying away.
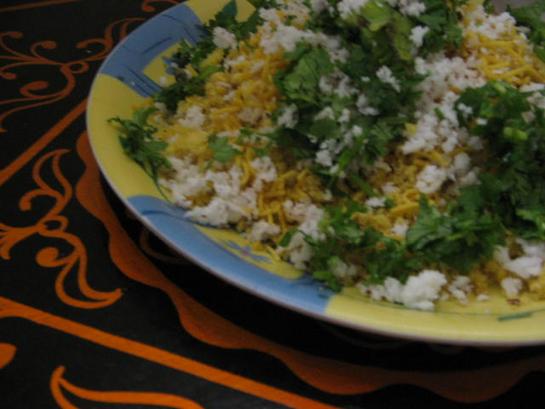
So back to Dhokla. Yeah I was saying how could I not like dhokla living in this mini Gujarath. Many times there would be excess dhokla which Dad recycled into this snack. This dish though made from leftover dhokla in the past. We like it so much at home that now we make Dhokla in the morning control temptation to eat it till evening and then when it is too cold to be enjoyed as dhokla transform it into this dish. However never try to make it using Nylon dhokla or dhokla made from besan it will not lend the same texture. Try it and tell me.
Ingredients

1 cup leftover Dhokla
1 tablespoon thin shev
1 teaspoon lime juice
1 teaspoon sugar
1/2 teaspoon fresh ground pepper
1/2 teaspoon toasted cummin seeds powder
1/2 teaspoon toasted corriander seed powder
grated fresh coconut and
cilantro for garnish
Crumble the Dhokla in a plate and save. In a bowl add lime juice and sugar and dissolve. Mix this juice with the dhokla crumbs using a fork. Sprinkle the three powders and mix again with the fork. To serve top it up with thin shev the ones used in bhels. Garnish with fresh grated coconut and loads of cilantro.

Tuesday, December 05, 2006

Moogache Ladoo


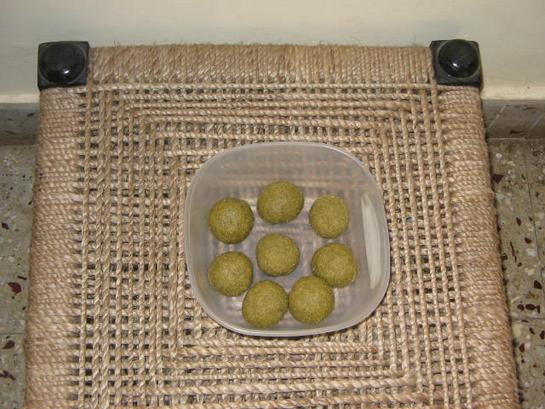
This recipe I learnt from my favorite Marathi cookbook, "Annapoorna" which I recieved as a gift at the age of 12 years. It is absolutely tattered now. What I realize is the great influence it had on my cooking. Some of the recipes I make may not be exactly from that book just like this one as now I don't even need to refer the book. I make the laddoos for my little nephew, Pranav who simply loves them.

Ingredients
1/2 kg Green lentils split
1/2 kg powder sugar
5-6 cardamons powdered
1 cup ghee

Dry Roast the Green lentils in a kadhai. Leave it to cool completely. Once cooled powder it to fineness in a dry grinder. Next heat ghee in the kadhai add the powdered green lentils and roast on simmmer till the rawness vanishes. Be careful not to burn the mix. Don't leave the roasting till you are done. It takes about 20 mins for the measures mentioned here. Then add the powder sugar while still on the heat and mix well. Remove from heat immediately else the sugar will char. Let it cool a bit so that it is easy to shape the laddoo. Just before you make the laddoo add the cardamom powder and mix well. Shape the balls real smooth. Relish the goodness of the green laddoo.

Ashwini made laddoos with the dehusked moog dal check out her version.

Monday, December 04, 2006

Shravani Cake


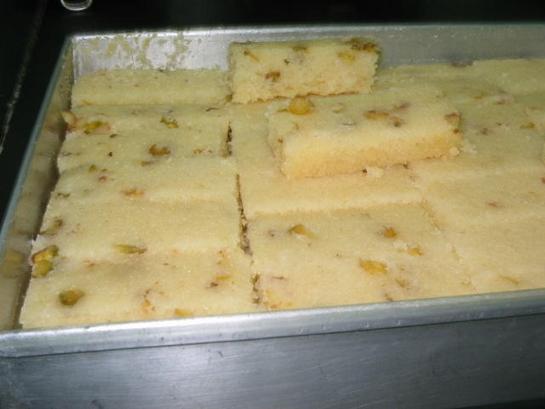
Shravani Cake gets its name from the fact that it is a cake to be feasted on in the sacred month of Shravan. We being a vegetarian family and with 2 kids whose birthday falls in the month of Shravan makes even an ordinary cook a creative one. Aai made this cake to prove that all children in our joint family were equal. This was a BD present to all 8 kids at home on their individual BDs. We loved it then and we love it now. My elder bro tells me that mine does not taste as good as Mom's. The secret it she made it in a cooker just like steaming idlis. Whereas I make in the Oven.
Ingredients
1 cup Semolina roasted
1/2 cup milk
2 tablespoon sour curds
1 tablespoon ghee
1/4 cup Pistachio, almonds, cashews slivered
1 generous pinch saffron to be soaked in milk
1/2 cup sugar
1 teaspoon baking powder
In a large bowl first lets beat the ghee to a froth. Add the sugar and beat till dissolved. Now lets add milk and curd then add the semolina and fold into the mix. Mix in the nuts and saffron and baking powder till mixed properly but with a light hand. Let in stand for 10 mins. Meanwhile preheat oven to 200 deg Cel. Grease 6 inch round mould with ghee. After 10 mins lets pour the batter in the mould. and bake for 20 mins. This cake should not be allowed to be browned as it is made from semolina it will give a very hard crust. It should be removed from the oven as soon as it is baked from inside. to check if done insert a dry knife if it pulls out dry then the cake is baked and done. Remove from the oven and let it cool for 10 mins. Then demould it on a tray or cake stand. As you see in the picture above, the cake I baked was for almost double the quantity given here and so I took a mould which could hold all the batter at one time. Enjoy!
Updated: 5th Feb 2007
Pressure Cooker Version
This varies only in the last step. Instead of baking we steam the batter. For steaming you can use a greased Dhokla stand and cut into diamonds after steaming Or in idli stand for small cakes. This versions is fluffier and tastier after all this is how Aai made it. It should be steamed for 20 mins and make sure it is cooked as explained in the oven version before removing from heat and leaving it to cool. I'm sure you will like this version more than my oven version.

Friday, December 01, 2006

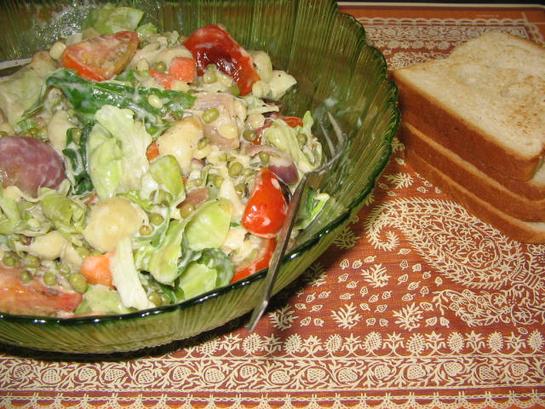
Pasta Salad


This salad is much loved in my family due to the color, crispiness and yet warm bite it provides. I just loved taking the pictures and knew my blog would look festive with them so forgive me for the similar looking shots. I devepoed a real taste for the salad when I was working in nightshifts for a while. I din't want to eat heavy food yet wanted to keep full through the night without the side effects of doing night shifts. This recipe is just great for students who stay up all night to study during exam times.

Ingredients

1/2 cup Conchiglie(shell) Pasta
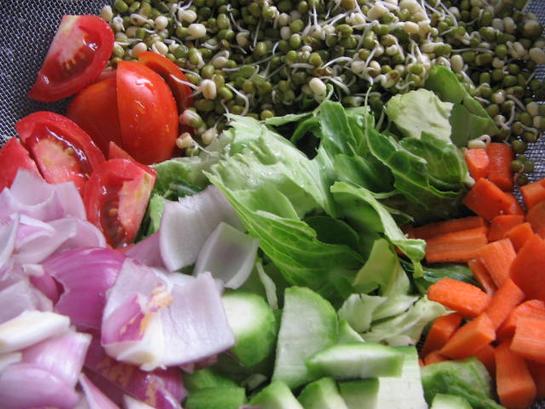
some cabbage, tomatoes, carrots, zucchini chopped large
2 onions chopped big
1/ cup green sprouts
1 1/2 cup milk
salt to taste
fresh ground black pepper as much as you like


Step I
Lets start by putting the saucepan on the heat. Pour in the milk and add pasta, sprouts, chopped zucchini. Cook till done with salt. The rawness of the sprouts and zucchini should have vanished. I just added torn cabbage on the top before taking the picture below.

Step II

Then prepare the veggies. In a shallow pan roast the veggies with minimum oil and salt as per taste. They should look like this. If you notice I had roasted zucchini too but it did not cook well and had to weed it out while eating. Therefore in this recipe I have suggested it be cooked along with the pasta.


Step III

Now in a salad bowl mix together the cooked stuff from step I and step II. Add the fresh ground pepper. I like a lot of pepper in this salad.
Serve while still warm with toasted bread. At home we like to dip the bread in the sauce. It tastes too good.

Thursday, November 30, 2006

Oven Methi Nan


I have been cooking for a long time now but don't know why had never thought I could made tandoori rotis in an electrical oven on the grill. Well what happened was I went shopping for a new electrical oven. I needed a small one as this home is not my permanent one. I came across an electrical tandoor. I saw that it was built the same way as an oven. Just heating element and a box. Except that the oven has a large shell whereas the tandoor had a flatter shell. As soon as I came home with the oven the first thing I tried was this Oven Roti. My Dad sweared by it and he was so happy now would be able to eat tandoor style rotis at home. See the grill marks look so good in the picture and ofcourse the melted ghee. What you see in the platter is Spinach soup and Sime Badnekayi (Chayote Squash) stir fry with Methi Nan.

Ingredients

1 cup wheat flour
1 cup maida
1/2 cup curds
1/4 cup milk
1/2 cup chopped fenugreek leaves
1/2 teaspoon baking powder
1/2 teaspoon Nigella seeds
1/2 teaspoon salt.
Mix all the ingredients in a bowl and form pliable dough. Keep it aside for 1/2 hr. Preheat oven at 250 deg C or 480 deg F for 10 mins. Use bottom element only. Roll out Oval Nans so that you can bake 2 at a time. Bake the Nan on the grill for 10 mins on each side till it gives the grill marks. In this way one can make almost any type of oven rotis.

Wednesday, November 29, 2006

Toor Masale Bhat

Once in a while my Dad surprises me by making dinner on days when I have spent a long day at work. He had bought some Toorichya shenga that looked really fresh. We normally make toor curry with ground coconut masala. The Toor when separated from the pods looked like peas so he decided to make masale bhat with it. The toor rice turned out so fluffy and nice that I feasted on it. The red and green chillies he used were just to add color to the picture as He now watches me taking pictures for the blog. I wanted to take a picture of the toorichya shenga but dinner was ready when I reached home and the waste pods were in the dustbin. Ambe mohar rice is the best rice for masale bhat. This variety of rice is small grained and smells like ripe mangoes when cooked. We used long grained rice on this day as you see in the picture.

Ingredients

1 cup rice

1 cup toor

4-5 red chilies / green chillies slit with stem intact

1/2 teaspoon turmeric

1/2 teaspoon red chilli powder

2 pinches asofeotida

1/2 cup curds

1 cup water

1 tablespoon fresh grated coconut

1 tablespoon cilantro

1 tablespoon oil

salt to taste

Masala for 1 cup rice:

2 cloves

3-4 black peppercons

2 small sticks cinnamon

1 bay leaf

1/2 teaspoon cumin seeds

2 cardamom pods

1 teaspoon Coriander seeds

Grind together all items. No roasting required. Traditional maharashtrian masale bhat powder is not roasted this gives the lovely flavor and smell.

To begin heat oil in a small pressure cooker add turmeric, chilli powder, asofeotida, Masale bhat powder stir for a min and sprinkle water on the seasoning to allow the flavors to come out. Add the toor and stir. Wash rice and mix into the seasoning. Add the curds and mix. Next add water and salt before you close the cooker. Pressure cook and allow only one whistle. Let steam subside and open cooker while still hot else rice will become soft. Do you smell the heavenly aroma?

Now remove all the rice on a platter and make it fluffy by using a fork to separate the grains and garnish with coconut and cilantro.

Tuesday, November 28, 2006

Chivda bhel


Earthy snack
Chivda made in the earlier post is used to make this bhel. While taking this picture I tought it appropriate to place the plate on the floor and fill the tea in the steel tumbler as this one is an earthy snack.
Ingredients
1 cup Chivda
1/2 tablespoon chopped onions
1 tablespoon chopped tomatoes
1 tablespoon Tikhat shev/ any shev
salt to sprinkle
cilantro to garnish
squeeze of lime
Mix all of this together in a bowl and serve in a plate. It will be gone in minutes to whoever you serve. Don't forget to offer Kadak chaha with the chivda bhel.

Chivda

Chivda packets ready to be shared during Diwali along with other sweets 

Chivda is the snack omnipresent on all occassions be it naming ceremony, engagement, or no occasion at all in Koli and Maharashtrian homes. It is an all time snack. I make it every weekend fresh for my family and I don't touch it myself. In our home we always had a box of Chivda available in the pantry after a couple of days all the peanuts would be gone from it. We all knew who the mouse was and tease my brother aged 45 till date about it. Each one had their own way of eating it. Some ate mixed with shev, other's made a bhel. some squeezed a lemon on it. All yummy versions yet I stayed away from the Chivda. It was also a travel snack carried along on most journeys. This is the first time I am giving large proportions as this snack can be stored for a long time.

Ingredients

1 kg Thin rice flakes
10 green chillies chopped
1/2 teaspoon turmeric
1 teaspoon salt
2 teaspoon sugar
1 cup peanuts
1/2 cup roasted and split chickpeas
1/4 dry coconut slivers
1/2 teaspoon Poppy seeds
1 teaspoon mustard seeds
1 bunch curry leaves
4 tablespoons oil
1/4 teaspoon asoefotida

Firstly prepare the rice flakes for the chivda. It can be done in 2 ways- by leaving the rice flakes in the sun for 2 hrs or till they are brittle Or by dry roasting them till brittle. If roasting then allow to cool before making the chivda else it won't turn out that crispy.
Later in a big vessel heat oil for the seasoning. Splutter mustard seeds then in goes the asoefotida. Then fry the peanuts and coconut slivers till red. Add the poppy seeds and stir. Then add the roasted and split chickpeas, curry leaves and stir for a min. Once the curry leaves are crispy add the green chillies and fry still crisp. Last add the turmeric and salt and mix well. Add the rice flakes which we kept ready to it and mix thoroughly by flipping the mix in the vessel. Do not stir with ladel else the rice flakes crumble down. Finally add th sugar and mix again and remove from the gas. At home we pour out the chivda in a large fine sieve to cool it makes the chivda very brittle and tasty. 

All of you who have posts on chivda link up here to share your versions.

Here is a bhel I love to make with this Chivda.

Monday, November 27, 2006

Tikhat Shev


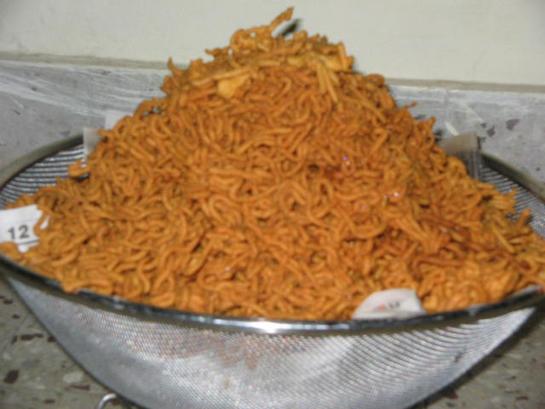
Mountain of Tikhat Shev

This picture was taken during the Diwali preparations. Thikat Shev is the easiest thing to make among the munchies. It just vanishes fast from the stocks as soon as it is made especially during Diwali when one gets tired of eating sweets.
Ingredients
1 cup chick pea flour
1 teaspoon red chilli powder
1/4 teaspoon turmeric powder
1/2 teaspoon salt
1/4 cup water
1 generous pinch hing
Oil to fry
Mix all the items to get a thick paste. Oil or water should be smeared on the inner side of the Shev press. Fill the press with the paste and drop the shev in hot oil. Fry the shev to nice red color on medium heat. Remove from oil once done in a basket lined with absorbent paper to drain excess oil. Shilpa too had made her version for diwali.

Masala Papad


It is actually a starter but can also be eaten as a evening snack. When one is dead tired to make some thing really elaborate but needs a quick bite into something crunchy and savoury the masala papad come to help. Most people use fried papad for it but I used roasted to cut out the extra fat. It's a snack churned out from the basic ingredients in the kitchen and yet so tasty.


Ingredients

1 papad
1 teaspoon finely chopped onions
1 tablespoon finely chopped tomatoes
1 teaspoon finely chopped cilantro
1 pinch red chilli powder
black salt to sprinkle on

Roast or fry the papad and lay it in a plate. The fried ones don't become soggy fast but anyways masala papads don't last long enough to sog anyways. Garnish it with onions, tomatoes, cilantro and sprinkle the salt and red chilli powder on it.

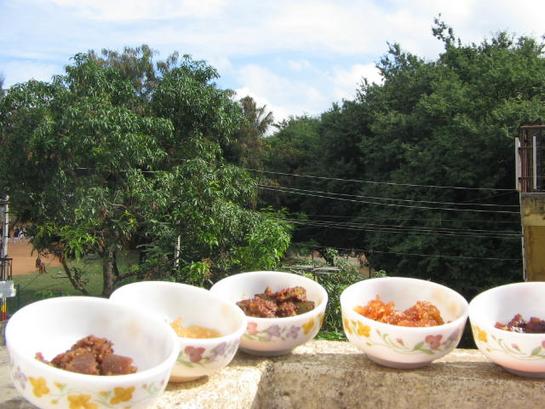
Five Pickles and a Chutney

This is a trailer for the upcoming posts.


Lovely colors
Mango Tree in the background
Moramba- Lonche- Chunda


Pickles perched on a wall


Winter Mangoes


Lip Smacking Pickles


Lasun Chutney

Friday, November 17, 2006

Shevndi -Lobsters

They are the "Love of my Life". There is no good recipe for lobsters. The simplest and the best is fresh boiled lobsters. They have to be tasted that way to really enjoy lobsters. The Koli name for lobsters is Shevndi. They stay live outside water for atleast 4-5 hrs after they are caught and don't loose taste. In Thal people make curry and stir fries. They only end up spoiling the real taste. I have tried to make butter-garlic-pepper lobsters but that too mars the taste.

My maternal uncle S Mama used to supply lobsters to Taj at Gateway. So whenever he came to Mumbai with his catch he always gave me some. On such days even if I was fasting I would quit midday to enjoy the feast. They are considered the highest cash drivers among Kolis and you know why.

Lobsters like everything else that I loved in life so much is a thing of the past. I am now a veggie by choice since the last 20 odd years. This post is dedicated to the lobsters.

Thursday, November 16, 2006

Slurp~~


Any Mumbaikar is a diehard fan of gola the ubiquitous crushed-ice candy. It was banned by most parents to eat from the Golawala pushing his cart on the street as it was unheigenic but do kids care. We loved to watch the golawala crush the ice on his green pressing machine. My cuz loved to do it himself. Then shaping the Gola in the hand and then sticking the slit bamboo piece to make a candy. The last bit was enchanting when the Bhaiya splashed the deep red sweet syrup onto the crushed ice candy with a deft hand. We called that deep red syrup Lali simply because it colored our mouths red like lipstick. That was the treacherous clue that parents looked for if they wanted to police on their gola eating brats. We would stand at the cart and suck the juice on the candy and then take more lali from Bhaiya and he never did mind we could ask for more till the ice got over.

My Mom made this recipe thinking she could stop us from eating Gola outside our home. She made it with almost any fruit syrup viz kala khatta, lime juice, moramba, moravala, kokum syrup etc.

Ingredients

4-5 ice cubes
2-3 tablespoons any fruity syrup
chat masala
In the wet grinder jar add the ice cubes and the syrup run till crushed. Scoop out into a tall glass and decorate with mint leaves and chat masala. Eat the flavored crushed ice with a spoon as the street gola in now in cultured company. So at home the exciting Gola turned into SLURP~~.

Update: 24 April 2011

The pictures are of slurp made from Kairi Panha

Talleli Vangi


Near Alibag on the way to Murud there is a village called Borli/Borlai. It is very famous for its huge sized brinjals. They are as big as 1.5 feet in length and 0.5 feet in width. These are the best ones for Baigan ka bharta or fries like we do in Thal. They are very simple to make but need to watch calories when gorging on them. I have tried baking them too but don't taste as divine as the shallow fried ones.

Ingredients
1 huge brinjal
1/2 teaspoon turmeric
2 teaspoons red chilli powder
1/4 teaspoon asoefotida
salt to taste
Oil to fry

Cut the brinjal into round slices about 1/2 inch thick and lightly draw a chequred pattern on the slices with a knife. Layout the pieces on a board and smear with the turmeric, salt, chili powder, asoefotida and leave to stand for 5 mins. Shallow fry the slices in a non stick pan. The fried brinjals can be eaten with steaming hot rice or rolled in a chapati. At home we kids loved it with rice so much that on the day the dal would remain untouched. In our joint family the lady who made fried brinjals for us kids got a scolding from Dad and uncles for making junk food that is sooooo oily and spoling us kids :) everytime they were made.

On Trail