Monday, October 15, 2012

Fish Cake


My bro joked, he wanted a Fish cake for his 30th birthday! As a vegetarian kid he would always pick up the Fish shaped mawa barfi from Parsi Dairy. Yes I am talking about the Mawa ni Boi.

I did not have a mould and time was a constraint so I took a short cut. I bought 250 gms of Mawa Barfi from Jhama's in the neighborhood and cut it with a pizza cutter and a knife to shape it like a fish. 

steps here for you to try it

1. Select a barfi covered with Silver varakh/ edible foil. Put the entire sliced slab of Mawa barfi onto a serving plate.
2. With the pizza cutter shape 3/4 of the slab like an eye or Oval. 
3. The 1/4 that forms the tail can be shaped with a sharp knife.
4. Cut a V first for the tail then cut out the sides. Save the cut side for the fins.
5. Cut out triangles for fins and place them on the sides.
6. For the eyes, create tiny grooves and fill them with strawberry crush. The Mawa ni Boi always had red plastic discs for eyes and my bro always wanted to eat them when young, we had to do a magic trick to discard the plastic eyes before he could pop it into his mouth. Hence I used the strawberry crush to make everything edible. 

My bro was thrilled with this fish cake that took him down the memory lane! Any kid would love it, and he even though an adult with his own family is still my kid bro right?

Well the Fish has a symbolic importance for Parsis. You find it on all their religious buildings and so the Mawa ni Boi is gifted for LUCK in that community. Well but for my bro it has always been Fish Cake.

Saturday, October 06, 2012

Homemade Mascarpone Served With Kiwi


Tubs of Mascarpone lured me in the mall. I have spent double the amount of money on it than when I made it at home. Plus homemade is pure Mascarpone, no preservatives and absolutely fresh. The thrills of making such stuff at home is inexplicable.

How hard is it to make it at home, you think? As easy a paneer I would say. Only thing here you just stop the heat once the cream just swells a bit. No don't look at me that way, you have to try this in your own kitchen to understand what I am saying.

Let me put it down for those interested in this recipe and directions.

Ingredients

1 litre carton of Amul Fresh Cream, its 25% Fat
2 tablespoon of lime juice

In a double boiler heat the cream to boiling point. Add the lime juice. You will see cream go from a pure white to a off white color and swell slightly due to coagulation. Boil for 2-3 mins with stirring. The coagulation is more like a thickening. The lumping as it happens when making paneer does not happen here. Put off the heat. Let it cool.

Wet a large kerchief or muslin cloth. Take a bowl, place a strainer over it. Place the wet cloth in the sieve. Carefully pour the thickened cream into the cloth. Tie it up like a bag to avoid overflow. Keep the bowl with the strainer in the fridge to drip for 24hrs.

You will get this mass of soft creamy Mascarpone cheese.

Mascarpone cheese goes best with fresh fruits me think! When I made a small batch to test in my kitchen lab I sweetened it with sugar and vanilla extract and served it with Kiwi.

Later made it again for the A Glamorous Heart Cake.

Deeba is an experienced soft cheesemaker besides an awesome baker, she rightly advised me to store the Mascarpone in an airtight container in the chiller of the fridge. I was worried if the cheese would get spoilt since I needed to make it in advance for the cake. She dispelled all my doubts. I had stored away a cup of the extra cheese for a gorgeous dessert that you must come to see here next...


Saturday, September 29, 2012

A Glamorous Heart Cake


Whenever there is an upcoming marriage in the family, I make sure that I get my special moments with the bride or groom to be. I was brought up in the joint family. I have no sibblings but have 4 cousin sisters and 2 cousin brothers, we grew up as a tight knit family. It does not stay that way though, so then you begin to carve out these moments with more effort to be treasured later. With all my cousin sisters I have tried to make those moments precious, they got married and absorbed into the vortex of life that followed. So before the last of my cousins gets married we spent this refreshing holiday together last September after celebrating his birthday in Blr last year.

Now I am back in Mumbai and so a special cake for everyone in the family. I asked Hrushi what he would like but he trusts my judgement more or the experiment more don't know, he left it to me. I knew I was going to make Mascarpone cheese for his birthday so did a advance test. The test was successful in My Kitchen Lab. Will soon share it here.

The Mascarpone cheese goes really beautifully with fresh fruits, it was a discussion and then Deeba's post that made me feel confident that this will be one Glamorous cake for a birthday. 

This is an elaborate recipe so I preferred making it over 3 days.

Day1: Made the Heart sponge cake
Day2: Made the Mascarpone cheese and left it to drain and firm up in the fridge.
Day3: Did the layering and left it to chill in the fridge. Added the ganache on top.
Day4: At midnight the cake was cut. The flavors were soaked well. The Fruits still crunchy. Happy appreciative smiles and many drools.

Ingredients

For the Heart sponge cake

1.5 cups All Purpose Flour / Maida
2 tsp Baking powder
1 cup Curd
3/4 cup Sugar
1/4 cup oil
1/4 cup condensed milk
1 tsp Raspberry essence
1 tablespoon flax seeds powder + 3tablespoons water; rested for 10 mins.

Measure out the flour and along with the baking powder sieve it. Keep aside.

In a mixing bowl, add curd, condensed milk, oil, raspberry essence and sugar and beat until fluffy.

Add the flax seeds powder sludge which would have become albuminous to the wet ingredients. Mix well.

Now add little by little the flour and baking powder mix. Fold in the flour to get a batter that falls in layers when poured.

Preheat oven for 10 mins at 180 deg celcius.

Prepare heart shaped tin by greasing and dusting with flour.

Pour the batter into the tin. Tap the tin gently on the counter to remove the air bubbles and evenly spread the cake batter.

Bake in preheated oven for 40 mins or till top is golden and knife inserted in it comes out clean.

Let it cool in the tin for 30 mins and then demould onto a plate. I left the cake covered on the counter for an entire day. If you are doing the entire cake in a single day ensure it cools completely before you do the layers.

This cake is slightly dense and works well with the wet layers. It provides the required support and
absorbs the liquids released by the filling.

For the layered filling

1/2 cup Orange Marmalade 
1/2 cup icing sugar
1 teaspoon Raspberry essence
Mixed cut fruits
(I used 2 ripe pears + 1 apple with skin + 2 Nagpur oranges peeled + 1 cup Pomegranate arils, choose a colorful combination of fruits.)

After the cake is cooled completely, start the layering. Slice the cake horizontally.

Put the slice into the cake tin. First spread the Orange marmalade, level it out evenly.

Chill a splash proof bowl in the freezer. Next in the splash proof bowl put the mascarpone cheese, raspberry essence and add little icing sugar at a time and keep beating with a wooden spatula till all icing sugar is incorporated and you get stiff creamed mascarpone.

At this point add the mixed cut fruits to the creamed mascarpone cheese. Mix gently.

Fill  in all the mix into the tin. Place the top slice of the sponge cake over it. Press a bit to make it stick to the filling. Cover the tin with cling film and keep in the fridge to chill.


For the Ganache

1 slab of Bournville Dark chocolate (I used Hazelnut)
50 ml fresh cream

Just before serving, make the ganache. Remove the set layered cake onto a serving dish. You can just turn it upside down on any plate for support and place the Final serving plate face side down on it. Turn it upright again. Remove the support plate. Leave it to stand upright for further decoration.

In a bowl break the bar of  chocolate into pieces. Place the cream in a clean bowl and heat till it starts boiling, keep stirring so it does not spill over. Pour the boiling cream over the chocolate pieces. Beat it to dissolve the chocolate and fluff up a bit.

Pour the ganache from the center and move outward. Spread it with a butter knife. With a clean finger draw the swirl at the center to give it a effect of a rose bud. 

Monday, September 24, 2012

Sayandesh, A Sandesh for Sayantani

 This is Sayandesh!

It marks our friendship, of borrowing from each others culture and making it our own.
 
It was two years ago that Sayantani and me had decided to meet at the Durga puja in Kormangala, Blr. We both lived there at the time, but for some reason we missed each other by a few hours and did not meet. Ever since we have always wanted to meet in person but now she lives in Kolkata and I in Mumbai but friendship knows no boundaries. It is entirely credit to Sayantani the sweetheart that she is. She keeps in touch inspite of her busy schedule as a mother with a growing child and demands on the home front.

Some time ago I made sandesh from her blog and shaped them into plain ovals. She saw them on my Fb page and commented that I deserved some sandesh moulds! She offered to send me these special stone moulds and I accepted the showering of love without the least resistance. There are those genuine people whom you can allow that entry into your coterie, she is one of them.

I was thrilled to open a packet of these goodies that you see below. Carefully packed was a Speedpost from Kolkata, a jar of Pyaraki (I love the sound of it). the raw mango and pineapple relish, a table cloth a sling pouch and those priceless stone sandesh chachch.


This packet arrived at the time when on a foodie group we were discussing about family heirlooms and preserving traditions! It was fun doubled when Preeti announced that she too had received her packet delivered in Pune at her Mom's. Immediately we decided that to have a Sandesh fest and name it after Sayantani, so you see the Sayandesh here!

This Sayandesh is special because though it looks like Nolen gurer sandesh, it is not. I am using Sayantani's original recipe here. This one is made using Dark jaggery from Gondavle, Satara. Anything from Gondavle is special for me. Bengal meets Maharashtra in this Sandesh. That is how it is for us friends. Preeti and me waited till the sandesh moulds flew to UK and then we synced this sandesh making, she in her English kitchen and me in my Mumbai one. We both dedicated the creations to our dear friend Sayantani.
 

Ingredients

1 liter Full fat milk
Juice of ½ a lime
2 tbsp Powdered sugar
4 tbsp Dark Jaggery from Maharashtra

Preparing the chenna or cottage cheese

Boil the milk.

To the boiling milk add the lime juice. Keep boiling till all the milk solids clump up and the clear whey separates out.

In a large bowl place a large sieve. Line it with muslin cloth. Pour the curdled milk into to the cloth. The whey will drain away into the bowl and the solids will remain on the cloth. 

Wash it under water to remove the traces of lime juice. Leave it to drain completely for 1-2 hrs.

Remove the cottage cheese ball on a counter after completely solidified. Knead for 10 mins to smoothness. Press with the heel of the palm to get rid of the graininess. 

Mix in the sugar and jaggery and then knead.

Then remove this mixture into a non stick pan and put it on heat. Keep stirring till you see the mixture leaving the sides of the pan. It takes about 5 mins.

Let it cool till you can handle it. Lightly oil the sandesh moulds. Shape into marble sized balls. Press them on the moulds to imprint the designs. Separate from the molds and place on to a serving plate.

Enjoy at room temp or chilled either ways you will be transported into old world Bengal...

This post is incomplete if I do not share a little thing that came in the parcel as packing (involuntarily) is a doodle by Sayantani, it is her signature and that's who she is!

Friday, September 21, 2012

Bramhani Taat


(Clockwise: Methkut, Beetroot Yogurt, Tomatochi BhaajiGoda Varan on Rice, Ghadichi Poli and Papad)

In the Bramhan homes in Maharashtra the food that is cooked is very simple for an everyday meal. It consists of two carbohydrate components of rice and chapati/ Poli in Marathi. A dal like a simple Goda Varan that you see here or a sweet and sour dal called Aamti which is the source of protein.  A stir fry made with a fresh vegetable. Here you see a Onion and Tomato bhaaji. In some Brahman homes where onions and garlic is not consumed you may find these absent altogether in the food. The salad is called Koshimbir, it has many variations, see here and here. For brightening up the taste buds there is always a chutney wet or dry that you can dip your finger into or a pickle to lick up. Here in the Taat you see the quintessential Marathi dry chutney called Methkut. To give a crunch to the meal a papad is indispensable.

On a festive day the Taat would have a ras bhaaji/ wet curry and a sweet like puranpoli/ kheer/ sheera/ shrikhand

To round off this meal would be a vati/ bowl of buttermilk or Taak.

Thursday, September 20, 2012

Bhapa Doi

When you must have a creamy dessert and still not worry too much about calories you can make Bhapa doi. In simple English Bhapa Doi is steamed curd the Bengalis would say. It is a delicious dessert that can be whipped, steamed and chilled. Yeah the chilling time is the longest in this recipe else everything else is quick. This is also a dessert that can be made ahead of time and served at a party.

The basic bhapa doi can be decorated with nuts and dry fruits, oh! why even fresh fruits would be good. I chose to decorate with soaked raisins and sultanas and a handful of crushed walnuts to give it some texture.

While in the Western cooking you have a baked cheesecake and a no-bake one, here is a steamed cheesecake of Indian origins actually a Bengali Mishti. It makes me wonder how this got created? Condensed milk was not a common place ingredient in an Indian kitchen until a decade ago. Who created it and what was the need that spurred this creation? Was it created in a home or a restaurant or a Mishti shop?

Till some one educates me more on it, here is the recipe that I arrived at after a lot of googling and my gut feel about what will give me the best consistency. This turned out a luscious dessert.

Ingredients

The Basic Doi

1 tin Amul mithai mate
1 cup well set homemade curd
1/2 cup milk
2 big pinch nutmeg powder

In a big bowl take all the ingredients and 1 big pinch nutmeg powder. Beat till smooth and homogenized. In an aluminum tin or jelly mould pour the mix. In a pressure cooker add enough water and place a ring or vessel to give some height. Put the mould over it and steam for 25 to 30 mins. Let it cool completely and then sprinkle a big pinch nutmeg powder over it. Chill in the fridge for atleast 4-5 hrs before serving.

For the garnish

1 tablespoon raisins
1 tablespoon sultanas
1 tablespoon crushed walnuts

While the Bhapa Doi is chilling in the fridge. Boil water and add the raisins and sultanas to it. Let them soak till you need to serve. Drain the soaked raisins and sultanas on a sieve, keep the water. Use them to garnish. Save the water, it is laden with the sugar from the dry fruits and use to sweeten your cold drinks.

To serve, unmould the Bhapa doi into a serving dish and garnish with chopped walnuts and soaked raisins and sultanas.

Serves 4 generous portions or 6 small ones.


Updated: 15 Oct 2012

Another time powdered with Pistachios and in this one skipped the cup of milk to get a Bhapa doi that can be cut up like a cake for my bro, Sumeet's birthday. It was so much like Kharwas!

Tuesday, September 18, 2012

Goda Varan

 Such a colorful meal!
(Clockwise: Methkut, Beetroot Yogurt, Tomatochi Bhaaji,
Goda Varan on Rice, Ghadichi Poli and Papad)

When Cynthia, a reader of this blog asked me to make Goda Varan or plain dal which is a staple in Marathi homes, I was very sure that the picture would be boring and repetitive on this blog. Did I know that this Marathi Taat of an everyday simple meal would look to colorful, like Holi on a Thali! Never.

Until I pulled out the camera and focused on it to click what is supposed to be just another meal. Yet it is not, if you look at it carefully it a beautiful balanced meal so characteristic of Maharashtra. This one is what would be a typical Bramhani Taat. However even though this post is about Goda Varan one of the components of this Thali (in Marathi it is called Taat) you will be keen to know more about it I am sure.

Back to Goda Varan, the simplest dal mostly served at the begining of the meal to start up an appetite. Many a babies are fed on this and many Maharashtrians who can't bear chilies swear by it. This forms the protein component of the Taat. The Dal though involves no sweat yet is very flavorful, it does not even have any tadka or phodni involved. This is how a Goda Varan is made in the Bramhan homes that I have frequently eaten at. Depending on which part of Maharashtra this is made the only variation would be adding sweetness to it or not. I have always known it with a bit of sweetness in it.

When I have hyped so much on the simplicity, you would definitely like to add it to your repertoire won't you?

Ingredients

1 cup split pigeon peas/ tur dal
1/4 teaspoon strong asafoetida/ hing
1/4 teaspoon turmeric/ halad
1 teaspoon oil
1 inch piece of jaggery/ gul
salt

In a small pressure cooker measure out the tur dal. Wash it clean with water. Add turmeric, oil, asafoetida and top up with water just to cover the dal enough.

Close the lid and keep on heat. Allow 4-5 whistles to cook dal till mushy. Switch off heat and let it cool. 

Open lid and beat up the dal while still hot to crumble it. I use a traditional Ravi to do it. Salt the dal and boil along with jaggery. You can thin it a bit with additional 1/2 cup of water.

The sweet smell is enough to get you hungry. Serve it hot over a mound of rice. A squeeze of lime, a dolop of curd and a drizzle of sajuk tup and you are in heaven!

Serves 4 if it is just a poli, bhaaji, varan, bhaat meal.

Monday, September 17, 2012

Mint Pesto


Mint is very popular in the Middle Eastern cuisine. The mint tea is as refreshing as the pesto. It is use to flavor the non-veg stews and as garnish to couscous or tabouli.

Mint Pesto is a raw sauce, to Indians it is familiar as a chutney. A little goes a long way.

Today yet another delicious dip for the Arab Meze serial is here.

Ingredients

1 cup fresh mint leaves
1/4 cup toasted walnut
2-3 garlic cloves
2 tablespoons Olive oil
salt

In a chutney jar put all the ingredients together and grind to fine paste.

Remove to a serving bowl and place it along with the other items on your Arab Meze menu.

Yet another dip is ready to enjoy in just about a whiz!

Sunday, September 16, 2012

Labni


Fresh cream cheese made from yogurt, "Arey that's our chakka!" said my family. All your life you have eaten the fresh cream cheese made from yogurt by sweetening it with sugar to make Shrikhand and then you find that there exists a savory version of it somewhere in the world. That is exciting in itself. Well though I am posting this recipe now its not like I discovered it just now. I have been making Labni for years now. Anyways, what's there to make in Labni? It is so simple, except waiting and then whisking there is no work involved really.

Ingredients

1 liter Curd
salt to taste 
Olive oil for drizzle

Take a muslin cloth, Tie the diagonal corners together to form a bag. Pour the curd into the bag. Tie it up closer to form a ball. Either hang it over the basin or put it in a sieve. Collect the whey dripping in a vessel for other uses. (Whey can be used to knead dough instead of water, so you don't waste the nutrients in it.) Best is to leave it in the fridge so it does not sour too much. For about a cup of Labni you do require a liter of Curd.

After about 8 hrs, you will get a nice drained ball of cheese. Remove the muslin pouch to the counter. Roll together the cheese ball and remove to a bowl. Add salt to it and whisk to get a creamy Labni. Drizzle with olive oil. It's ready to dip your  warm Khubz

It is a very refreshing dip.

Saturday, September 15, 2012

Khubz


Khubz or Pita bread is something I was introduced to by my uncle MJK when I was in my teens. Whenever he visited the Middle East he came back with huge discs of Khubz. Later I came to know that they are called Pita bread in the US and the name became fashionable.

Yes essentially Khubz is a common name for bread in Arab countries. How I would describe Khubz as a leavened bread round like a roti, thicker than Naan. It is only when you make smaller ones like phulkas you make them slightly less thick. For a good pita to puff up it has to have some thickness in proportion to the disc size. A 4 inch Khubz should have atleast 1/4 inch thickness before going into the oven. Khubz is an indispensable part of an Arab meze.

Khubz or Pita bread is very versatile, dip it in, mop up stews n curries, open up the pockets and make sandwiches, that is onething you can't do with a chapathi, you will agree. As I write this I remember a conversation with a loved one. He lived off pita bread substituting chapathi as he is in the US and wasn't skilled enough when younger at rolling out the daily Indian bread. I used to feel so bad for him even though I like Khubz a lot but it cannot substitute something that you ate everyday of your life when growing up. Yet who would not like a perfectly puffed up Khubz for a change?

I like to tear my breads with my hand but some people like theirs cut up into wedges, do it the way you like it, but don't forget to enjoy!

I also like it that this bread it fat free. So here is how to make it.

Ingredients

3 cups whole wheat flour or maida
2 tsp. dry yeast 
1 cup warm water
1 tsp. salt 

To begin take about 1 tablespoon of whole wheat flour from the measured flour. Add the yeast to it and then add the 1 cup water slowly to make a sludge of it. Let is bubble up for 30 mins.

Then mix in the rest of the wheat flour and knead to form a ball. Keep it aside for proofing till doubled. 

At this stage incorporate the salt and knead for a min. Divide into 8 portions and roll out on a floured surface into 4 inch diameter and 1/4 inch thick discs.

Preheat oven to full power and 250 deg celcius. This time I used the grill mode for baking as it has the highest power setting. On the top rack bake the Khubz for 10-15 mins till slightly golden spots appear on it. They will puff up into nice pillows of warmth. 

On cooling they might fall flat but will still have pockets.

Serve with the dips like I made here or make Pita pockets with falafels and choice veggies.
 

Tuesday, September 11, 2012

Hummus bi Tahina


The picture of the Middle east flashing on TV is always one of meat being cooked everywhere. It gives the impression they are complete carnivores, even though they eat a lot of vegetables and chickpeas! But here I am presenting a complete veg meal from the Arab cuisine, three dips that a Indian vegetarian can enjoy. Hummus bi tahina or chickpeas with sesame seed paste is the first I show you here.

Hummus is healthy as it has protien and is low in calorie, no wonder we can include it in our foods without worrying about the carb dose. It is rich in fibre, minerals and vitamins. Ok so before you start swallowing capsules of hummus in the near future take some time out to make this really easy peasy dip which if you have preped in advance is ready in a jiffy.

Ingredients 
1 cup chickpeas /Kabuli chana, soaked overnight and cooked soft
juice of 2 lemons
1/8 cup Tahina
6-7 garlic cloves
salt

For the garnish
1 Tbs. olive oil
1 tsp. paprika/ Kashmiri chili powder
few sprigs of parsley or cilantro, finely chopped

Grind the chickpeas in a blender (or food processor) with the lemon juice, tahina, garlic, salt and enough of stock from boiling the chickpeas. It should be a soft creamy consistency easily scoopable on a morsel of pita bread.

Yes and next coming up is a post on how to make Pita bread, you will come back to read how I made them won't you?

Tuesday, September 04, 2012

Arab Meze: Khubuz, Hummus, Labni and Mint Pesto

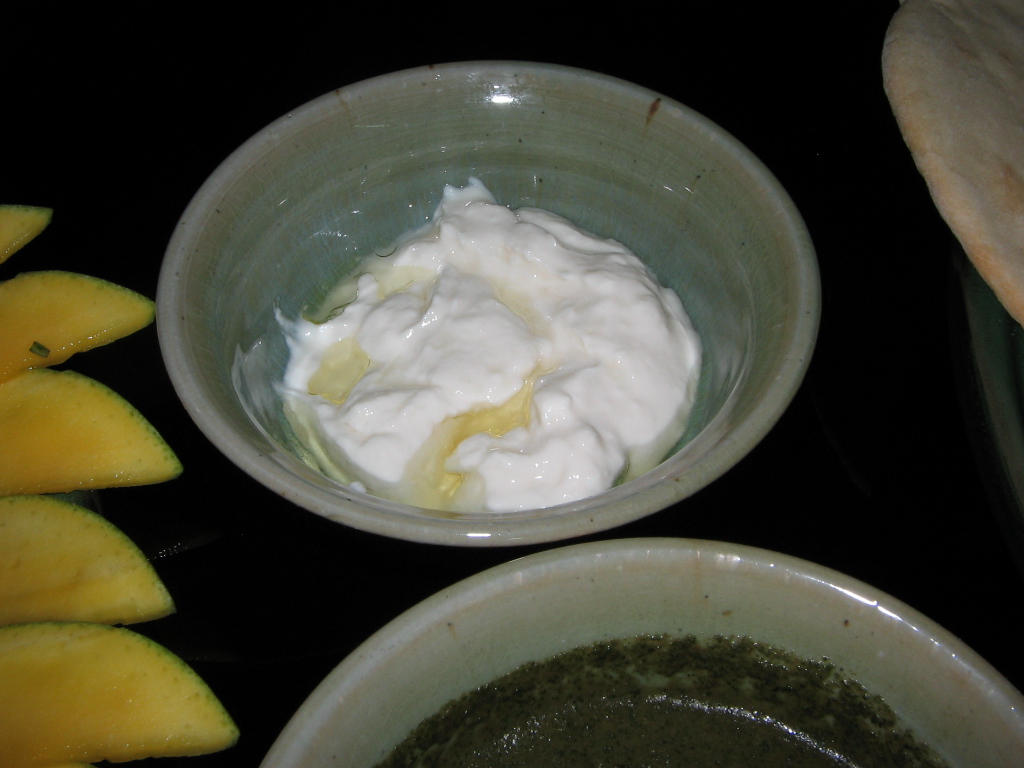
L to R: Big bowl of Hummus, Sliced Totapuri Mango, Labni, Mint Pesto and Khubuz

The Middle Eastern culture has a wonderful social leveler in its eating habits. It is probably that brotherhood that has made Islam so popular in that world. In theory it is the culture of eating from a common platter that unites men from different walks of life. This is reflected in the way food is served in the Middle Eastern countries of Turkey, Cyprus, Balkans, Greece etc and most countries under the Osmani Empire. It is common to serve bowls of varieties of relishes, starters, breads and fruits mostly melons, in a single meal. It could be a breakfast, lunch or dinner. This layout of a variety of foods in small bowls and platters is called a Meze. Turkish in origin but included in English now. I am thinking the Hindi word "Maza" which means "to relish" would have been derived from it. Even if it were not. Meze is maza, it is fun to relish different dips in a single meal. It appeals a lot to Indians for we have our own Thali.  Will write on the traditions of a thali and the cultures associated with it in a separate post.

Coming back to Meze, specifically this Arab Meze. I made it mid week when time was lacking. It is very easy to put together with advance prep. I realized this was a balanced meal and so healthy where you can control the amount of oil going into the food and it still tastes awesome. It even includes a fruit that is supposed to be eaten as a dessert but I would recommend beginning the meal with it.

Like you see in the picture I made a big bowl of Hummus, Labni, Mint Pesto, Khubuz and sliced some Totapuri Mango though a Musk melon would have been more authentic when I did have the option. Following this post you will find a series of each of these recipes labelled as Arab Meze.

Will leave you on it, Enjoy the Arab Meze... maza lo Arab Meze ka...

Saturday, September 01, 2012

Pista Cake Bake Together


You have looked at the picture and wondered finally did She learn to decorate?

Last weekend we had a virtual bake together. Anshie of  Spiceroots had got us drooling with a beautiful shelled pista studded cake, so we coaxed her into sharing the recipe and then followed this bake together. I was watching all the frantic activity thru the day, as the status updates said, pistas shelled and slivered, cake baking and home filled with aroma, discussions on what creative liberties one can take with the recipe and the dressings et al. One awesome picture was posted first thing in the morning by M, who is a beyond awesome baker and decorator to cheer us on.

I love to bake but you know me I am not too much into decorating or rich cakes, except the last time when I attempted the Moist Chocolate Cake. This time however it is the magic of a lil world of foodies that pushed me into it. In between anecdotes Anshie mentioned about her daughter teasing her why she had tied a diaper around a cake tin? I scampered into my kitchen immediately! Keep reading to know what spurred me on...

The original recipe for Sicilian Pistachio Cake With Golden Neoclassic Buttercream is the point of reference however due to my family's vegetarian choices I decided to adapt it but decorate it just like you see it there, all with the blanched, slivered pistachios that make the cake look so gorgeous.

Here are my adaptations of that classic cake:

Serves: I halved the measures as it is a rich cake to get 6 decent servings

Cake: eggless, used flax seed powder. Sour cream replaced with thick curd/ yogurt. No soda increased baking powder. 

Cream: eggless, honey in place of golden syrup, lime zest big pinch instead of pista essence. 

Verdict: Rich creamy all the way a pista celebration. 

Next time: I would make a light pista butter for the frosting.

So putting down the recipe here to look back and use it when I want, for it was a success truly.

Ingredients

For the cake:
1 tablespoon of flax seed powder (soaked in 3 tablespoons of warm water and rested for 10 mins)
1/3 cup, thick yogurt
1/4 cup oil
1/2 teaspoon pure vanilla extract
1/4 cup lightly toasted pista
1/2 cup powdered sugar
1 cups leveled,white flour/ maida
1/2 teaspoon baking powder
1/4 teaspoon salt
2 tablespoons ghee or butter

In a mixing bowl, measure out yogurt, vanilla extract, butter and beat together till light and fluffy.

Grind pista to a coarse meal. Mix together the pista meal, flour, powder sugar, baking powder and salt to make it airy.

Fold the dry ingredients into the the wet beaten ingredients. Meanwhile keep a greased and flour dusted 5 inch tin ready. Pour the batter into the tin. Level out the batter by tapping it on the counter.

What I unlearnt is, the usual pulling the batter to the edges to level out the batter after it bakes.

No more cutting out the dome to flaten the top of the cake and no more wastage.

Now get ready for a new learning! The original recipe mentions use of cake strips. You can buy those if you are in the US but in India, we are very resourceful. We wet a kitchen napkin. Tie it around the cake tin. This will ensure an even rise. This is the take way for me from the bake together. Doesn't it look just like a diaper on the cake tin?


I baked the cake in a preheated oven at 180 deg Celsius in the convection mode for 45 mins. Till a knife pricked in came out clean. This mode turned out best for the cake. It retained its green color which is so important for this cake. Let the cake cool completely for 1.5 hr. Put it in the fridge for 1/2 hr.

You get a perfectly flat top cake best for decoration. That is what you do next. So get the cream ready now.

For the cream and decoration
1/8 cup icing sugar
1/8 cup honey
1/2 teaspoon lime juice, freshly squeezed
1 big pinch lime zest
4 tablespoons unsalted butter
1/2 teaspoon pure vanilla extract
1-2 drops pistachio essence (I skipped it)
1/4 cup blanched pista nuts, slivered

Put butter, vanilla, lime juice in the bowl and whisk. Mix in the honey and the icing sugar whisk till light. You get a beautiful creamy dressing.

Now spread the creamy dressing over the cake and carefully decorate with the pista slivers. There you have the wonderfully studded cake. Drool.

Tuesday, August 21, 2012

Veg Mayo


Veg Mayo a perfect coat of snow white for a Smörgåstårta and more...

Many of my friends made a request for this recipe when they saw the SmörgÃ¥stÃ¥rta. Rich, creamy, luscious is what you can describe it as. All those who cannot eat egg but love the look of Mayo will be thrilled by this recipe. Now you can enjoy it too. 

Ingredients

1 litre curd
2 tablespoons fresh cream
1 lime, juiced
salt to taste

In a muslin cloth pour out the curd and hang it or place it in a sieve to let the whey drain. It should give a hung curd about 1.5 cups yield.

Remove the hung curd to a bowl. Add the cream to it. Add the lime juice and salt. Now beat the mix at low speed with a hand beater. You will get a light fluffy, creamy texture.

Use this as a spread for your regular sandwiches, as a dip or a dressing to replace Egg Mayo in recipes to make it a pure vegetarian one. It lends itself beautifully to decorate a Smörgåstårta like you see above. Have you seen that post, go check it out.

This is a recipe  for the perfect white Veg Mayo. With varying herbs you will get a whole range of tastes just use your imagination and go go.

Tuesday, August 07, 2012

Sparkling Strawberry Float


If all the menu for the Birthday Party was fun then this mocktail was super fun, said my family. What you need is...

Ingredients

1.5 litres Sprite or any colorless sweet soda
1 cup Strawberry crush
1/2 litre pack of Vanilla icecream

Take 6 large glasses. Divide equally the strawberry crush into the 6 glasses. Slant the glass and pour in the Sprite slowly, to about less than 3/4 level of the glass. Finally lightly drop a blob of icecream on top. The icecream will float atop. 

Insert a bent straw into the drink. Pass around the drinks. Inform the party that it is a sparkling drink so they must not stir vigorously or else they may be showered by a bubbling fountain.

As you stir and sip the icecream forms a cloud over the liquid. The color is a lovely electric pink with a baby pink couldy float. 

Enjoy the drink and that brings us to the end of the Birthday party menu. Hope you enjoyed following this series as much as I did posting it! Before you go away let me tell you there is another interesting theme that is coming up. So see you again after the 20th.

Monday, August 06, 2012

Blueberry Tall Muffins


The birthday was on Friday and I was at Four Point Sheraton, Vashi for a conference couple of days before that. It was so well timed. After the Conference, I walked straight into the neighboring Inorbit Mall to shop for the celebrations. It had been six months since I bought a new wardrobe. So off I went picked up 4 new sets of clothes, I must have been in a very happy mood for I bought colors like yellow, orange, fuchsia and rust, rare in my wardrobe. The food picks were some Cheddar and Gouda cheeses, of which the Cheddar went into the Cheese Potato balls. The blueberries that have appeared in the market had to be bought. There was only one specific thing on my mind, blueberry muffins!

Now for a birthday if I was making Blueberry muffins they had to be king sized, else what's the fun?

So I made these Tall muffins, the recipe is adapted from Joy of Baking. I have doubled the measure of ingredients mentioned in the original. Omitted baking soda and instead increased the amount of baking powder. I use a half and half combo of oil and butter. The flax seed powder works as egg substitute. Also I have made the muffins sweeter as the blueberries were mildly sweet.

Ingredients

2 tablespoons of Flax seed powder
2 cup curd
1/3 cup vegetable oil
1/3 cup butter 
2 teaspoon vanilla essence
4 cups all-purpose flour
1.5 cup granulated white sugar
3 teaspoons baking powder
1/2 teaspoon salt
1 cups Fresh blueberries

Making these muffins is really easy.

Mix the flax seed powder with 1/4 cup water and leave it for 10 mins.

Mix all the wet ingredients and whisk lightly.

In another bowl mix together all the dry ingredients. Dredge the blueberries in the flour, so they don't sink to the bottom of the muffin.

Then fold all the dry ingredients into the wet ingredients. This batter is not your foldable batter like your usual cake batter. It is thick and needs to be spooned into the muffin moulds. I got 8 Tall Muffins from this batter.

They were delicious, soft crumb, jammy blueberries. Not your one person muffins, we shared because we had so much on the party menu and the Tall muffin as a single item is as big as a lunch serving!

My Dad loved his with a dribble of fresh cream.

Sunday, August 05, 2012

Smörgåstårta, It's A Sandwhich Cake!


We are a family that loves our local sandwich, the club sandwich that you get all over Mumbai. It is while I was in Blr, I had posted about the ubiquitous Mumbai Sandwich. It continues to top my most popular all time posts.

For the Birthday Party I decided to make healthy and pretty open sandwiches. I was looking for ways of decorating open sandwiches when I hit upon this word Smörgåstårta, Scandinavian in origin and following this link it lead me to the world of Sandwich cakes!

Cake? yes Cake in the way it is decorated. You have to just let your creative juices flow to create a beautiful looking sandwich cake. I put together my sandwich cake in just 15 mins with the help of my Dad. He buttered the slices of bread and I arranged the cake. Since we did not have time I did not do an elaborate decoration but even this simple decoration surprised my family so much. No one expects it from a sandwich.

There are ways and endless ways how you can decorate yours but I know you definitely want to know how I did it. You must be cringing at the cream that covers the cake, thinking that much cream! Read on to find out if it really is?

Ingredients for the decoration

2 cups finely chopped cilantro
1-1.5 cups of Homemade Veg Mayo
slice onion, cucumber and beetroot

First choose a serving dish you want to use. It should be large enough to hold 4 regular slices of a loaf.

The bread slices need to be buttered, this will prevent the slices from sogging. If you like spicy ones like us apply green or red chutney. Make tiers of bread slices and vegetables of choice. I used cucumber, beetroot and onion slices between the bread. Keep the edges to let the cake hold shape. If you need a recipe for making the sandwiches use my recipe of the Mumbai Sandwich.

I used five slices to give the cake a height. You will need to make a total of 4 such to get the large square foundation for the cake.

Then slather the veg mayo generously onto the cake foundation, to cover the top and all four sides.

Now take the finely chopped cilantro and shower on the sides. The cilantro will be held by the cream to give it a nice ivy covered wall look.

Last, make 4 rosettes with cucumber slices. On top of the rosettes place a slice of beetroot to make it look like a flower. The veggies used on top for decoration should be the ones that are used inside so people know whats inside before the cake is sliced up. Hey but if you want to surprise people more use decoration that are not used in the layers but go well with the overall taste.

When you cut up the Smörgåstårta, use a sharp knife to be able to cut thru the vegetables all the way into the cake. Make slices and serve the hungry party.

With all the food we had this cake stayed good right upto next day in the fridge, store it above the crisper and it will not get soggy.

Saturday, August 04, 2012

Cheese Potato Balls


This birthday falls in the monsoon and what is a Mumbai monsoon without some fried goodies. In the morning before I left for work I had pressure cooked potatoes and left the cooker as is, knowing that it will stay good till I open the lid.

Once I was back from work the first thing I worked on in the Cheese potato balls. They got rolled and put into the fridge for setting, while I was busy with other things.

These Cheese Potato balls are a crowd pleasure and are gone just as they are out of the wok. It is fun to watch the animated eating, some delicately breaking into two, dipping in the sauces and taking a nip. Another greedily popping it in the mouth not realizing how hot it is and then gasping for air to cool the burnt mouth as he fans it with his hand. Another taking a small bite and looking into it curiously searching for an answer why such simple treats are loved by so many and trying to decode the ingredients. I loved feeding them and you will love making these for yours too. So here you go...


Ingredients

6 Potatoes
50 gms Cheddar cheese shredded
1/2 cup bread crumbs
salt as per taste
2 teaspoon Pav bhaaji masala
1 medium onion chopped fine

For the cover
1/4 cup all purpose flour
salt as per taste
1 cups bread crumbs

Oil for frying.

In a large bowl mash together all the ingredients. Roll them into small balls and place on a tray. Keep the tray in the fridge to set for at least 30 mins.

Prepare the batter of all purpose flour and water. It should be slightly thinner than bhajji batter.

Spread out bread crumbs in a plate.

Remove the balls from the fridge just before frying. Dip them in the batter and then roll them in the bread crumbs. 

Heat oil, keep the flame on high. This will fry the balls quickly and to crispness without absorbing too much oil. Drain them on absorbent paper.

Serve piping hot with sauce of your choice. I served with mustard sauce and ketchup, turns out its best with ketchup.

What are you waiting for? Get boiling the potatoes and grating the cheese...


Friday, August 03, 2012

Pumpkin Shorba


Pumpkin is a vegetable that I don't admire. Earlier it was only for some special use we would get it, like in vadas or that Gavar and pumkin combo. I am a little scared to buy those small pumpkins because they are definitely hybrids. The cuteness does not melt my heart. I would rather get a slice of a fresh cut large pumpkin.

Anyways for the birthday party the choice of soup zeroed on Pumpkin due to the color. I wanted different colored dishes. I never like it when all the food  on the plate is in just one color. So tomato soup was out, they would however be used generously in the pasta.

Also the menu was of different origins so a Shorba sounded better than a western soup. Indian in flavor and that would awaken the taste buds to an exciting menu that followed. A shorba is not thick in consistency and its never loaded with cream. It's light and refreshing and warmly spicy, just right for the cold monsoon that we have right now.

Here is how to make it.

Ingredient

1/2 kg pumpkin
1 medium onion
oil 2 teaspoons
2 Taj patta
3-4 cloves
1 small piece cinnamon
7-8 pepper corns
slat to taste.

In a pressure cooker heat oil, 1.5 teaspoon. Fry onions till translucent. Add pumpkin to it. Close the lid and cook for 1 whistle.

Let it cool. Once cooled open the cooker and transfer the cooked vegetable to a blender. Puree it. 

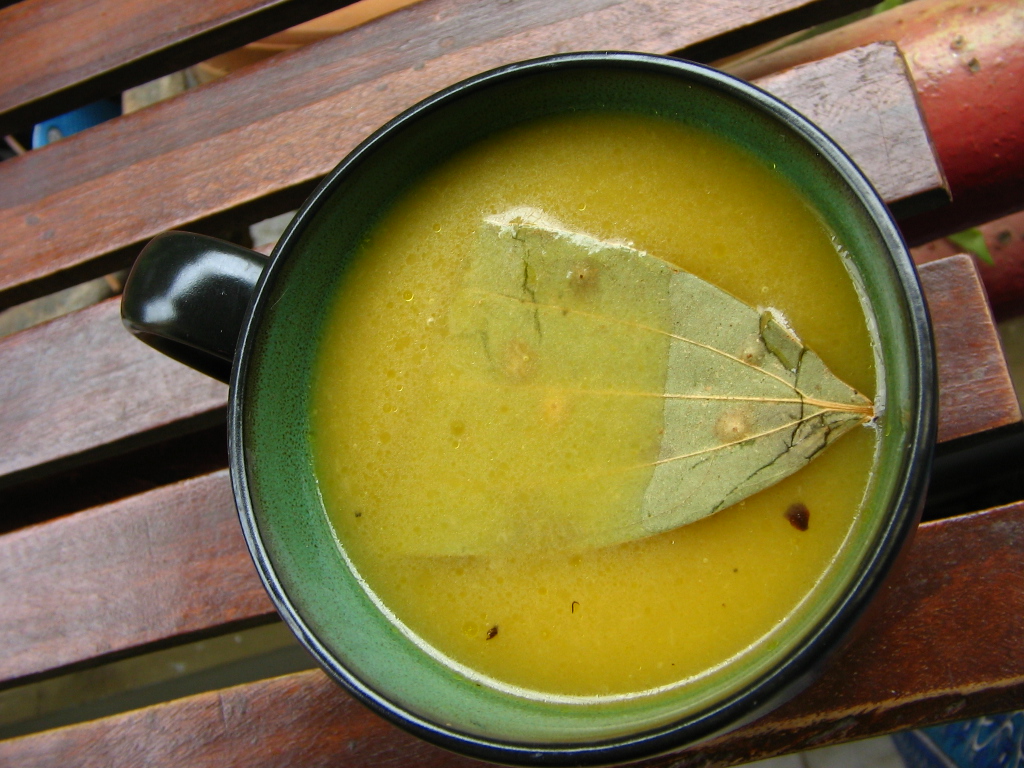
Now heat just a 0.5 spoon of oil. Make the seasoning with tej patta, clove, cinnamon and pepper. Add the puree to the tadka. Add water to thin it. The total soup should be about 2.5 litres. Boil vigorously. Serve in soup cups or deep dish.

Enjoy the warmth! That's how we kick started our party.


Thursday, August 02, 2012

A Birthday Party


Last weekend we had a birthday party at home.

The Menu

Soup:
Pumpkin Shorba

Starters : 
Cheese Potato balls with mustard sauce and ketchup
Hummus and Potato chips

Mains :
Smörgåstårta, its a sandwich cake
Pasta in creamy tomato sauce

Mocktail :
Sparkling Strawberry float

Dessert:
Blueberry Tall Muffins

I came back from work and decided 2hrs was enough for me to prepare dinner but I was wrong it took me 3 hrs to make this menu and I had no time to set up the table, so you see some pictures were taken the next day in daylight. Each of this recipe will follow this post. We were just 6 people but this amount of food could have served 10, you don't want the food to fall short when it is a party

My family was so happy and my bros especially showed an appetite like never before. I was so thrilled with all the chatter and sedated smiles that I could not sleep till 2 am that night!

My friend Sangita, kept telling me not to make elaborate menus like these, as she is worried for my health but this is what makes me happy truly!

On Trail